If you sell products online, you've seen them everywhere: those crisp, clean product photos with pure white backgrounds that make items look professional, trustworthy, and ready to buy. Amazon requires them. Etsy sellers swear by them. Every major ecommerce platform recommends them. But when you try to create white background product photos yourself, the results are disappointing—gray backgrounds, harsh shadows, washed-out colors, or products that look flat and lifeless.
The frustration is real. You know your products are high quality, but your photos don't reflect that. Potential customers scroll past your listings because the photos look amateur compared to competitors with clean, professional white background images. You've considered hiring a professional photographer, but at $50-200 per product, the costs add up impossibly fast when you have dozens or hundreds of items to photograph. You need a solution that's both professional and affordable.
Here's the truth that professional product photographers don't advertise: creating perfect white background product photos is completely achievable at home with minimal equipment and no photography experience. The techniques aren't complicated—they're just specific. Once you understand the fundamentals of setup, lighting, and editing for white background photography, you can create ecommerce-ready product photos that meet platform requirements, build customer trust, and increase conversions. Whether you're an Etsy seller photographing handmade jewelry, an Amazon seller with electronics to list, a Shopify store owner building your catalog, or a small business owner creating marketing materials, this comprehensive guide will teach you everything you need to know about DIY white background product photography that looks professionally shot.
Why White Background Product Photos Matter for Your Business
White background product photos aren't just an aesthetic choice—they're the industry standard for ecommerce for compelling psychological and practical reasons. Understanding why these photos work so effectively helps you appreciate the value of mastering this technique and motivates you to invest the time in getting it right.
Ecommerce platform requirements make white backgrounds non-negotiable for many sellers. Amazon requires main product images to have a pure white background (RGB 255, 255, 255) with no props, text, or graphics. Etsy strongly recommends white or light neutral backgrounds for main listing photos. eBay, Walmart Marketplace, and most other major platforms have similar guidelines. These requirements exist because white backgrounds create consistency across millions of products, making platforms easier to browse and more professional-looking. If you want to sell on these platforms, white background photos aren't optional—they're mandatory for your main product image.
The psychology of white backgrounds is powerful and well-researched. White backgrounds eliminate distractions, focusing 100% of the viewer's attention on your product. There's no competing visual information—no busy patterns, no contextual clutter, just your product in perfect clarity. This focus increases the likelihood that customers actually see and evaluate your product rather than getting distracted by background elements. White backgrounds also communicate professionalism, cleanliness, and trustworthiness. Research in consumer psychology shows that clean, uncluttered product presentations increase perceived product quality and brand credibility. Customers unconsciously associate professional photography with professional businesses, and white backgrounds are the universal signal of professional product photography.
Conversion rate impact is measurable and significant. Studies consistently show that high-quality product photos with white backgrounds convert better than photos with busy or inconsistent backgrounds. One analysis of thousands of ecommerce listings found that products with clean white background photos had 30-40% higher conversion rates than similar products with lifestyle or cluttered background photos. The reason is simple: customers can clearly see what they're buying, evaluate quality and details, and feel confident in their purchase decision. Uncertainty kills conversions, and white background photos eliminate visual uncertainty.
Brand consistency across platforms becomes effortless with white background photos. When all your product photos share the same clean white background aesthetic, your brand looks cohesive and professional whether customers find you on Amazon, your website, Instagram, or anywhere else. This consistency builds brand recognition and trust. Customers who see your products across multiple platforms will recognize your visual style and associate it with quality and professionalism.
When to use white backgrounds versus lifestyle photos is an important strategic decision. White backgrounds work best for main product images, catalog photos, comparison shopping, and any context where customers need to clearly see product details and features. Lifestyle photos—products in use or styled in context—work best for secondary images that show scale, demonstrate use cases, or create emotional connection. The ideal product listing combines both: white background main image for clarity and platform compliance, plus lifestyle images for context and storytelling. This guide focuses on white backgrounds because they're the foundation—once you master these, lifestyle photos become easier because you understand lighting and composition fundamentals.
Essential Equipment for DIY White Background Product Photography
One of the biggest misconceptions about white background product photography is that you need expensive professional equipment. The reality is that you can create platform-ready, professional-looking white background photos with equipment costing $0-50 total. Here's exactly what you need and what you don't.
Your smartphone camera is perfectly sufficient for white background product photography. Modern smartphones—iPhone, Samsung Galaxy, Google Pixel, and most mid-range Android phones—have cameras capable of capturing sharp, well-exposed, color-accurate product photos that meet ecommerce platform requirements. You don't need a DSLR or mirrorless camera. The key advantages of smartphone photography for product sellers are that you already own the equipment, you know how to use it, and you can shoot and edit on the same device. Professional photographers use expensive cameras because they need maximum flexibility and the highest possible image quality for large prints or billboards. For ecommerce product photos displayed on screens at relatively small sizes, smartphone cameras are more than adequate.
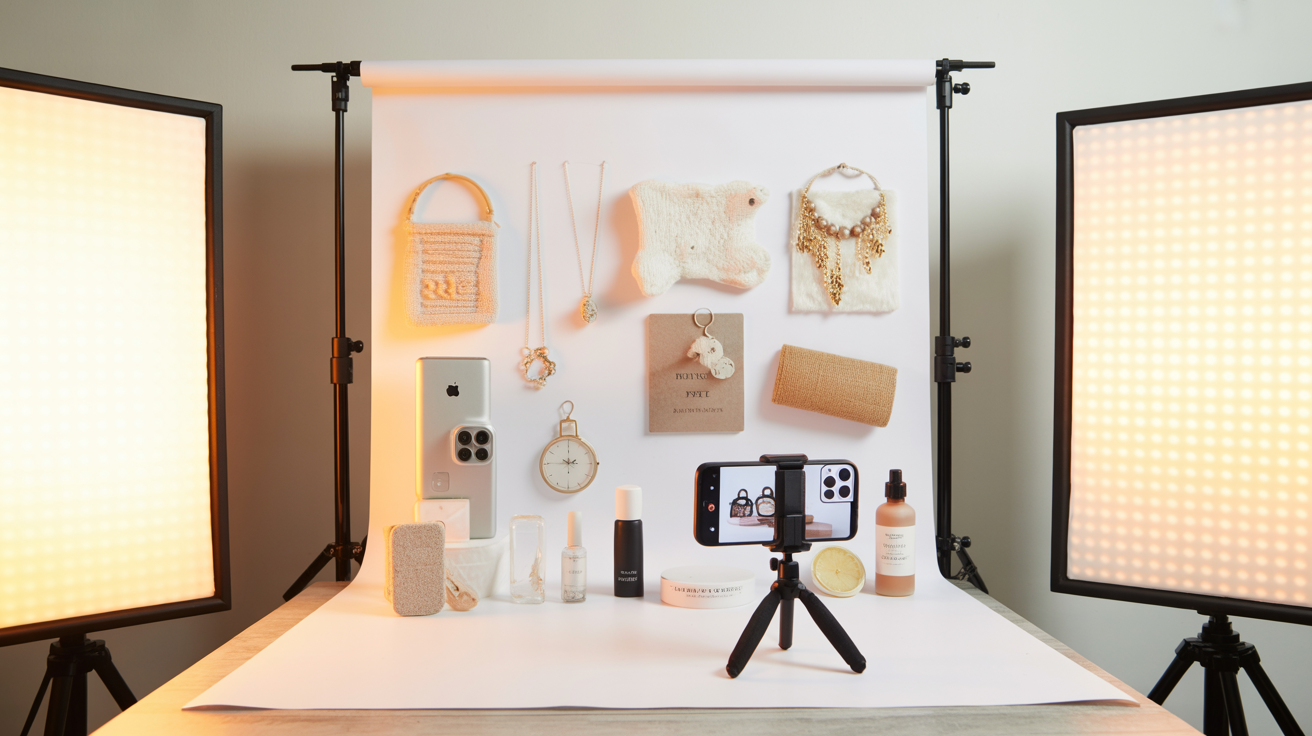
White background options are simple and affordable. The goal is a pure white, seamless surface that extends behind and beneath your product. Your options include white poster board ($3-5 for a large sheet at any craft or office supply store)—this is the cheapest option and works perfectly for small to medium products. White foam core board ($5-8) is sturdier than poster board and stands up better to repeated use. White fabric or bedsheet (free if you already own one, $10-15 for a new white sheet) works well for larger products and creates a soft, seamless look. Seamless white paper backdrop ($15-30 for a roll) is what professional photographers use—it's reusable, creates perfect seamless backgrounds, and is worth the investment if you'll be photographing products regularly. For most beginners, white poster board is the perfect starting point—it's cheap enough that you can experiment without worry, and it produces excellent results.
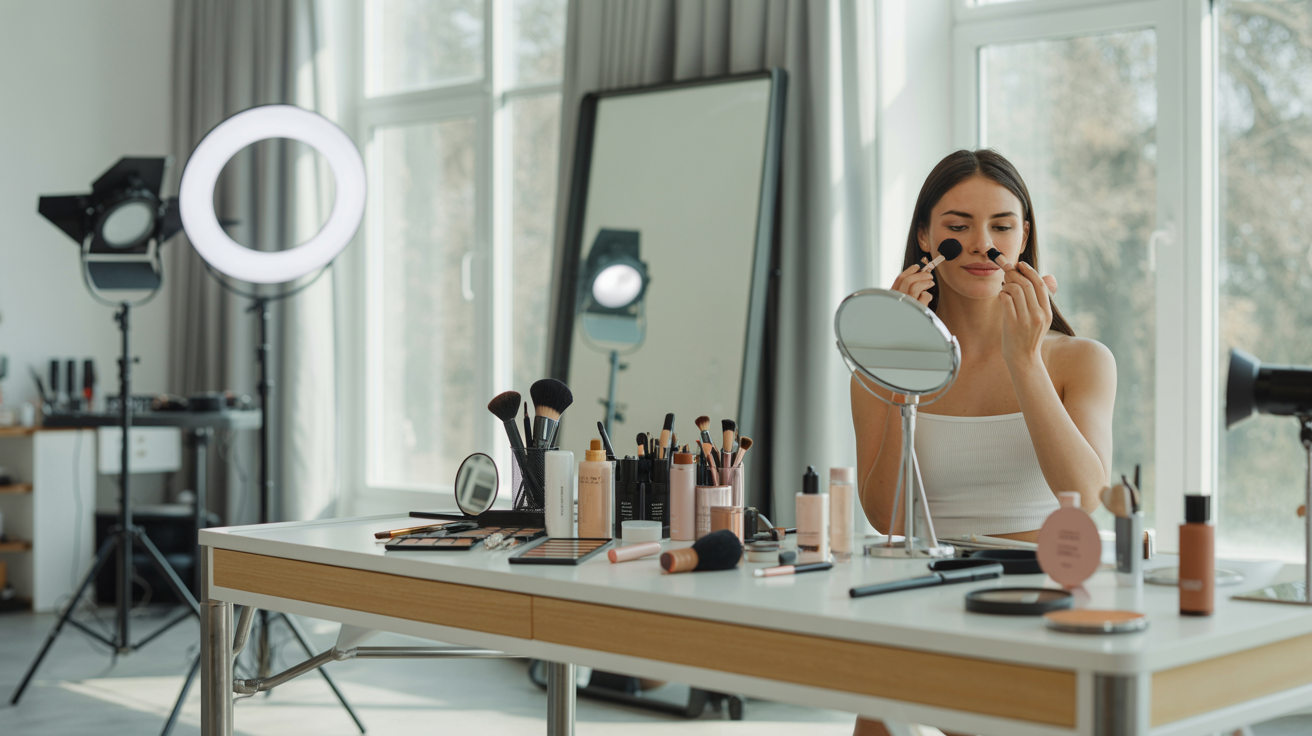
Lighting equipment can be as simple as natural window light (free) or as sophisticated as professional LED panels ($30-100 each). For beginners, natural window light is your best friend. It's free, abundant, soft, and flattering. A large window with indirect sunlight (not direct harsh sunlight) provides beautiful, even lighting perfect for product photography. If you need to supplement natural light or shoot at night, affordable LED light panels ($20-50 each on Amazon) provide clean, adjustable lighting. Look for panels with adjustable brightness and color temperature. You'll ideally want two lights—one main light and one fill light—but you can start with one and use reflectors to fill in shadows. Regular desk lamps with daylight-balanced LED bulbs ($10-15) can also work in a pinch, though they're less ideal than dedicated photo lights.
A tripod or phone stand ($10-30) is highly recommended but not absolutely required. A tripod keeps your camera steady for sharp photos, maintains consistent framing across multiple products, and frees your hands to adjust products and lighting. Even a basic smartphone tripod makes a significant difference in image quality and workflow efficiency. If you don't want to invest in a tripod immediately, you can improvise by propping your phone against a stable stack of books, but a tripod is one of the best investments you can make for consistent results.
Reflectors bounce light back onto your product to fill in shadows and create even lighting. Professional reflectors cost $15-30, but DIY reflectors work just as well. White poster board, white foam core, or even aluminum foil wrapped around cardboard creates effective reflectors for free. Reflectors are essential for white background photography because they help eliminate shadows that would otherwise appear gray against your white background.
Budget breakdown for a complete DIY white background product photography setup: Minimal setup ($0-15): smartphone you already own, white poster board ($5), natural window light (free), DIY reflectors from materials you have (free), improvised phone stand from books (free). Recommended setup ($30-60): smartphone, white poster board or foam core ($5-10), basic smartphone tripod ($15-25), DIY reflectors (free), natural window light plus one affordable LED panel if needed ($20-40). Professional DIY setup ($80-150): smartphone, seamless white paper backdrop ($20-30), quality smartphone tripod ($25-40), two LED light panels ($40-80), professional reflectors ($15-30). Even the "professional" DIY setup costs less than hiring a photographer for 2-3 products, and you can use it for unlimited products forever.
What you absolutely don't need: expensive DSLR or mirrorless camera, professional studio lighting equipment, photography degree or training, expensive editing software, professional photography studio rental. All of these are nice to have if you're a professional photographer, but they're completely unnecessary for creating ecommerce-ready white background product photos.
Setting Up Your DIY White Background Product Photo Studio
Creating a simple home product photography setup takes 10-15 minutes and transforms any space into a functional photo studio. The key is understanding the basic principles of setup and then adapting them to your specific space and products.
Choosing the right space in your home makes everything easier. Look for a location near a large window that receives plenty of indirect natural light. Indirect light—light from a window that doesn't have direct sunlight streaming through—is soft, even, and perfect for product photography. Direct harsh sunlight creates hard shadows and overexposed areas that are difficult to work with. A room with a large north-facing window (in the Northern Hemisphere) provides consistent indirect light throughout the day. East or west-facing windows work well in the morning or afternoon respectively, avoiding midday harsh sun. If you don't have ideal window light, you can work with artificial lighting, but natural light is easier for beginners.
Your setup space should have enough room to position your product, background, camera, and lights (if using artificial lighting). A table or desk near your window is ideal. You need about 3-4 feet of depth—enough space for your background sweep, product, and some distance between product and background to minimize shadows. Clear the space completely so you have a clean working area without distractions.
Creating a seamless white background is the technique that makes your photos look professional rather than amateur. A seamless background means there's no visible line or corner where the background surface meets the wall or backdrop—it's one continuous white surface that extends behind and beneath your product. Here's how to create it: Take your white poster board, foam core, or seamless paper and create a gentle curve from the horizontal surface (table) up to the vertical surface (wall or backdrop support). This curve is called a "sweep." Tape or clip the top of your background material to the wall or to a vertical support (like a chair back or stack of books). Let the material curve gently down to the table surface, creating a smooth transition with no visible corner. Place your product on the curved part of the sweep, not at the bottom where it meets the table. This positioning ensures the background behind your product is seamless white with no visible horizon line.
Positioning your product on the sweep requires some experimentation. Place your product far enough forward on the sweep that there's space behind it—this separation between product and background helps minimize shadows on the background. For small products, 6-12 inches of space behind the product is ideal. For larger products, 12-24 inches works better. The product should sit securely on the sweep without rolling or tipping. Use museum putty, double-sided tape, or small props hidden from camera view to stabilize products if needed.
Camera or phone placement and height depend on your product but follow general principles. Position your camera at roughly the same height as the center of your product—this creates a natural, straight-on perspective that shows products accurately without distortion. For small products, this might mean positioning your phone 12-18 inches above the table surface. For larger products, adjust accordingly. Your camera should be far enough from the product to capture the entire item with some white space around it (you can crop later), but close enough that the product fills a good portion of the frame. Start with your camera about 2-3 feet from your product and adjust based on your product size and desired framing.
Lighting setup is where white background photography gets technical, but the principles are straightforward. Your goal is to light your product evenly while also lighting the background bright enough that it appears pure white in your photo. The challenge is that if you only light your product, the background will appear gray. If you only light the background, your product will be underexposed. You need to light both.
For natural light setup: Position your table so the window is to the side of your product (90-degree angle), not behind it or directly in front. This side lighting creates dimension and shows product details while minimizing harsh shadows. Place a white reflector (poster board or foam core) on the opposite side of your product from the window to bounce light back and fill in shadows. This simple one-light-plus-reflector setup works beautifully for most products. If your background still appears gray rather than white, you may need to add a second light or reflector behind your product aimed at the background to brighten it.
For artificial light setup: Position one main light at a 45-degree angle to the side and slightly above your product. This creates your primary illumination. Position a second light on the opposite side at a similar angle, but at lower intensity (if your lights are adjustable) or farther away. This fill light reduces shadows without creating competing highlights. If you only have one light, use reflectors on the opposite side to bounce light back. To brighten your background, you can add a third light aimed at the background from behind your product, or position your existing lights so some light spills onto the background.
Eliminating shadows on white backgrounds is crucial because shadows appear as gray areas that ruin the clean white look. Shadows come from your product blocking light from reaching the background. To minimize them: increase the distance between your product and background (more space = softer, less visible shadows), add light aimed at the background to overpower shadows, use diffused lighting (soft light creates softer shadows than hard light), and use reflectors to bounce light into shadow areas. Some shadow is inevitable with three-dimensional products, but your goal is to make shadows so soft and light that they disappear when you brighten the background in editing.
> Want professional product photos without the DIY hassle? Glowup creates studio-quality product images with AI. Try it free at https://glowuplab.app/
Lighting Techniques for Perfect White Background Photos
Lighting is the single most important factor in white background product photography. Perfect lighting makes editing easy and results professional. Poor lighting makes even the best editing look amateur. Understanding specific lighting techniques for white backgrounds transforms your results.
Natural light setup with window light and reflectors is the most accessible technique for beginners. Position your setup near a large window with bright indirect light. The best time to shoot is mid-morning to mid-afternoon when natural light is abundant but not harsh. Overcast days are actually ideal because clouds diffuse sunlight into soft, even light perfect for product photography. Position your product so window light comes from the side (90-degree angle). This side lighting creates dimension, shows texture, and minimizes flat, lifeless lighting. Place a white reflector opposite the window to bounce light back onto the shadow side of your product. This fill light reduces contrast and creates even, flattering illumination. To brighten your background, position a second reflector behind your product angled to bounce light onto the background. This simple window-light-plus-reflectors setup can create professional results without any artificial lighting.
Artificial light setup with LED panels gives you complete control and consistency regardless of time of day or weather. Position your main light at a 45-degree angle to the side and slightly above your product. This angle creates natural-looking shadows that show dimension without being harsh. Your main light should be your brightest light source. Position your fill light on the opposite side at a similar angle but at lower intensity (either dimmed or positioned farther away). The fill light should be about half the intensity of your main light—bright enough to reduce shadows but not so bright that it creates competing highlights. This two-light setup creates even, professional lighting that shows products clearly.
To brighten your background with artificial lights, you have two options: add a third light positioned behind your product aimed at the background, or position your existing lights so they illuminate both product and background. The background light should be bright enough that the background appears pure white in your photo. This often means the background is slightly overexposed (very bright) while your product is properly exposed. This is exactly what you want—the background should be so bright it becomes pure white.
Eliminating shadows completely is the holy grail of white background photography. While some shadow is natural and acceptable, your goal is to make shadows so soft and light that they're barely visible and easily removed in editing. Techniques for minimizing shadows include increasing distance between product and background (the farther apart they are, the softer and lighter shadows become), using diffused lighting (soft light creates soft shadows; hard light creates hard shadows), adding light aimed at the background to overpower shadows, and using multiple reflectors to bounce light into all shadow areas. For very small products, you can even create a "light tent" effect by surrounding your product with white reflectors on all sides, creating completely even, shadowless lighting.
Avoiding overexposure and underexposure requires balancing your lighting. Overexposure happens when too much light hits your product, washing out details and colors. Underexposure happens when too little light reaches your product, making it appear dark and murky. The goal is proper exposure where your product shows all details, colors appear accurate, and highlights aren't blown out (pure white with no detail). Check your exposure by looking at your phone screen while shooting. If your product looks too bright or washed out, reduce light intensity or move lights farther away. If your product looks too dark, increase light intensity or move lights closer. Most smartphones allow you to adjust exposure by tapping on your product and sliding up or down to brighten or darken the image.
Dealing with reflective products like glass, metal, and jewelry requires special techniques because these materials reflect your lights, camera, and surroundings, creating distracting glare and reflections. For reflective products, use diffused lighting rather than direct lighting. Diffused light comes from a large, soft source rather than a small, hard source. You can diffuse your lights by placing white fabric or diffusion paper in front of them, or by bouncing light off white walls or reflectors rather than aiming lights directly at your product. Position lights at angles that don't create direct reflections toward your camera. For highly reflective products like jewelry, consider using a light tent (a white fabric enclosure that surrounds your product) which creates completely even, reflection-free lighting.
Lighting for different product types requires adapting these general principles. Clothing and fabric benefit from soft, even lighting that shows texture without harsh shadows. Slightly directional lighting (from the side) shows fabric texture better than flat frontal lighting. Electronics and gadgets need even lighting that minimizes reflections on screens and glossy surfaces. Use diffused lighting and position lights to avoid glare. Food products need lighting that makes them look fresh and appetizing. Slightly warm lighting (not too cool/blue) and directional lighting that creates some shadow for dimension work well. Handmade and craft items benefit from lighting that shows texture and detail. Slightly directional lighting from the side reveals texture better than flat lighting. Jewelry and small items need bright, even lighting and often benefit from a light tent setup to eliminate reflections.
Common lighting mistakes include using only one light source without reflectors (creates harsh shadows), positioning lights directly in front of product (creates flat, lifeless lighting), using harsh, direct lighting (creates hard shadows and glare), not lighting the background separately (results in gray backgrounds), and inconsistent lighting across product line (makes your catalog look unprofessional). Avoiding these mistakes and applying the techniques above creates professional lighting that makes editing easy and results impressive.
Camera Settings and Shooting Techniques
Once your setup and lighting are perfect, proper camera settings and shooting techniques ensure you capture the best possible images. Even with perfect lighting, wrong camera settings can ruin your photos.
Smartphone camera settings should be optimized for product photography. Turn off HDR mode—HDR is designed for high-contrast scenes with bright and dark areas, but product photography with white backgrounds is relatively even in brightness, and HDR can create unnatural-looking results. Use your phone's standard photo mode. If your phone has a manual or pro mode, you can use it for more control, but auto mode works well for most situations if your lighting is good. Disable any beauty or enhancement modes that might alter colors or details. You want accurate representation of your product, not artificial enhancement.
Exposure and white balance are the two most important settings to check. Exposure controls how bright or dark your image is. Tap on your product on your phone screen to set focus and exposure on the product. If the image is too bright or too dark, slide up or down (on most phones) to adjust exposure. For white background photography, you want your product properly exposed (showing all details and accurate colors) even if that means your background is very bright or slightly overexposed. White balance controls the color temperature of your image—whether it looks warm (yellow/orange) or cool (blue). Most phones handle white balance automatically reasonably well, but if your product colors look off, look for white balance settings (often represented by icons like sun, cloud, or light bulb) and adjust until colors look accurate. Alternatively, you can correct white balance in editing.
Focus techniques for sharp product photos are simple but important. Tap on your product on your phone screen to set focus. Make sure the focus point is on the most important part of your product—usually the front or center. For small products or detail shots, get close enough that your product fills most of the frame, but not so close that your camera can't focus (most phone cameras have a minimum focus distance of 4-6 inches). If your product has depth, focus on the front or most important part. Some phones allow you to lock focus by tapping and holding, which is useful if you're shooting multiple products in the same position.
Shooting multiple angles gives you options and shows customers your product completely. For most products, you'll want at least 3-5 angles: straight-on front view (main image), 45-degree angle view (shows dimension), side view (shows profile), back view (shows all sides), and top-down view (shows shape and layout). For products with important details, add close-up detail shots. Shoot more photos than you think you need—it's easier to choose the best shots later than to realize you're missing an important angle.
Consistency across your product line is crucial for a professional-looking catalog. Use the same setup, lighting, camera position, and framing for all products in the same category. This consistency makes your products look like they belong to the same professional brand rather than a random collection. Take notes or photos of your setup so you can recreate it exactly for future products. Use the same editing style (which we'll cover next) for all products.
Taking enough photos means shooting multiple frames of each angle. Even with a tripod, slight variations in product position, lighting, or camera settings can affect results. Shoot 3-5 frames of each angle, making small adjustments between shots. This gives you options when selecting the best images for editing. Storage is cheap, and you can always delete extras later.
Editing White Background Photos to Perfection
Even perfectly shot white background photos need editing to achieve that crisp, pure white background and polished look that defines professional product photography. The good news is that editing is straightforward with free apps and takes just a few minutes per photo once you learn the workflow.
Free editing apps that work excellently for white background product photography include Snapseed (Google's free app with comprehensive editing tools including selective adjustments perfect for brightening backgrounds), Lightroom Mobile (Adobe's mobile app with a robust free version offering professional-grade tools), and Photoshop Express (Adobe's simplified mobile app with easy background removal and adjustment tools). All three are available for both iPhone and Android and are completely free or have excellent free versions. For this guide, we'll focus on techniques that work in any of these apps.
Brightening backgrounds to pure white is the most important editing step. Your goal is to make the background pure white (RGB 255, 255, 255) while keeping your product properly exposed with accurate colors. Here's the workflow: Open your photo in your editing app. Increase overall brightness slightly to brighten the entire image. Then use selective editing tools (available in all three recommended apps) to brighten only the background without affecting your product. In Snapseed, use the "Selective" tool to place adjustment points on the background and increase brightness. In Lightroom Mobile, use the "Selective Edits" or "Masking" tools to select the background and increase exposure. The goal is to make the background so bright it becomes pure white while your product remains properly exposed.
Maintaining product color accuracy while brightening the background is crucial. As you brighten the background, check that your product colors remain accurate and aren't washed out. If your product starts looking too bright or colors look faded, use selective editing to brighten only the background, not the product. You can also reduce the brightness adjustment on your product specifically while keeping the background bright. The key is selective editing—adjusting different parts of your image independently.
Removing shadows and imperfections makes your photos look cleaner and more professional. Small shadows on the background can be lightened or removed using selective brightening. Dust spots, small scratches, or imperfections can be removed using spot healing or clone tools available in most editing apps. In Snapseed, use the "Healing" tool. In Lightroom Mobile, use the "Healing" brush. Tap on imperfections to remove them. Don't go overboard—remove obvious distractions but don't spend hours on tiny details that won't be visible in final images.
Cropping and sizing for platforms ensures your photos meet technical requirements. Most ecommerce platforms require square images (1:1 aspect ratio) or have specific size requirements. Amazon recommends at least 1000 pixels on the longest side (and requires at least 500 pixels). Etsy recommends 2000 pixels on the shortest side. Crop your images to the required aspect ratio, ensuring your product is centered with some white space around it. Size your images to meet platform requirements—larger is generally better because platforms can scale down but not up without quality loss.
Batch editing for efficiency saves enormous time when you have multiple products to edit. Once you've edited one photo to perfection, save your editing steps as a preset or copy your settings to apply to similar photos. In Lightroom Mobile, you can copy settings from one photo and paste them to others. In Snapseed, you can save your editing steps as a "Look" and apply it to other photos. This consistency also ensures all your products have the same polished style.
Meeting platform requirements means checking technical specs before finalizing your edits. Amazon requires pure white background (RGB 255, 255, 255), product filling at least 85% of the frame, minimum 1000 pixels on longest side, JPEG or PNG format. Etsy recommends 2000 pixels on shortest side, square or 4:5 aspect ratio, JPEG format. eBay recommends 1600 pixels on longest side, square aspect ratio preferred. Shopify recommends 2048 x 2048 pixels, square aspect ratio, JPEG format. Check your specific platform's requirements and ensure your edited photos meet them.
Common Mistakes and How to Avoid Them
Even with good technique, certain mistakes are common in DIY white background product photography. Recognizing and avoiding these pitfalls saves time and frustration.
Gray backgrounds instead of pure white is the most common mistake. This happens when your background isn't lit brightly enough or you don't brighten it sufficiently in editing. Fix: Add more light aimed at your background during shooting, and use selective editing to brighten the background to pure white in post-processing. Check your final images on a computer screen (not just your phone) to ensure the background is truly white, not light gray.
Harsh shadows on the background ruin the clean white look. This happens when your product is too close to the background or your lighting is too directional without fill light. Fix: Increase distance between product and background, add fill light or reflectors to soften shadows, and use selective editing to lighten remaining shadows.
Overexposed products where details are washed out happen when you brighten the entire image too much trying to achieve a white background. Fix: Use selective editing to brighten only the background while keeping your product properly exposed. Your product should show all details and accurate colors even if the background is very bright.
Inconsistent lighting across your product line makes your catalog look unprofessional. This happens when you shoot products at different times with different lighting setups. Fix: Create a documented, repeatable setup and shoot all products in the same category in one session with consistent lighting. Use the same editing preset for all similar products.
Poor focus and blur make products look unprofessional and low-quality. This happens when you don't tap to focus on your product or when you're too close for your camera to focus. Fix: Always tap on your product to set focus before shooting. Ensure you're at least 4-6 inches away (most phone cameras' minimum focus distance). Use a tripod to eliminate camera shake blur.
Incorrect white balance creating color casts (yellow, blue, or green tints) makes products look inaccurate. This happens when your camera's automatic white balance is confused by mixed lighting or strong colored light. Fix: Shoot in consistent lighting (all natural light or all artificial light, not mixed). Correct white balance in editing using temperature and tint sliders until whites look white and colors look accurate.
Not meeting platform requirements means your photos get rejected or don't display properly. This happens when you don't check technical specs before shooting and editing. Fix: Research your platform's requirements before starting. Check image size, aspect ratio, file format, and background requirements. Ensure your final edited images meet all specs before uploading.
Platform-Specific Requirements and Best Practices
Different ecommerce platforms have specific requirements and best practices for product photos. Meeting these ensures your photos display properly and aren't rejected.
Amazon product photo requirements are strict and specific. Main image must have pure white background (RGB 255, 255, 255). Product must fill at least 85% of the image frame. Minimum 1000 pixels on longest side (1600+ pixels recommended for zoom function). JPEG or PNG format. No text, graphics, or watermarks on main image. Product must be the actual product being sold, not illustrations or renderings. Additional images (2-8 additional photos allowed) can show lifestyle context, different angles, or details, but main image must be white background.
Etsy listing photo standards are recommendations rather than strict requirements, but following them improves visibility and sales. First photo should be clean and clear, showing the full product. White or light neutral background recommended for main photo. Minimum 2000 pixels on shortest side for best quality. Square (1:1) or vertical (4:5) aspect ratio works best. JPEG format. Up to 10 photos per listing. Use additional photos to show details, scale, different angles, and lifestyle context.
eBay photo guidelines recommend 1600 pixels on longest side for best quality and zoom function. Square aspect ratio preferred. White or light neutral background recommended for main photo. JPEG format. Up to 12 photos per listing (24 for some categories). First photo is most important—should clearly show the full product on clean background.
Shopify best practices for product photos include 2048 x 2048 pixels (square) for optimal display across all devices. JPEG format for faster loading. White background for main product photo. Multiple photos showing different angles and details. Consistent style across all products. File size under 20MB (though smaller is better for page load speed).
Instagram Shopping photos require square (1:1) aspect ratio, minimum 1080 x 1080 pixels. White or clean background works best for product focus. Photos must clearly show the product being sold. Consistent aesthetic across your feed builds brand recognition.
Meeting technical specs means checking and double-checking before uploading. Verify image dimensions (pixel width and height), file format (JPEG vs PNG), file size (some platforms have maximum file sizes), aspect ratio (square, vertical, or horizontal), and background color (pure white RGB 255, 255, 255 for platforms that require it). Most editing apps show image specs and allow you to export at specific sizes and formats.
> Ready to elevate your product photography? Get started with Glowup's AI-powered photo enhancement at https://glowuplab.app/signup
Maintaining Consistency and Efficiency
Once you've mastered white background product photography, maintaining consistency and efficiency across your entire product line ensures professional results at scale.
Creating a repeatable setup means documenting your exact configuration so you can recreate it every time. Take photos of your setup from multiple angles showing background position, lighting placement, camera height, and product positioning. Write down your camera settings, lighting settings (if using adjustable lights), and any other variables. Store this documentation where you can reference it easily. When you need to photograph new products, simply recreate your documented setup exactly.
Documenting your process includes your shooting workflow and editing workflow. Create a checklist: setup steps, lighting check, camera settings check, angles to shoot, number of frames per angle, editing steps, export settings, and platform upload requirements. Following the same checklist every time ensures you don't miss important steps and maintains consistency.
Using templates and presets in your editing app saves enormous time. Once you've edited one product photo to perfection, save those editing settings as a preset. In Lightroom Mobile, tap the three dots and select "Create Preset." In Snapseed, save your editing steps as a "Look." Apply this preset to all similar products as a starting point, then make minor adjustments as needed for each specific product. This ensures consistent style while dramatically reducing editing time.
Batch photography sessions are more efficient than photographing products one at a time. Set up your white background studio once, then photograph 10, 20, or 50 products in one session. This amortizes setup time across many products and ensures consistent lighting and conditions. Prepare all products in advance (clean, assemble, remove tags, etc.), shoot all products in one session, then batch edit all photos using your presets.
Quality control checklist ensures every photo meets your standards before uploading. Check: background is pure white with no gray areas, product is sharp and in focus, colors are accurate, no harsh shadows, product fills appropriate amount of frame, meets platform technical requirements (size, format, aspect ratio), and consistent with other products in your catalog. Reject and reshoot any photos that don't meet all criteria.
Updating photos as products change keeps your listings current and accurate. If you change product design, packaging, or colors, update photos immediately. Schedule regular photo audits (quarterly or annually) to review all product photos and update any that look dated or inconsistent with your current brand aesthetic.
Conclusion
White background product photography is the foundation of professional ecommerce presence. The clean, focused aesthetic builds trust, meets platform requirements, and increases conversions by showing your products clearly and professionally. While the technique requires some learning and practice, it's completely achievable at home with minimal equipment and no professional photography experience.
The key principles to remember: invest in proper setup with seamless white backgrounds and adequate space, master lighting to illuminate both product and background evenly, use selective editing to achieve pure white backgrounds while maintaining accurate product colors, maintain consistency across your entire product line, and meet platform-specific requirements for optimal display and compliance.
Your action steps are straightforward: start with one product and the minimal equipment setup (smartphone, white poster board, window light, DIY reflectors). Follow the setup and lighting techniques in this guide. Shoot multiple angles and frames. Edit using free apps and the workflow described. Check your results against platform requirements. Once you've successfully created one perfect white background product photo, you've proven you can do it. Then simply repeat the process for your entire product line, refining your technique and efficiency with each product.
The return on investment for mastering white background product photography is immediate and substantial. Professional-looking photos increase conversion rates, reduce returns (customers know exactly what they're buying), build brand credibility, and save thousands of dollars compared to hiring professional photographers. For online sellers, product photography isn't optional—it's the primary way customers evaluate your products and your business. Investing time in mastering this skill pays dividends with every product you sell.
Remember that perfection isn't required on your first attempt. Product photography is a skill that improves with practice. Your tenth product photo will be better than your first. Your hundredth will be better than your tenth. Start today, apply these techniques, and watch your product photos transform from amateur snapshots to professional ecommerce images that drive sales and build your brand.