Scroll through any successful brand's Instagram feed, Etsy shop, or e-commerce product page and you'll notice a recurring visual format: the flat lay. Products arranged artfully on a clean surface, photographed from directly above, styled with complementary props and textures — it's one of the most versatile, engaging, and widely used formats in modern visual content. And for good reason.
Flat lay photography is powerful because it gives you complete creative control. Unlike lifestyle photography, which requires models, locations, and complex logistics, flat lays can be created anywhere — on your kitchen table, your office desk, or a piece of foam board on the floor. The format is inherently organized and visually satisfying, making it ideal for showcasing products, telling brand stories, and creating the kind of scroll-stopping content that drives engagement and sales.
Whether you're a small business owner photographing your products for an online store, a content creator building a cohesive Instagram aesthetic, a freelancer showcasing your tools and workspace, or simply someone who wants to create beautiful visual content — this guide will walk you through everything you need to know. From choosing your surface and styling your props to mastering overhead lighting and editing your final images, you'll have a complete flat lay toolkit by the time you're done.
What Makes a Great Flat Lay? The Core Principles
Before diving into the technical details, it's worth understanding what separates a great flat lay from a mediocre one. The best flat lays share a handful of core qualities that you can apply regardless of your subject matter, budget, or equipment.
Visual Hierarchy: One Hero, Supporting Cast
Every great flat lay has a clear visual hierarchy — a "hero" element that the eye lands on first, supported by secondary and tertiary elements that add context and interest without competing for attention. In product photography, the hero is almost always the product itself. Everything else in the frame — the props, the textures, the negative space — exists to support and enhance the hero, not to upstage it.
Before you start arranging your flat lay, identify your hero element and make sure it's the largest, most prominent, or most centrally positioned item in the frame. Then build outward from there, adding supporting elements that complement without overwhelming.
Intentional Negative Space
One of the most common mistakes in flat lay photography is filling every inch of the frame with objects. Negative space — the empty areas of your composition — is not wasted space. It's breathing room that allows the eye to rest, creates a sense of elegance and intentionality, and makes the hero element stand out more clearly.
As a general rule, aim for at least 30-40% of your frame to be negative space. This might feel like too much when you're arranging your shot, but it almost always looks better in the final image than a densely packed composition.
Color Harmony and Contrast
Color is one of the most powerful tools in flat lay styling. A well-chosen color palette creates visual cohesion and makes your flat lay feel intentional and polished. A poorly chosen palette creates visual noise that distracts from your subject.
There are two main approaches to flat lay color: monochromatic (using different shades and textures of the same color family for a clean, sophisticated look) and complementary (using colors that sit opposite each other on the color wheel for a vibrant, high-contrast effect). Both work beautifully — the key is to choose one approach and commit to it, rather than mixing colors randomly.
Your background surface is the largest color element in your flat lay, so choose it first and build your palette around it. A white or neutral background is the most versatile starting point, allowing you to introduce color through your props and products without creating visual conflict.
Texture and Dimension
Flat lays are, by definition, two-dimensional — but the best ones create a sense of depth and tactile richness through the strategic use of texture. Smooth products look more interesting against textured backgrounds. Matte surfaces contrast beautifully with glossy ones. Organic textures (linen, wood, plants, paper) add warmth and humanity to product shots that might otherwise feel cold and clinical.
When styling your flat lay, think about texture at every level: the background surface, the props, the product itself, and any fabric or paper elements you introduce. Varying textures across these layers creates visual interest and makes the final image feel rich and considered.
Choosing Your Background Surface
Your background surface is the foundation of your flat lay — it sets the tone for everything that goes on top of it. Choosing the right surface for your subject matter and brand aesthetic is one of the most important styling decisions you'll make.
Classic White and Light Neutrals
White and light neutral backgrounds (cream, off-white, light grey, pale beige) are the workhorses of flat lay photography. They're clean, versatile, and work with virtually any product or color palette. They also make post-processing easier, since a neutral background is simple to color-correct and doesn't introduce unwanted color casts.
For a white background, you have several options: a large piece of white foam board (inexpensive and widely available), a white sheet or fabric, a white-painted wooden board, or a white marble surface (real or faux). Each has a slightly different texture and feel — foam board is flat and matte, fabric adds softness and subtle texture, wood adds warmth, and marble adds luxury.
Wood and Natural Textures
Wood surfaces — whether real wood, wood-look vinyl, or printed wood-effect backdrops — add warmth, organic texture, and a handcrafted feel to flat lays. They work particularly well for food, lifestyle, artisan, and wellness products, and for brands with a natural, earthy, or rustic aesthetic.
Light wood tones (blonde, whitewashed, pale oak) are the most versatile, working with both warm and cool color palettes. Darker wood tones (walnut, mahogany, dark oak) create a more dramatic, moody effect that works well for luxury or masculine-leaning products.
Fabric and Textile Backgrounds
Fabric backgrounds — linen, cotton, velvet, burlap — add softness, texture, and a tactile quality that's hard to achieve with hard surfaces. They're particularly effective for fashion, beauty, jewelry, and lifestyle products, and for creating a cozy, intimate aesthetic.
The key with fabric backgrounds is to manage wrinkles and folds carefully. Slight, natural-looking texture is beautiful; obvious wrinkles and creases are distracting. Iron or steam your fabric before shooting, and use tape or clips to keep it smooth and taut.
Colored and Patterned Backgrounds
Colored backgrounds — a deep navy, a warm terracotta, a sage green — can create striking, brand-aligned flat lays that stand out in a crowded social media feed. The key is to choose a color that complements your product and props without overwhelming them, and to ensure there's enough contrast between the background and the hero element for the product to read clearly.
Patterned backgrounds (subtle geometric prints, marble-effect paper, textured wallpaper) can add visual interest, but use them with caution — a busy pattern can easily overwhelm a flat lay and make it feel chaotic rather than curated.
Lighting Your Flat Lay: Natural vs. Artificial
Lighting is the single most important technical factor in flat lay photography. Great lighting can make a mediocre composition look beautiful; poor lighting can ruin even the most carefully styled shot. The good news is that you don't need expensive studio equipment to achieve professional-quality flat lay lighting.
Natural Window Light: The Flat Lay Photographer's Best Friend
Natural window light is the gold standard for flat lay photography. It's soft, directional, and flattering — and it's completely free. The key is to position your flat lay surface near a large window and shoot during the hours when the light is bright but not direct (direct sunlight creates harsh shadows and blown-out highlights that are difficult to work with).
North-facing windows provide the most consistent, even light throughout the day — ideal for product photography where consistency matters. East-facing windows provide warm, soft morning light. West-facing windows provide warm afternoon light. South-facing windows (in the northern hemisphere) receive the most direct sunlight and are the trickiest to work with — use a sheer curtain to diffuse the light if needed.
Position your flat lay surface parallel to the window, with the light coming from the side rather than directly overhead. This creates gentle, directional shadows that add depth and dimension to your composition. If the shadows are too harsh, use a white foam board or reflector on the opposite side of the window to bounce light back into the shadows and soften them.
Artificial Lighting for Consistent Results
If you're shooting flat lays regularly — for an e-commerce store, a content calendar, or a product line — natural light has one significant limitation: it changes throughout the day and varies with weather and season. For consistent, repeatable results, artificial lighting gives you control that natural light can't match.
LED panel lights are the most popular choice for flat lay photography. They're bright, color-accurate, and adjustable, and they produce a soft, even light that works well for overhead shooting. Position two LED panels at 45-degree angles to your flat lay surface, one on each side, for even, shadow-free illumination.
Ring lights are another popular option, particularly for smaller flat lays. A ring light positioned directly above your flat lay surface creates even, shadow-free lighting — though it can produce a slightly flat look that lacks the depth and dimension of side lighting.
Softboxes produce the softest, most flattering artificial light and are the professional standard for product photography. They're more expensive than LED panels or ring lights, but the quality of light they produce is noticeably superior.
The Overhead Shooting Challenge
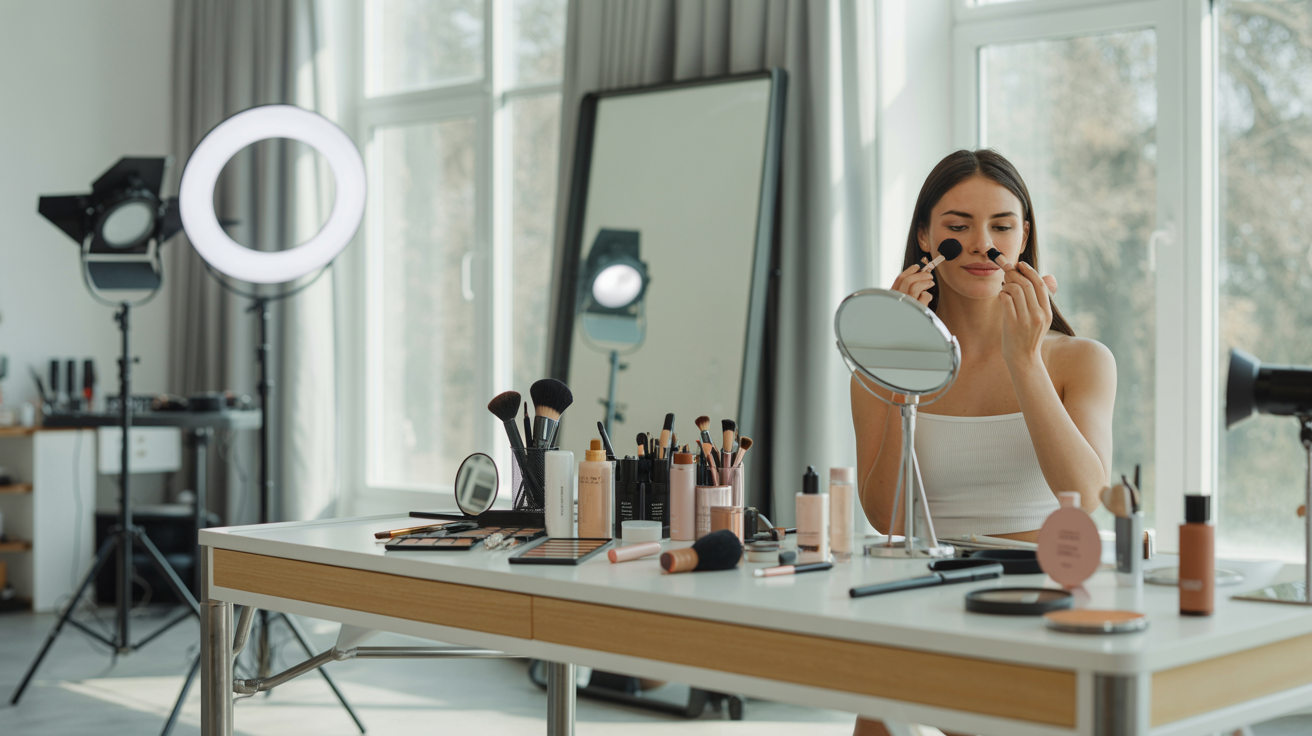
Flat lay photography requires shooting from directly above your subject — which creates a practical challenge: how do you position your camera overhead without casting a shadow on your flat lay?
The most common solutions are:
A tripod with a horizontal arm (also called a boom arm or overhead arm) that extends the camera directly above the flat lay surface. This is the most stable and professional solution.
A ladder or step stool positioned beside your flat lay, with you holding the camera overhead. This works for occasional shooting but is tiring and less consistent than a tripod.
A wall-mounted shelf or bracket that holds your camera at a fixed overhead position — a good solution if you shoot flat lays regularly in the same location.
Your phone camera held directly overhead, using the self-timer or a remote shutter to avoid camera shake. Modern smartphone cameras are more than capable of producing professional-quality flat lay images.
Styling Your Flat Lay: Props, Arrangement, and Composition
Styling is where flat lay photography becomes an art form. The technical elements — lighting, camera position, background — create the conditions for a great shot, but the styling is what makes it memorable.
Choosing Props That Tell a Story
Props are the supporting cast of your flat lay. Their job is to add context, texture, and visual interest to your hero product — to tell a story about how the product fits into a lifestyle, a moment, or a mood.
The best props are:
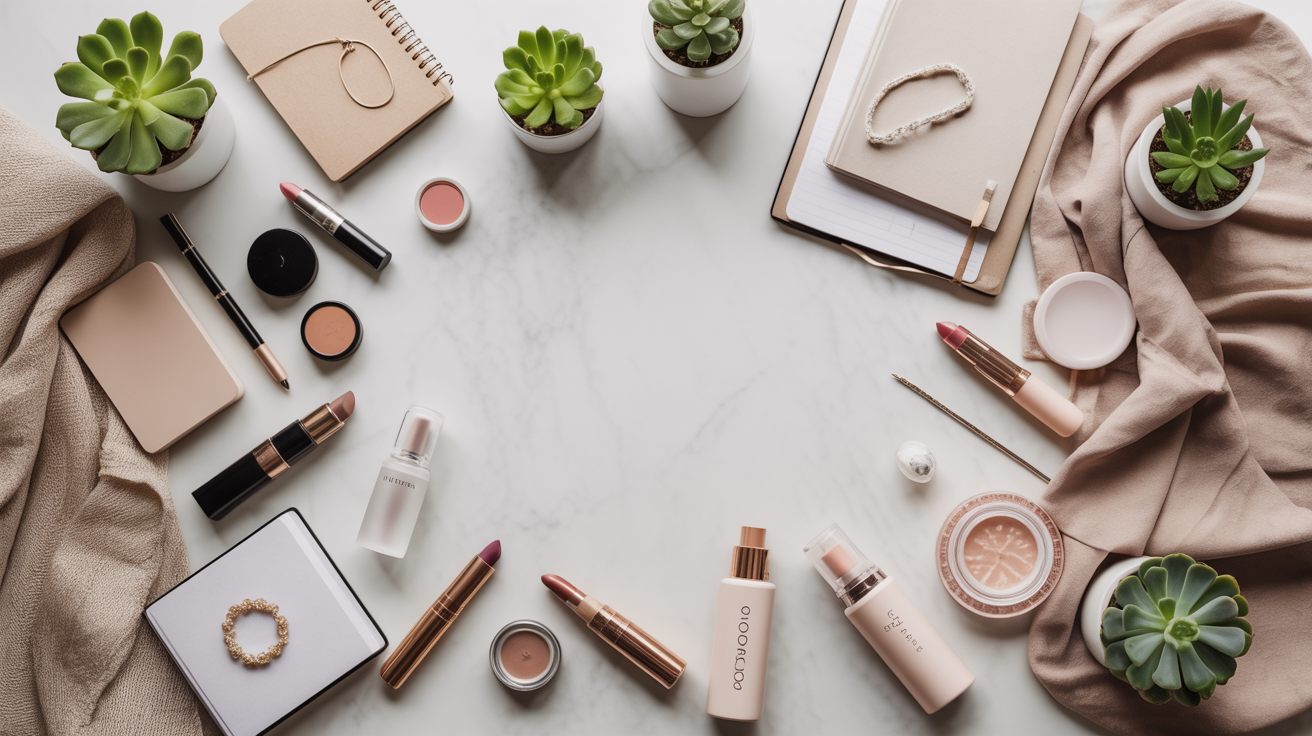
Contextually relevant. Props should make sense in the context of your product. A skincare product might be styled with a face roller, a small plant, and a linen towel. A coffee brand might be styled with a ceramic mug, a book, and a few coffee beans. A stationery brand might be styled with pens, washi tape, and a small succulent. The props should feel like they naturally belong in the same world as your product.
Visually complementary. Props should complement your product's color palette, texture, and aesthetic without competing with it. If your product is the hero, your props are the supporting cast — they should enhance, not upstage.
Varied in scale. Using props of different sizes creates visual rhythm and prevents your flat lay from feeling monotonous. Mix large props (a book, a fabric swatch, a large leaf) with medium props (a small plant, a candle, a jar) and small props (a few dried flowers, a coin, a small crystal) for a layered, dynamic composition.
Restrained in quantity. More is not more in flat lay styling. Start with fewer props than you think you need and add gradually, checking the composition through your camera viewfinder at each step. It's much easier to add props than to remove them once you've committed to an arrangement.
Composition Techniques for Flat Lays
Composition is the arrangement of elements within your frame. Good composition creates visual flow — it guides the viewer's eye through the image in a way that feels natural and satisfying. Here are the most effective composition techniques for flat lay photography:
The Rule of Thirds. Divide your frame into a 3x3 grid (most cameras and phones have a grid overlay option). Place your hero element at one of the four intersection points of the grid lines, rather than dead center. This creates a more dynamic, visually interesting composition than centered placement.
The Diagonal. Arrange your props along a diagonal line from one corner of the frame to the other. This creates a sense of movement and energy that draws the eye through the image.
The Cluster. Group your props in a loose cluster around the hero element, with negative space on one or more sides. This creates a focal point and allows the eye to rest in the negative space.
The Scatter. Distribute props loosely across the frame, with the hero element slightly more prominent than the others. This creates a casual, organic feel that works well for lifestyle and artisan brands.
The Flat Lay Grid. Arrange multiple products or props in a neat, organized grid pattern. This works particularly well for product collections, gift guides, and "what's in my bag" style content.
The Art of Imperfect Arrangement
One of the counterintuitive secrets of great flat lay styling is that perfect symmetry and rigid organization often look less appealing than slightly imperfect, organic arrangements. A few props slightly overlapping, a fabric edge that's not perfectly straight, a flower petal that's fallen slightly out of place — these small imperfections make a flat lay feel natural and human rather than stiff and artificial.
As you arrange your flat lay, aim for intentional imperfection: organized enough to feel curated, but loose enough to feel alive. The goal is a composition that looks effortless — even though it took careful thought to achieve.
Ready to take your product photos to the next level? Glowup is an AI photo platform that can enhance your product images, adjust backgrounds, and help you create polished, professional visuals for your brand — without a professional studio. Try it free at glowuplab.app.
Camera Settings and Equipment for Flat Lay Photography
You don't need expensive camera equipment to take great flat lay photos. A modern smartphone camera is more than capable of producing professional-quality results — and in many ways, smartphones are better suited to flat lay photography than DSLRs, because they're lighter, easier to hold overhead, and produce images that are already optimized for social media.
Smartphone Flat Lay Tips
Use the rear camera, not the selfie camera. The rear camera on most smartphones has a significantly higher resolution and better optical quality than the front-facing camera.
Enable the grid overlay. Go to your camera settings and enable the grid overlay (usually called "Grid" or "Rule of Thirds Grid"). This makes it much easier to compose your shot accurately.
Tap to focus and expose. Tap on your hero product in the viewfinder to ensure the camera focuses on it and exposes correctly for it. If the exposure is too bright or too dark after tapping, use the exposure slider (the sun icon on iPhone, the brightness slider on Android) to adjust.
Use portrait mode carefully. Portrait mode creates a shallow depth of field effect (blurred background) that can look beautiful in some flat lays, but can also blur props that you want to keep sharp. Use it selectively, and always check that your hero product is in sharp focus.
Shoot in the highest resolution available. This gives you more flexibility in cropping and editing without losing quality.
Use a remote shutter or self-timer. Holding your phone overhead and pressing the shutter button simultaneously can cause camera shake. Use the self-timer (2 or 10 seconds) or a Bluetooth remote shutter to eliminate this problem.
DSLR and Mirrorless Camera Tips
If you're shooting with a DSLR or mirrorless camera, a few additional settings will help you get the best results:
Use a wide aperture (f/2.8–f/5.6) for a shallow depth of field that keeps your hero product sharp while slightly softening the background and props. Or use a narrower aperture (f/8–f/11) if you want everything in the frame to be equally sharp.
Set your ISO as low as possible (ISO 100–400) to minimize digital noise, especially in lower light conditions.
Use a remote shutter release or the camera's self-timer to eliminate camera shake when shooting from overhead.
Shoot in RAW format if your camera supports it — RAW files contain significantly more image data than JPEGs, giving you much more flexibility in post-processing.
Post-Processing: Editing Your Flat Lay Photos
Even the best-lit, most carefully styled flat lay will benefit from some post-processing. The goal of editing is not to transform your image, but to refine it — to correct any technical imperfections, enhance the colors and tones, and ensure the final image looks polished and consistent with your brand aesthetic.
Essential Editing Adjustments
Exposure and brightness. Adjust the overall brightness of your image so that the highlights are bright but not blown out, and the shadows retain detail. For flat lays, a slightly brighter exposure (slightly overexposed compared to what looks "correct" on your camera screen) often looks better in the final image.
White balance. Correct the white balance so that your white or neutral background actually looks white or neutral, not yellow, blue, or green. This is especially important if you're shooting under artificial light, which can introduce color casts.
Contrast. A slight increase in contrast adds depth and punch to your image. Be careful not to overdo it — too much contrast can make your image look harsh and unnatural.
Saturation and vibrance. A slight increase in vibrance (which boosts muted colors without oversaturating already-vivid ones) can make your flat lay look more lively and appealing. Avoid increasing saturation too aggressively, as this can make colors look artificial.
Sharpening. A small amount of sharpening adds crispness and detail to your hero product. Apply sharpening selectively to the product rather than the entire image if your editing software allows it.
Editing Apps for Flat Lay Photography
Lightroom Mobile (free with limited features, subscription for full access) is the most powerful and versatile mobile editing app for flat lay photography. It offers precise control over every aspect of your image and allows you to save and apply presets for consistent editing across your content.
Snapseed (free) is an excellent free alternative with a wide range of editing tools, including selective adjustments that allow you to edit specific areas of your image independently.
VSCO (free with subscription for premium filters) is popular among content creators for its film-inspired presets and clean, consistent aesthetic.
Adobe Lightroom (desktop, subscription) is the professional standard for photo editing and offers the most powerful and precise editing tools available.
Creating a Consistent Editing Style
If you're creating flat lay content for a brand or social media presence, consistency in your editing style is as important as consistency in your styling. A cohesive editing style — a consistent color temperature, contrast level, and overall tone — creates a recognizable visual identity that makes your content instantly recognizable in a crowded feed.
The easiest way to achieve editing consistency is to create a preset (a saved set of editing adjustments) in Lightroom or your preferred editing app, and apply it as a starting point to every image. You'll still need to make small adjustments for each individual image, but the preset ensures a consistent baseline.
Flat Lay Photography for Different Use Cases
The principles of flat lay photography apply across a wide range of use cases, but each context has its own specific considerations and best practices.
E-Commerce Product Photography
For e-commerce flat lays, clarity and accuracy are paramount. Your customer needs to be able to see exactly what they're buying — the product's color, texture, size, and details — without any ambiguity. This means:
- Using a clean, neutral background that doesn't distract from the product
- Ensuring the product is in sharp focus and well-lit
- Shooting multiple angles and variations (different colors, sizes, configurations)
- Including a scale reference (a hand, a common object) if the product's size might not be obvious from the photo alone
- Keeping props minimal and contextually relevant — enough to tell a story, not so many that they obscure the product
Social Media Content Creation
For social media flat lays, engagement and aesthetic appeal are the primary goals. You have more creative freedom than in e-commerce photography — you can experiment with bolder color palettes, more elaborate styling, and more expressive compositions. The key considerations are:
- Creating a consistent aesthetic that aligns with your brand identity and looks cohesive in your feed
- Shooting in the correct aspect ratio for your primary platform (1:1 square for Instagram grid, 4:5 portrait for Instagram feed, 9:16 vertical for Stories and Reels)
- Including enough visual interest to stop the scroll — a striking color, an unexpected prop, an unusual composition
- Leaving space for text overlay if you plan to add captions or graphics to the image
Gift Guides and Product Collections
Flat lays are particularly effective for showcasing product collections, gift guides, and curated sets. The key is to create a composition that shows each product clearly while also communicating the overall theme or story of the collection. Grid compositions work well for this use case, as they allow each product to have its own visual space while still feeling cohesive as a group.
Workspace and "Tools of the Trade" Content
Flat lays of workspaces, tools, and professional equipment are popular content formats for freelancers, creatives, and service providers who want to showcase their expertise and process. These flat lays work best when they feel authentic and personal — a real workspace, real tools, real materials — rather than overly staged or generic.
Common Flat Lay Mistakes (And How to Fix Them)
Even experienced flat lay photographers make predictable mistakes. Here are the most common ones — and how to avoid them:
Mistake 1: Shooting at an angle instead of directly overhead. Even a slight angle away from directly overhead creates perspective distortion that makes your flat lay look amateurish. Use a tripod with an overhead arm, or position yourself directly above your flat lay and use a self-timer to ensure you're shooting at a true 90-degree angle.
Mistake 2: Inconsistent lighting. Mixing natural and artificial light sources creates uneven, color-inconsistent lighting that's difficult to correct in post-processing. Choose one light source and stick with it for each shoot.
Mistake 3: Overcrowding the frame. Too many props, too many products, too little negative space — this is the most common flat lay mistake. Edit ruthlessly. If a prop isn't adding something meaningful to the composition, remove it.
Mistake 4: Ignoring the background. A wrinkled fabric, a dusty surface, or a background with visible seams or edges will undermine even the most carefully styled flat lay. Prepare your background surface carefully before you start shooting.
Mistake 5: Inconsistent editing. Applying different editing styles to different flat lays creates a fragmented, unprofessional look in your feed or store. Develop a consistent editing style and apply it to every image.
Mistake 6: Forgetting to clean your products. Fingerprints, dust, and smudges are invisible to the naked eye but show up clearly in photographs. Clean your products carefully before every shoot, and check for smudges through your camera viewfinder before shooting.
Building a Flat Lay Photography Workflow
If you're creating flat lay content regularly — for a product line, a content calendar, or an e-commerce store — developing a consistent workflow will save you time and ensure consistent results.
Batch Shooting for Efficiency
Rather than shooting one flat lay at a time, batch your shooting sessions. Set up your lighting and background once, then shoot multiple flat lays in a single session. This is more efficient than setting up and breaking down for each individual shot, and it ensures consistent lighting and background across your content.
Plan your shots in advance — sketch out your compositions, gather your props, and prepare your products before you start shooting. The more preparation you do before the camera comes out, the more efficient and productive your shooting session will be.
Building a Prop Library
Over time, build a curated library of props that work well for your brand aesthetic. A small collection of versatile, high-quality props — a few plants, some fabric swatches, a selection of small decorative objects, some textured paper — will serve you across dozens of flat lay shoots. Store your props organized by color and type so you can quickly find what you need for each shoot.
Creating Templates for Consistency
If you're shooting flat lays for a brand or social media presence, create a few go-to composition templates that you can return to repeatedly. A template might be as simple as "hero product in the upper left third, two medium props in the lower right, negative space in the upper right" — a basic framework that you can adapt with different products and props while maintaining a consistent overall look.
Take Your Product Photos Further with AI Enhancement
Even the best flat lay photography can benefit from AI-powered enhancement. Whether you need to clean up a background, adjust lighting, remove distracting elements, or create consistent, polished images at scale, AI photo tools can take your flat lays from good to exceptional.
Glowup is an AI photo platform designed to help individuals, creators, and small business owners create professional-quality images without a professional studio. Whether you're enhancing your flat lay product shots, creating consistent brand visuals, or generating polished images for your online store, Glowup makes it fast, easy, and affordable to produce the kind of visual content that drives engagement and sales.
Start your free trial at Glowup and see how AI-powered photo enhancement can elevate your flat lay photography — and every other type of visual content you create.
Flat lay photography is one of the most accessible, versatile, and effective visual formats available to creators and business owners today. With the right surface, thoughtful styling, good lighting, and a consistent editing approach, you can create stunning flat lays that showcase your products, tell your brand story, and stop the scroll — all from your kitchen table, with nothing more than a smartphone and a few well-chosen props. Start simple, experiment freely, and let your visual style evolve as you go.