The numbers don't lie: properties with professional-quality photos sell 32% faster and command prices up to 47% higher than listings with amateur snapshots. In today's real estate market, where 97% of homebuyers start their search online, your listing photos aren't just important—they're the single most critical factor in whether a potential buyer clicks to learn more or scrolls past to the next property. Those first few seconds when someone sees your listing photos determine whether you get a showing or get ignored.
Here's the problem: professional real estate photography costs $200-500 per property. For realtors managing multiple listings or homeowners selling their own property, this expense adds up quickly or simply isn't in the budget. Many agents and FSBO (For Sale By Owner) sellers resort to taking quick snapshots with their phones, hoping for the best. The results are predictable—dark, cramped-looking rooms, tilted horizons, cluttered spaces, and blown-out windows that make even beautiful properties look unappealing. These amateur photos cost sellers thousands of dollars in lost value and weeks or months of additional time on the market.
But here's what most people don't realize: you don't need a $3,000 camera or professional training to create real estate photos that look professional and help properties sell faster. Modern smartphone cameras are remarkably capable, and the difference between amateur snapshots and professional-looking listing photos isn't equipment—it's technique. Understanding lighting, composition, staging, and basic editing transforms ordinary phone photos into compelling images that make buyers want to schedule a showing.
This comprehensive guide teaches you everything you need to know to photograph properties like a professional, whether you're a realtor building your business, a homeowner selling your property, a property manager marketing rentals, or an Airbnb host trying to increase bookings. You'll learn room-by-room photography strategies, lighting techniques that make spaces look bright and inviting, composition rules that make rooms appear spacious, staging tips that maximize appeal, and editing workflows that add professional polish. By the end of this guide, you'll have the knowledge and confidence to create listing photos that compete with professional photography—and help your properties sell faster and for higher prices.
Why Real Estate Photography Matters More Than You Think
In the digital age of real estate, your listing photos are your first showing—and often your only chance to make an impression. Before a single buyer walks through the door, hundreds or thousands of potential buyers will see your photos online. Those photos determine whether your property gets added to their "must-see" list or dismissed as not worth their time. The quality of your listing photos directly impacts every metric that matters: number of showings, time on market, and final sale price.
The statistics are compelling and consistent across markets. According to the National Association of Realtors, 87% of buyers find photos to be among the most useful features of real estate websites. Properties with high-quality photos receive 61% more views than listings with low-quality images. More views translate directly to more showings—listings with professional-quality photos average 118% more online views and generate significantly more showing requests. But the impact goes beyond just traffic: properties with professional photos sell 32% faster than those with amateur photos, reducing time on market from an average of 70 days to 47 days. Perhaps most importantly, better photos command higher prices—studies show that homes photographed professionally sell for $3,400-$11,200 more than comparable homes with amateur photos.
The psychology behind these numbers is straightforward. When buyers browse listings online, they're making snap judgments based on visual appeal. High-quality photos signal that the property is well-maintained, the seller is serious and professional, and the home is worth their time to visit. Poor-quality photos—dark, cluttered, poorly composed—create the opposite impression, suggesting a neglected property, an unmotivated seller, or hidden problems. Even if the property itself is beautiful and well-maintained, bad photos will cost you showings and offers. Buyers simply won't take the time to look past poor photography to imagine the property's potential.
The cost of bad photos extends beyond just fewer showings. When buyers do visit a property after seeing poor photos, they often arrive with lowered expectations and a skeptical mindset. They're looking for problems rather than possibilities. This negative framing affects their perception of the property and ultimately the offers they make. Conversely, when buyers visit after seeing compelling photos, they arrive excited and optimistic, more likely to see the property's best features and make strong offers. Your photos literally frame how buyers perceive your property before they ever step inside.
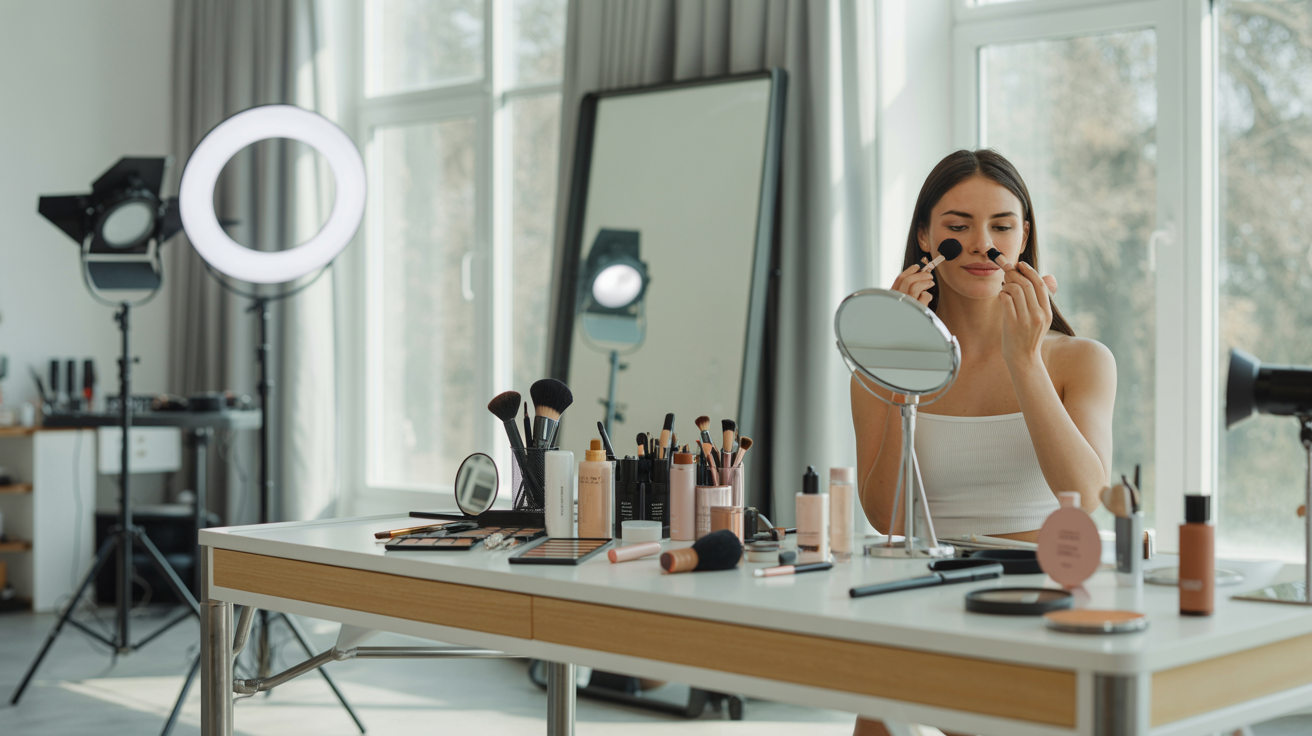
The good news is that you don't need to hire a professional photographer to achieve professional results. Modern smartphone cameras—any iPhone from the 12 series onward, or recent Android flagships—are capable of capturing images with sufficient quality for real estate listings. The difference between amateur snapshots and professional-looking photos isn't the camera; it's understanding and applying fundamental photography principles: proper lighting, thoughtful composition, careful staging, and basic editing. These techniques are completely learnable, and once you understand them, you can create listing photos that compete with professional photography at a fraction of the cost.
The ROI of learning proper real estate photography technique is immediate and substantial. Even if you're selling just one property, the difference between amateur and professional-quality photos can mean thousands of dollars in higher sale price and weeks less time on market. For realtors, the ability to create professional-quality listing photos for every property—without the $200-500 per-listing expense of hiring photographers—represents significant cost savings and competitive advantage. The techniques you'll learn in this guide pay for themselves many times over with your very first listing.
Essential Equipment (You Probably Already Have)
One of the biggest misconceptions about real estate photography is that you need expensive professional equipment to get professional results. The truth is that the camera you already carry in your pocket is probably sufficient for creating listing photos that meet professional standards. While professional photographers use specialized equipment that offers advantages in certain situations, the gap between smartphone cameras and professional gear has narrowed dramatically in recent years. For real estate photography specifically, proper technique matters far more than equipment quality.
Your smartphone camera is your primary tool, and if you have a relatively recent model, it's more than capable of professional-quality real estate photos. Any iPhone from the 12 series onward (12, 13, 14, 15, or newer) has excellent camera quality with wide-angle capabilities perfect for interior shots. On the Android side, recent flagship models from Samsung (Galaxy S21 and newer), Google (Pixel 5 and newer), and other major manufacturers offer comparable or superior camera quality. The key features that make modern smartphones excellent for real estate photography are wide-angle lenses (essential for capturing entire rooms), HDR capability (balances bright windows with darker interiors), high resolution (12+ megapixels is plenty for web listings), and computational photography (automatic scene optimization and exposure blending). If your phone is more than 3-4 years old, you might consider upgrading, but even older smartphones can produce acceptable results with proper technique.
A wide-angle lens attachment is an optional but valuable addition, especially if your smartphone doesn't have a built-in ultra-wide camera. These clip-on lenses cost $20-50 and attach to your phone's camera, expanding the field of view to capture more of a room in a single shot. This is particularly helpful for small rooms, bathrooms, and tight spaces where you can't physically back up far enough to capture the entire room. Quality varies significantly among cheap lens attachments, so look for reputable brands like Moment, Olloclip, or Xenvo. The investment is worthwhile if you'll be photographing properties regularly, but it's not essential—you can create professional results with just your phone's built-in cameras.
A tripod or smartphone stabilizer is one of the most impactful investments you can make for real estate photography, and it costs just $15-40. A tripod serves multiple critical functions: it keeps your camera perfectly level (essential for straight walls and horizons), ensures sharp photos by eliminating camera shake, allows you to shoot at consistent heights for uniform photos, and enables HDR and exposure bracketing techniques that blend multiple exposures. You don't need an expensive professional tripod—a basic smartphone tripod with adjustable height and a phone mount works perfectly. Look for models that extend to at least 5 feet (chest height, the ideal shooting height for real estate) and have a bubble level to ensure your camera is perfectly horizontal. This small investment dramatically improves photo quality and consistency.
Lighting equipment is generally unnecessary for real estate photography because natural light combined with the property's existing lights produces the best, most natural-looking results. Professional real estate photographers sometimes use external flashes or continuous lights to balance exposure, but these require expertise to use effectively and can create an artificial look if not used skillfully. For beginners, the best approach is to shoot during daytime when natural light is abundant, turn on all the property's lights, and use your camera's HDR mode to balance bright and dark areas. Save your money on lighting equipment and invest your time in learning to work with available light effectively.
What you definitely don't need: an expensive DSLR or mirrorless camera (smartphones are sufficient), professional lighting equipment (natural light works best), a drone (nice for luxury properties but not essential for most listings), expensive editing software (free mobile apps work great), or any other specialized gear. The real estate photography industry has traditionally used professional equipment, but smartphone technology has democratized the field. You can create professional-quality listing photos with equipment you already own or can acquire for under $100.
Budget breakdown for optimal results: If you're starting completely from scratch, you can create professional-quality real estate photos with a total equipment investment of $0-100. Free option: Use your existing smartphone with its built-in cameras and free editing apps—total cost $0. Basic setup: Add a smartphone tripod ($15-30) for level, sharp photos—total cost $15-30. Optimal setup: Add a wide-angle lens attachment ($20-50) if your phone lacks ultra-wide capability—total cost $35-80. Professional setup: Add a gimbal stabilizer ($60-100) for smooth video walkthroughs—total cost $95-180. For most people, the basic setup (smartphone + tripod) provides 90% of the benefit at minimal cost.
The bottom line is that equipment is not the barrier to professional-quality real estate photography. The barrier is knowledge and technique. Invest your time in learning the principles covered in this guide rather than spending money on equipment you don't need. A photographer who understands lighting, composition, and staging will create better photos with a smartphone than an amateur with a $5,000 DSLR. Focus on technique first, equipment second.
Preparing the Property: Staging and Decluttering
The single most important factor in creating appealing real estate photos isn't your camera, your lighting, or your composition—it's the state of the property itself. No amount of photographic skill can make a cluttered, dirty, or poorly staged space look appealing. Professional real estate photographers spend significant time preparing properties before taking a single photo, and you should too. The preparation phase is where amateur and professional results diverge most dramatically. A well-staged, decluttered, spotlessly clean property photographed with a smartphone will always look better than a cluttered, messy property photographed with professional equipment.
Decluttering is absolutely non-negotiable and should be your first priority. Clutter is visual noise that distracts viewers from the property's features and makes spaces look smaller, messier, and less appealing. Remove everything that isn't essential to the room's function: excess furniture that crowds the space, personal items like mail, keys, and everyday clutter, decorative items that don't add to the room's appeal, anything on countertops in kitchens and bathrooms, visible cords and cables, and anything that draws the eye away from the room itself. The goal is to create a clean, spacious canvas that allows buyers to focus on the property's features and imagine their own belongings in the space. When in doubt, remove it. You can always add back a few carefully chosen decorative elements, but you can't un-clutter a photo after it's taken.
Deep cleaning is the second essential preparation step. Buyers are looking for well-maintained properties, and cleanliness signals care and quality. Before photographing, ensure that windows are spotlessly clean inside and out (dirty windows are glaringly obvious in photos and block natural light), all floors are swept, vacuumed, and mopped, all surfaces—countertops, tables, shelves—are wiped clean and clear, bathrooms are scrubbed and sanitized, mirrors and glass surfaces are streak-free, carpets are vacuumed and stain-free (consider professional cleaning if needed), and the exterior is swept, with walkways clear and clean. Pay special attention to windows—they're featured prominently in most real estate photos, and dirty windows immediately signal neglect. The hour or two spent deep cleaning before your photo session will pay dividends in how the property presents.
Depersonalization helps buyers imagine themselves in the space rather than feeling like they're intruding on someone else's home. Remove or minimize family photos, personal collections and memorabilia, religious items and symbols, children's artwork and school projects, personal hygiene products, and anything that strongly reflects the current occupant's personality or lifestyle. The goal isn't to make the space feel sterile, but to create a neutral backdrop that appeals to the widest possible range of buyers. Buyers need to envision their own lives in the space, and that's difficult when the current owner's personality is prominently displayed throughout.
Creating neutral appeal means styling the property to appeal to the broadest possible audience. This doesn't mean boring—it means thoughtfully curated to highlight the property's best features without polarizing potential buyers. Use neutral colors in any added decor, choose classic styles over trendy or personal tastes, add touches of warmth (fresh flowers, a bowl of fruit, tasteful throw pillows) without overdoing it, ensure furniture arrangement shows good flow and functionality, and create inviting vignettes that suggest lifestyle without being too specific. Think of model homes or high-end hotel rooms—they're styled to feel welcoming and aspirational while remaining neutral enough for anyone to imagine themselves there.
Room-by-room staging checklist ensures you don't miss critical preparation steps:
Living room: Remove excess furniture to show spacious flow, arrange remaining furniture to create conversation areas and show room layout, add a few tasteful decorative elements (throw pillows, a plant, a coffee table book), ensure all surfaces are clear and clean, open curtains fully to maximize light, and turn on all lamps and overhead lights.
Kitchen: Clear all countertops completely (this is critical—buyers want to see counter space), hide small appliances in cabinets, add one simple decorative element (bowl of lemons, small plant, or fresh flowers), ensure sink is empty and spotless, hide dish soap and sponges, wipe down all surfaces including appliances, turn on under-cabinet lighting if available, and make sure cabinet doors and drawers are fully closed.
Bedrooms: Make beds perfectly with hotel-quality presentation (crisp, smooth, symmetrical), remove personal items from nightstands and dressers, minimize furniture to show spacious feel, add simple decorative touches (throw pillows, a folded blanket at foot of bed), ensure closets are organized (buyers will look), remove visible clothing and shoes, open curtains fully, and turn on all lights including bedside lamps.
Bathrooms: Hide all toiletries and personal items in cabinets, put down toilet lid, add fresh, fluffy towels (white or neutral colors), add a small plant or fresh flowers for warmth, ensure all surfaces are spotless and dry, remove bathmats and shower curtains if they're worn or dated, wipe down mirrors until streak-free, turn on vanity lights, and make sure the space smells fresh and clean.
Exterior: Mow lawn and trim edges, trim bushes and hedges, weed flower beds and add fresh mulch if needed, sweep walkways, porches, and driveways, hide trash cans and recycling bins, add potted plants or flowers at the entrance for welcoming appeal, ensure house numbers are visible and attractive, clean exterior windows, and remove any clutter (hoses, tools, toys, etc.).
Quick staging tricks that make immediate impact: Fresh flowers in key rooms (kitchen, living room, master bedroom) add life and color for minimal cost. Opening all curtains and blinds maximizes natural light and makes spaces feel larger. Turning on every light in the house creates a bright, welcoming atmosphere. Adding a bowl of fresh fruit to the kitchen counter provides a pop of color and suggests freshness. Hiding trash cans and recycling bins eliminates visual clutter. Adjusting the thermostat to a comfortable temperature prevents fogged windows in photos. These small touches take minutes but significantly improve how the property photographs.
What to hide before photographing: Pet items (bowls, toys, beds, litter boxes), personal hygiene products (toothbrushes, medications, toiletries), clutter of any kind (mail, keys, remotes, chargers), worn or dated items that detract from appeal, visible trash cans, cleaning supplies, and anything that makes the space feel occupied rather than ready for new owners. When in doubt, put it away.
Virtual staging option for empty properties: If you're photographing a vacant property, consider virtual staging—using AI tools to digitally add furniture and decor to empty rooms. Empty rooms photograph poorly because they lack scale, warmth, and context. Virtual staging helps buyers visualize the space's potential and makes rooms feel more inviting. Services like Glowup and specialized virtual staging platforms can add realistic furniture to your photos for a fraction of the cost of physical staging. Just be sure to clearly disclose that photos are virtually staged to maintain ethical transparency with buyers.
The time you invest in preparing the property before photographing will have a greater impact on your final photos than any other factor. Plan to spend 2-4 hours staging and preparing a typical property before you start shooting. This preparation is where amateur and professional results truly diverge—professionals understand that great real estate photos are created before the camera comes out, not after in editing.
Lighting: The Most Important Factor in Real Estate Photography
If you remember only one principle from this entire guide, remember this: lighting makes or breaks real estate photography. More than composition, more than staging, more than equipment—lighting is the single factor that most dramatically separates professional-looking photos from amateur snapshots. Dark, dingy photos kill buyer interest instantly, while bright, well-lit photos make even modest properties look appealing and inviting. Fortunately, achieving great lighting for real estate photography doesn't require expensive equipment or complex techniques. It requires understanding a few simple principles and timing your shoot appropriately.
The golden rule of real estate photography lighting is deceptively simple: shoot during daytime with all interior lights turned on. This combination of abundant natural light from windows plus all the property's artificial lighting creates the bright, evenly lit look that makes properties appear spacious, clean, and inviting. Many beginners make the mistake of shooting with only natural light (leaving interior lights off) or only artificial light (shooting at night or with curtains closed). Neither approach works as well as combining both light sources. Natural light alone often creates harsh contrasts between bright windows and dark interiors. Artificial light alone creates a dim, yellow-tinted look that feels dingy. Together, they balance each other and create the bright, natural look that buyers respond to.
The best time of day for real estate photography is mid-morning to early afternoon, roughly 10am to 2pm. During these hours, natural light is at its brightest and most even, coming from overhead rather than at harsh angles. This timing provides maximum natural light to work with while avoiding the extreme contrasts of early morning or late afternoon when the sun is low and creates strong directional shadows. Overcast days can actually be ideal for real estate photography because clouds act as a giant diffuser, creating soft, even light without harsh shadows or bright spots. Don't avoid shooting on cloudy days—embrace them for their flattering, even lighting.
Turn on every single light in the property before you start shooting. This means overhead lights, lamps, under-cabinet lights in kitchens, vanity lights in bathrooms, closet lights, exterior lights if shooting twilight exteriors—everything. The goal is to add as much light as possible to balance the bright natural light from windows and create an evenly lit space. Many beginners worry that turning on lights during daytime looks unnatural, but the opposite is true—interior lights add warmth and balance that makes photos look professional. The human eye adjusts to different light levels automatically, but cameras capture the full range of brightness, so you need all available light to avoid dark shadows and underexposed areas.
Open all curtains and blinds completely to maximize natural light. Natural light from windows is your primary light source and creates the bright, airy feel that makes properties appealing. Partially closed curtains or blinds block light and create a dim, closed-in feeling. Open everything fully, clean the windows if needed, and let maximum light flood in. The only exception is if direct sunlight is streaming through windows and creating harsh bright spots or glare—in that case, you might use sheer curtains to diffuse the light while still allowing it through.
Balancing interior and exterior light is one of the trickiest aspects of real estate photography. When you're inside looking out, windows often appear blown out (completely white with no detail visible outside) because the exterior is much brighter than the interior. This looks unprofessional and makes rooms feel like caves. The solution is HDR (High Dynamic Range) photography, which most modern smartphones do automatically. HDR takes multiple photos at different exposures and blends them together, capturing detail in both the bright windows and the darker interior. Enable HDR mode in your camera settings (it's often called "Auto HDR" or "Smart HDR") and it will handle this balancing act automatically. The result is photos where you can see both the room's interior and the view outside the windows—much more appealing and professional-looking.
Avoid harsh shadows by shooting when light is most even. Harsh shadows make rooms look smaller and create distracting dark areas that draw the eye away from the property's features. The best lighting is soft and even, illuminating all areas of the room without creating strong shadows. This is why overcast days work so well—the clouds diffuse sunlight and eliminate harsh shadows. If you're shooting on a sunny day, avoid times when direct sunlight is streaming through windows and creating bright spots and dark shadows. Wait for the sun to move, or shoot rooms when they're not receiving direct sunlight.
Evening and night shots have a specific purpose in real estate photography: showcasing exterior curb appeal with the home's lights glowing warmly. These "twilight shots" create an inviting, cozy impression and make properties stand out in listings. To capture twilight exteriors, shoot about 20-30 minutes after sunset when the sky still has some color but is dark enough that interior and exterior lights show up. Turn on all exterior lights, interior lights visible from outside, and any landscape lighting. Use a tripod (essential for the longer exposure times needed in low light) and your camera's night mode if available. Twilight shots are optional but add visual variety and emotional appeal to your listing photos.
Room-specific lighting tips help you handle challenging spaces:
Dark rooms: If a room is naturally dark even with all lights on and curtains open, consider adding temporary lighting. Bring in floor lamps or table lamps from other rooms to add light. Position them out of frame but aimed to illuminate dark corners or walls. Even one additional light source can make a significant difference in a dark room's appearance.
Bathrooms: Bathrooms are often windowless or have small windows, making them challenging to light well. Turn on vanity lights, overhead lights, and any other available lighting. If the bathroom is still too dark, bring in a lamp from another room temporarily. Bright, well-lit bathrooms look clean and spacious; dark bathrooms look dingy and small.
Kitchens: Under-cabinet lighting makes a dramatic difference in kitchen photos. If the property has under-cabinet lights, turn them on—they illuminate countertops and add warmth. Also turn on lights inside glass-front cabinets if applicable. Kitchens should be among the brightest, most well-lit rooms in your photos because they're a primary selling feature.
What to avoid in real estate photography lighting: Never use your camera's flash. Flash creates harsh, unnatural lighting with strong shadows and bright spots that look amateurish. Flash also creates reflections in windows, mirrors, and glossy surfaces that ruin photos. Always rely on natural light plus the property's existing lights rather than flash. Also avoid shooting in dim conditions—if a room is too dark even with all lights on, it's better to skip that room or come back when natural light is better than to try to photograph it in poor lighting.
HDR technique deserves special emphasis because it's the secret weapon of professional-looking real estate photos. HDR (High Dynamic Range) solves the fundamental challenge of real estate photography: capturing both bright windows and darker interiors in the same photo. Without HDR, you have to choose—expose for the windows (making the interior too dark) or expose for the interior (making the windows blown out and white). HDR captures both by taking multiple photos at different exposures and blending them. Most modern smartphones do this automatically when HDR mode is enabled. The result is photos where you can see detail in both the bright areas and dark areas—exactly what you want for real estate. Enable HDR in your camera settings and use it for every interior shot. The difference is dramatic and immediately makes your photos look more professional.
Lighting is where you'll see the most dramatic improvement in your real estate photos with the least effort. Simply shooting at the right time of day (mid-morning to early afternoon), turning on all lights, opening all curtains, and using HDR mode will transform your results. These simple lighting principles are the foundation of professional-looking real estate photography.
> Want professional-quality real estate photos without the learning curve? Glowup's AI enhances your property photos to professional standards instantly. Try it free at https://glowuplab.app/
Composition and Angles: Making Rooms Look Spacious and Inviting
Once you've mastered lighting, composition is the next critical skill that separates professional-looking real estate photos from amateur snapshots. Composition refers to how you frame your shot—where you position yourself, what angle you shoot from, what you include in the frame, and how you arrange the visual elements. Good composition makes rooms look spacious, inviting, and well-proportioned. Poor composition makes the same rooms look cramped, awkward, or distorted. The good news is that real estate photography composition follows predictable rules that anyone can learn and apply.
Shoot from corners to capture maximum room in your frame and show layout and flow. The corner of a room is almost always the best position for real estate photography because it allows you to capture two walls, showing the room's dimensions and how it's laid out. Position yourself in a corner (or as close to a corner as furniture allows) and aim your camera toward the opposite corner. This diagonal view captures the maximum amount of the room and creates depth that makes spaces feel larger. Shooting from the middle of a wall or the center of a room captures less of the space and creates a flatter, less interesting composition. The corner-to-corner approach is the foundation of professional real estate photography composition.
Shoot at chest height for the most natural, flattering perspective. The ideal camera height for real estate photography is approximately 5 feet—roughly chest height for most people. This height shows rooms from a natural viewing perspective that matches how people actually experience spaces when walking through them. Shooting too low (waist height or lower) makes rooms look distorted with exaggerated perspectives and too much floor visible. Shooting too high (above head height) creates an unnatural bird's-eye view that feels disconnected. Chest height is the sweet spot that creates natural-looking, well-proportioned photos. This is where a tripod becomes invaluable—it allows you to shoot at a consistent height for all your photos, creating visual consistency across your listing.
Keep your camera perfectly level to avoid the tilted, disorienting look that screams "amateur." Nothing makes real estate photos look more unprofessional than tilted horizons and leaning walls. Your camera should be level both horizontally (so horizons are straight) and vertically (so walls are straight up and down, not leaning). Most smartphone cameras have a grid overlay option in settings that displays lines on your screen while shooting—enable this feature and use it to ensure your camera is level. The horizontal line of the grid should align with horizontal elements in the room (countertops, window frames, ceiling lines), and the vertical lines should align with vertical elements (door frames, wall corners, windows). Take an extra second to level your shot before pressing the shutter—this small attention to detail makes a dramatic difference in how professional your photos look.
Vertical lines must be straight, especially walls, doorways, and windows. When you tilt your camera up or down, vertical lines converge and lean, creating a distorted look. This is called perspective distortion, and it's one of the most common mistakes in amateur real estate photography. To avoid it, keep your camera level (not tilted up or down) and position yourself at the right height to capture what you need without tilting. If you need to capture more of a tall room, back up rather than tilting up. If you can't back up far enough, it's better to crop the top or bottom of the room than to tilt and create leaning walls. Straight vertical lines create a professional, well-proportioned look that makes rooms feel solid and well-built.
Wide-angle technique captures entire rooms but requires care to avoid distortion. Wide-angle lenses (or the wide-angle camera on your smartphone) are essential for real estate photography because they capture more of a room in a single shot. However, ultra-wide lenses can create fisheye distortion that makes rooms look warped and unnatural. Use your phone's wide-angle camera, but avoid the ultra-wide setting if it creates obvious distortion. The goal is to capture as much of the room as possible while maintaining natural proportions. If your wide-angle shots look distorted, try backing up slightly and using a less wide setting. Some distortion is acceptable and expected in real estate photography, but extreme fisheye effects look unprofessional.
Show room flow by positioning to show how rooms connect. Buyers want to understand how a property's spaces relate to each other. When possible, position your shots to show doorways, hallways, or openings that lead to adjacent rooms. This creates a sense of flow and helps buyers mentally map the property's layout. For example, when photographing a living room, position yourself to show the doorway to the dining room or kitchen. When photographing a hallway, show the doors to bedrooms. This contextual composition helps buyers understand the property's layout and creates visual interest by showing depth and connection between spaces.
Include doorways in your compositions to show transitions between spaces and add depth. Doorways create natural frames within your photos and show how rooms connect. When shooting from a hallway into a room, include the doorway frame in your shot. When shooting from inside a room, position to show the doorway leading out. Doorways add architectural interest and help buyers understand the property's flow. They also create depth by showing multiple spaces in a single photo—the room you're in plus a glimpse of the adjacent space.
Capture key features with dedicated shots that highlight the property's best selling points. Beyond the standard room overview shots, take close-up or feature-focused photos of elements that add value: fireplaces (shoot straight-on to show the fireplace as the focal point), built-in shelving or cabinetry (shows storage and craftsmanship), architectural details (crown molding, coffered ceilings, wainscoting), high-end finishes (granite countertops, tile work, hardwood floors), views from windows (if the property has desirable views), and unique features that differentiate the property. These detail shots add visual variety to your listing and highlight features that justify the property's price.
Rule of thirds creates visual interest by positioning key elements on grid intersections. The rule of thirds is a fundamental composition principle: imagine dividing your frame into nine equal sections with two horizontal and two vertical lines, creating a 3x3 grid. Position important elements along these lines or at the four points where lines intersect rather than centering them. For real estate photography, this might mean positioning a fireplace at one of the vertical lines rather than dead center, or placing the horizon (where walls meet ceiling) along the upper horizontal line rather than cutting the frame in half. The rule of thirds creates more dynamic, visually interesting compositions than centered framing. However, real estate photography is one area where centered compositions also work well, which brings us to the next point.
Symmetry works beautifully for certain real estate shots. While the rule of thirds creates dynamic compositions, centered, symmetrical framing works excellently for formal rooms, architectural features, and shots where balance and order are the goal. Fireplaces, formal dining rooms, grand entryways, and architectural details often look best with centered, symmetrical composition that emphasizes their formality and balance. Don't be afraid to center your subject when symmetry serves the shot. The key is being intentional—center when you want to emphasize symmetry and formality, use rule of thirds when you want to create dynamic visual interest.
What to avoid in real estate composition: Don't shoot into corners (makes rooms look small and cramped), don't use extreme angles (creates distortion and unnatural perspective), don't tilt your camera up or down (creates leaning walls), don't include too much floor or ceiling (wastes frame space and makes rooms look smaller), don't cut off important features at the edge of the frame (include them fully or exclude them completely), and don't shoot from too close (back up to capture more of the room and create better perspective).
Room-by-room composition strategies help you approach each space with a clear plan:
Living room: Shoot from the corner that shows the room's main seating arrangement and focal point (fireplace, TV, or windows with view). Position to show how the seating is arranged and how the room flows. If the room is large, take a second shot from the opposite corner to show the full space. Include any architectural features like fireplaces or built-ins prominently.
Kitchen: Shoot from the entrance or doorway to show the full kitchen layout and how it connects to adjacent spaces. This overview shot should show the main work triangle (sink, stove, refrigerator) and overall layout. Then take detail shots of countertops, appliances, and any high-end features. If there's an island, shoot from multiple angles to show it from different perspectives.
Bedrooms: Shoot from the doorway or the corner opposite the bed to show the bed as the focal point with windows visible. Position to show how the bed is placed and how much space surrounds it. Capture closet interiors with a separate shot—buyers want to see storage space. If the room has a sitting area or desk, capture that with an additional shot.
Bathrooms: Shoot from the doorway to show the vanity and shower/tub in one shot if possible. If the bathroom is large or has a separate toilet room, take multiple shots to show the full space. Get a detail shot of the vanity area showing the countertop, sink, and mirror. Shoot straight-on rather than at angles for bathrooms—the symmetry works well for these smaller, functional spaces.
Exterior: Shoot from the street to show the full front of the house with context (landscaping, driveway, neighboring properties visible but not prominent). This is your hero shot—the first photo buyers see—so take time to get it right. Shoot from multiple angles if the property has interesting architecture. Capture the backyard from the back door or deck to show the outdoor space and how it relates to the house.
Composition is where your artistic eye comes into play, but it's guided by these proven principles. Practice these techniques with each property you photograph, and you'll quickly develop an instinctive sense for how to frame shots that make rooms look their best. The goal is always the same: make spaces look spacious, inviting, well-proportioned, and appealing to the widest possible range of buyers.
Room-by-Room Photography Checklist
Creating a comprehensive set of listing photos requires a systematic approach that ensures you capture every important space and feature. Professional real estate photographers follow a consistent sequence and checklist to ensure they don't miss critical shots. This systematic approach not only ensures complete coverage but also creates a logical flow that helps buyers mentally walk through the property as they view your photos online.
How many photos per listing is the first question to answer. For a typical single-family home, plan to capture 25-40 photos. Smaller properties (condos, townhomes) might need 20-30 photos, while larger properties might require 40-50 or more. The goal is to comprehensively show every room and important feature without being repetitive. More photos are generally better than fewer—buyers want to see as much as possible before deciding whether to schedule a showing. However, quality matters more than quantity. Thirty excellent photos are far more valuable than fifty mediocre ones.
Photo sequence that works follows the natural flow of how someone would tour the property. Start with exterior shots that establish curb appeal and context, move to the entry that shows how you enter the home, progress through main living spaces (living room, dining room, kitchen), continue to bedrooms and bathrooms, capture special features and bonus spaces, and end with additional exterior shots (backyard, patio, garage). This sequence creates a logical narrative that helps buyers mentally walk through the property. When buyers view your listing online, they should be able to understand the property's layout and flow from the photo sequence.
Exterior shots (5-8 photos) establish first impressions and curb appeal:
Front of house from street (hero shot): This is the single most important photo in your listing—it's typically the first image buyers see and determines whether they click to see more. Shoot from the street or sidewalk, positioned to show the full front of the house with some context (landscaping, driveway). Shoot during the day when the house is well-lit, or at twilight for a dramatic, warm look. Ensure the lawn is mowed, walkways are clear, and the entrance looks inviting. This shot should make buyers want to see more.
Front entrance close-up: Capture the front door and entrance area to show the entry's character and condition. This shot should show the door, any porch or stoop, and immediate surroundings. It helps buyers imagine arriving at the property.
Backyard overview: Shoot from the back door, deck, or patio to show the full backyard and how it relates to the house. Capture the size of the yard, any landscaping or features, and how the outdoor space connects to the indoor living areas.
Patio/deck: If the property has a patio, deck, or outdoor living space, give it dedicated coverage. Shoot from multiple angles to show the space itself and the view from the space (both toward the house and toward the yard).
Garage: If the garage is a selling feature (size, organization, condition), include a shot showing the interior. If it's just a standard garage, you can skip this or include it as a lower-priority shot.
Neighborhood context: If the property is in a desirable neighborhood or has attractive surroundings, include a shot that shows context—the street, neighboring homes, nearby amenities. This helps buyers understand the property's setting.
Interior shots (15-25 photos) form the core of your listing and should comprehensively show every room:
Entry/foyer: Capture the entry area to show how you enter the home and what the first impression is. Shoot from just inside the front door looking into the home, or from the main living area looking back toward the entry.
Living room (2-3 angles): The living room typically warrants multiple shots because it's a primary living space. Shoot from at least two corners to show the full room and how it's laid out. If the room is large or has multiple focal points (fireplace and windows with view, for example), take a third shot to capture everything.
Dining room: Capture the dining room from the angle that best shows the table, any architectural features (like a chandelier or built-in hutch), and how the space relates to adjacent rooms (kitchen or living room).
Kitchen (3-4 angles including detail shots): Kitchens are primary selling features and warrant comprehensive coverage. Take an overview shot from the entrance showing the full layout, a shot showing the main work area and appliances, a detail shot of countertops and backsplash, and if applicable, a shot showing an island or breakfast nook. Kitchens should be among your most thoroughly documented rooms.
Each bedroom (1-2 angles each): Capture each bedroom from the doorway or corner opposite the bed. If bedrooms are large or have notable features (sitting areas, walk-in closets, en-suite bathrooms), take additional shots to show these features. Don't forget to photograph closet interiors—buyers want to see storage space.
Each bathroom (1-2 angles each): Shoot bathrooms from the doorway to show the vanity and shower/tub. If bathrooms are large or have separate toilet rooms, take additional shots. Get a detail shot of the vanity area for master bathrooms or updated bathrooms with high-end finishes.
Laundry room: If the property has a dedicated laundry room (not just a closet with washer/dryer), capture it to show this functional space. Buyers appreciate seeing where laundry happens and what storage is available.
Basement/bonus rooms: Capture any finished basement space, bonus rooms, home offices, or other special-use spaces. These rooms add value and should be documented thoroughly.
Special features: Give dedicated shots to any features that add value or differentiate the property: fireplaces (shoot straight-on to show as focal point), built-in shelving or cabinetry, architectural details (crown molding, coffered ceilings, exposed beams), high-end finishes, walk-in closets, pantries, mudrooms, and any unique or custom features.
Detail shots (5-10 photos) highlight features that justify the property's value and add visual variety:
Unique architectural features: Crown molding, coffered ceilings, wainscoting, exposed beams, archways, or any architectural details that add character and value.
High-end finishes: Granite or quartz countertops, tile work, hardwood floors, custom cabinetry, high-end appliances, or any finishes that represent quality and justify the price.
Storage solutions: Walk-in closets, pantries, built-in shelving, mudroom organization, or any storage features that buyers value.
Views from windows: If the property has desirable views (mountains, water, city skyline, wooded lot), capture these views from inside looking out. These shots help buyers imagine enjoying these views daily.
Outdoor amenities: Pool, hot tub, outdoor kitchen, fire pit, playground equipment, or any outdoor features that add value and lifestyle appeal.
What NOT to photograph saves time and keeps your listing focused on the property's strengths: Don't photograph cluttered areas you couldn't stage properly, rooms or areas in poor condition that would hurt rather than help (unless you're marketing a fixer-upper and need to show condition honestly), personal items or spaces (like a home office full of personal documents), unflattering angles that make rooms look worse than they are, dark rooms you couldn't light adequately (better to skip than include poor-quality photos), or repetitive shots that don't add new information. Every photo in your listing should serve a purpose—showing a space, highlighting a feature, or providing context. If a photo doesn't add value, don't include it.
Shooting checklist to use on-site ensures you don't miss critical shots:
- [ ] Front exterior from street (hero shot)
- [ ] Front entrance close-up
- [ ] Entry/foyer
- [ ] Living room (2-3 angles)
- [ ] Dining room
- [ ] Kitchen (3-4 shots including details)
- [ ] Master bedroom (2 angles)
- [ ] Master bathroom (2 angles)
- [ ] Additional bedrooms (1-2 angles each)
- [ ] Additional bathrooms (1-2 angles each)
- [ ] Laundry room
- [ ] Basement/bonus rooms
- [ ] Special features (fireplace, built-ins, etc.)
- [ ] Backyard overview
- [ ] Patio/deck
- [ ] Garage (if notable)
- [ ] Detail shots (finishes, features, views)
This systematic approach ensures comprehensive coverage and creates a logical flow that helps buyers understand and appreciate the property. Plan to spend 45-90 minutes photographing a typical property, depending on size and complexity. Don't rush—taking time to capture quality photos of every important space is an investment that pays off in faster sales and higher prices.
Common Real Estate Photography Mistakes (and How to Avoid Them)
Even when you understand the principles of good real estate photography, certain mistakes are so common that they're worth calling out specifically. These errors immediately signal amateur work and undermine your listing's appeal. The good news is that once you're aware of these mistakes, they're easy to avoid.
Mistake 1: Using flash creates harsh, unnatural lighting with strong shadows and bright spots that look amateurish. Flash also creates reflections in windows, mirrors, and glossy surfaces that ruin photos. The light from a camera flash is too harsh and directional to create the soft, even lighting that makes properties look appealing. Solution: Never use flash. Instead, shoot during daytime when natural light is abundant, turn on all the property's lights, and use your camera's HDR mode to balance bright and dark areas. If a room is too dark even with all lights on, bring in additional lamps temporarily or come back when natural light is better. Natural light plus existing lights always looks better than flash.
Mistake 2: Shooting too narrow makes rooms look cramped and small. When you don't use a wide-angle lens or don't position yourself to capture the full room, you end up with photos that show only a portion of the space. This makes even large rooms look small and doesn't give buyers a sense of the room's actual size and layout. Solution: Use your phone's wide-angle camera (not ultra-wide if it creates distortion), shoot from corners to capture maximum room, and back up as far as possible to get more of the room in frame. The goal is to show as much of each room as possible so buyers can understand the space's size and proportions.
Mistake 3: Tilted horizons look unprofessional and disorienting. When your camera isn't level, horizontal lines (where walls meet ceiling, countertops, window frames) appear tilted, and vertical lines (walls, door frames) appear to lean. This creates a disorienting, amateur look that immediately signals poor quality. Solution: Enable the grid overlay in your camera settings and use it to ensure your camera is level before every shot. The horizontal grid line should align with horizontal elements in the room, and vertical grid lines should align with vertical elements. Take an extra second to level your shot—this small attention to detail makes a dramatic difference.
Mistake 4: Including clutter distracts from the property's features and makes spaces look messy, small, and unappealing. Clutter is visual noise that draws the eye away from what you want buyers to see. Even small amounts of clutter—items on countertops, personal belongings on furniture, cords and cables—significantly detract from your photos' appeal. Solution: Declutter ruthlessly before photographing. Remove everything that isn't essential to the room's function. Clear all countertops, hide personal items, remove excess furniture, and create clean, spacious-looking spaces. If you look at your staged room and think "that's probably fine," it's not—remove more. You can't un-clutter a photo after it's taken.
Mistake 5: Poor lighting creates dark, dingy photos that kill buyer interest instantly. Dark photos make properties look small, old, poorly maintained, and unappealing. Even beautiful properties look terrible in poor lighting. This is the single most common mistake in amateur real estate photography and the one that has the biggest negative impact. Solution: Shoot during daytime (10am-2pm is ideal) when natural light is brightest, turn on every light in the property, open all curtains and blinds fully, and use HDR mode to balance bright and dark areas. If a room is still too dark, bring in additional lamps temporarily. Bright, well-lit photos are non-negotiable for appealing real estate photography.
Mistake 6: Blown-out windows make exteriors look overexposed and create a cave-like feeling. When windows appear as bright white rectangles with no detail visible outside, it signals that the interior is much darker than the exterior and creates an unappealing contrast. Buyers want to see both the interior space and the views or natural light from windows. Solution: Use HDR mode, which takes multiple exposures and blends them to capture detail in both bright windows and darker interiors. Most modern smartphones do this automatically when HDR is enabled. The result is photos where you can see both the room and what's outside the windows—much more appealing and professional.
Mistake 7: Shooting at wrong height distorts perspective and creates unnatural-looking photos. Shooting too low (waist height or below) shows too much floor and makes rooms look distorted. Shooting too high (above head height) creates an unnatural bird's-eye view. Either extreme makes photos look amateurish and doesn't represent how people actually experience spaces. Solution: Shoot at chest height (approximately 5 feet) for all interior shots. This height matches natural viewing perspective and creates well-proportioned, natural-looking photos. Use a tripod to maintain consistent height across all your shots.
Mistake 8: Including yourself in mirrors is an embarrassing amateur mistake that immediately ruins a photo. When you're photographing a bathroom or bedroom with a mirror, it's easy to accidentally capture your reflection. This looks unprofessional and distracts from the property. Solution: Before shooting any room with mirrors, check your composition to ensure you won't appear in the reflection. Angle your shot slightly to avoid the mirror, or position yourself so you're not in the reflection. If you can't avoid it, you can edit yourself out later, but it's better to avoid the problem when shooting.
Mistake 9: Too few photos leaves buyers with unanswered questions and reduces interest. When listings have only 10-15 photos, buyers can't get a complete sense of the property and may skip it in favor of listings with more comprehensive photo coverage. Buyers want to see everything before deciding whether to schedule a showing. Solution: Plan to capture 25-40 photos for a typical home, ensuring you show every room, important features, and exterior spaces. More photos (within reason) increase buyer confidence and interest. Comprehensive photo coverage signals that you have nothing to hide and helps buyers feel like they understand the property.
Mistake 10: Inconsistent editing creates a disjointed, unprofessional look. When some photos are bright and others are dark, some are warm-toned and others are cool-toned, or some are heavily edited and others are barely edited, the inconsistency is jarring and looks amateurish. Your listing photos should look like they belong together as a cohesive set. Solution: Edit all your photos with the same settings and adjustments. Develop a consistent editing workflow (covered in the next section) and apply it to every photo. Use the same brightness, contrast, saturation, and color temperature adjustments across all photos so they have a unified look. Consistency signals professionalism and attention to detail.
Avoiding these common mistakes will immediately elevate your real estate photography from amateur to professional-looking. Most of these mistakes are easy to avoid once you're aware of them—they're not about skill or equipment, but about knowledge and attention to detail. Make a mental checklist of these mistakes before each shoot, and you'll find yourself naturally avoiding them as you gain experience.
Editing and Enhancement: From Good to Professional
Even perfectly shot real estate photos benefit from editing to add professional polish and ensure consistency across your listing. Editing isn't about manipulating or misrepresenting the property—it's about optimizing your photos to look their best while accurately representing the space. The goal is to create bright, inviting, color-accurate photos that make buyers want to see the property in person.
Basic editing essentials that every real estate photo needs: Straightening ensures horizons are level and vertical lines are straight (if you didn't get it perfect in-camera), cropping removes unnecessary elements at the edges and improves composition, brightness/exposure adjustment ensures photos are bright and inviting without being overexposed, contrast enhancement adds depth and makes photos pop without looking overdone, and color correction ensures accurate, appealing colors that represent the property honestly. These five adjustments form the foundation of real estate photo editing and can transform good photos into great ones.
Free editing tools make professional-quality editing accessible to everyone. You don't need expensive software like Photoshop to edit real estate photos effectively. Snapseed (free for iOS and Android) is a powerful mobile editing app with all the tools you need for real estate photography. It offers precise control over exposure, contrast, color, straightening, and more. Lightroom Mobile (free version available for iOS and Android) is Adobe's mobile editing app with professional-grade tools and the ability to save and apply presets for consistent editing. Built-in phone editors (iOS Photos app, Google Photos) offer basic but capable editing tools including brightness, contrast, saturation, and straightening. For most real estate photography, these free tools provide everything you need.
Editing workflow for consistent, professional results:
Step 1: Straighten and crop. Start by ensuring your photo is level and well-composed. Use the straighten tool to level horizons and ensure vertical lines are straight. Then crop to improve composition, remove distracting elements at the edges, or adjust the aspect ratio if needed. This foundational step ensures your photo has good structure before you adjust colors and tones.
Step 2: Adjust exposure/brightness. Real estate photos should be bright and inviting. Increase exposure or brightness until the photo looks well-lit and appealing, but stop before it looks overexposed or washed out. The goal is to make spaces look bright and spacious without losing detail in the highlights. If your photo has both very bright and very dark areas, use the shadows and highlights tools to brighten shadows without overexposing highlights.
Step 3: Enhance contrast slightly. Adding a small amount of contrast makes photos pop and adds depth. Increase contrast until the photo has good visual punch, but don't overdo it—too much contrast creates harsh, unnatural-looking images. A subtle contrast boost (10-20% increase) is usually sufficient for real estate photos.
Step 4: Adjust white balance (make warm and inviting). White balance controls the color temperature of your photo—whether it looks warm (yellow/orange tones) or cool (blue tones). Real estate photos generally look more inviting with slightly warm tones that suggest comfort and coziness. If your photos look too blue or cold, adjust the white balance toward warm. If they look too yellow or orange, adjust toward cool. The goal is neutral to slightly warm tones that look natural and inviting.
Step 5: Sharpen slightly. A small amount of sharpening adds clarity and crispness to your photos. Most editing apps have a sharpening or clarity tool—apply it subtly to make details pop without creating a harsh, over-sharpened look. Be conservative with sharpening; too much creates halos around edges and looks artificial.
Step 6: Apply consistently to all photos. Once you've edited one photo and are happy with the results, note the settings you used (or save them as a preset if your editing app allows). Apply the same adjustments to all your photos to create visual consistency across your listing. Consistent editing is what makes a set of photos look professional and cohesive rather than like a random collection of images.
What to avoid in editing: Over-editing that makes photos look artificial or unrealistic defeats the purpose—buyers will be disappointed when they see the property in person. Unrealistic colors that don't accurately represent the property are unethical and can lead to buyer complaints or legal issues. Heavy filters that dramatically alter the look of photos are inappropriate for real estate—you're documenting a property, not creating art. Excessive HDR effect that creates halos around objects or an artificial, over-processed look is a common mistake with HDR photography—use HDR for exposure balancing, but don't push it so far that it looks unnatural. The goal of editing is to make your photos look their best while accurately representing the property.
AI enhancement tools like Glowup can automatically enhance real estate photos to professional quality with minimal effort. These platforms use artificial intelligence to analyze your photos and apply optimal adjustments for brightness, contrast, color, and sharpness. The advantage of AI enhancement is consistency and speed—you can process dozens of photos in minutes with consistent, professional results. AI tools are particularly valuable if you're not confident in your editing skills or want to save time. They handle the technical aspects of editing while you focus on shooting great photos.
Virtual staging for empty properties helps buyers visualize potential and makes vacant spaces feel more inviting. Empty rooms photograph poorly because they lack scale, warmth, and context—buyers struggle to imagine how furniture would fit and how the space would feel when lived in. Virtual staging uses AI to digitally add furniture, decor, and styling to empty rooms. The result is photos that show the space's potential and help buyers envision themselves living there. Virtual staging costs a fraction of physical staging (typically $20-50 per photo vs. $2,000-3,000 for physical staging) and can be done quickly. Important: Always disclose that photos are virtually staged to maintain ethical transparency with buyers. Most MLS systems have a field to indicate virtual staging, and you should note it in your listing description as well.
Sky replacement can enhance exterior shots by replacing dull or overcast skies with more appealing blue skies or dramatic sunset skies. Many editing apps now include AI-powered sky replacement tools that make this easy. This technique can make exterior photos more appealing and eye-catching. Important: Use sky replacement ethically—don't misrepresent the property or create unrealistic expectations. A slightly enhanced sky is fine; replacing a rainy day with perfect sunshine when the property is in a rainy climate is misleading. The goal is to present the property in its best light while remaining honest about what buyers can expect.
Consistency is key to professional-looking listing photos. All your photos should have similar brightness, color tone, contrast, and overall style. When buyers scroll through your listing, the photos should feel like a cohesive set rather than a random collection from different sources. This consistency signals professionalism and attention to detail. It also creates a more pleasant viewing experience that keeps buyers engaged with your listing longer.
Before and after examples demonstrate the impact of proper editing. Take one of your raw, unedited photos and edit it following the workflow above. Compare the before and after versions side by side. You'll see how editing transforms a good photo into a professional-looking image that's brighter, more inviting, and more appealing. This dramatic improvement is why editing is an essential part of real estate photography, not an optional extra.
> Ready to create professional real estate photos that help properties sell faster? Get started with Glowup's AI photo enhancement at https://glowuplab.app/signup
Special Situations: Airbnb, Rentals, and Unique Properties
While the principles covered in this guide apply universally to real estate photography, certain property types and situations require adapted approaches. Understanding how to photograph these special situations ensures you can create compelling photos regardless of the property type or purpose.
Airbnb and vacation rental photography focuses on lifestyle appeal and creating an emotional connection rather than just documenting spaces. While traditional real estate photography emphasizes space, layout, and features, Airbnb photography should make viewers imagine themselves on vacation, relaxing, and enjoying the space. Key differences: Include lifestyle elements like a book and coffee cup on a side table, wine glasses on the patio, or fresh towels artfully arranged. Show amenities prominently—hot tub, pool, outdoor dining area, game room, or any features that make the property special for vacationers. Create inviting vignettes that suggest experiences—a cozy reading nook, a romantic dinner setting, a fun game night setup. Capture the ambiance and character of the space, not just its dimensions. Include photos of the surrounding area if it's a desirable location—beach access, mountain views, proximity to attractions. Goal: Make viewers feel like they're already on vacation and this is where they want to stay.
Rental property photography balances showing the property honestly while highlighting its best features. Unlike sale listings where you want to create maximum appeal, rental listings need to set accurate expectations to avoid tenant complaints while still attracting quality tenants. Approach: Document the property thoroughly and honestly—show the actual condition, not an idealized version. Highlight features that matter to renters—storage space, parking, laundry, outdoor space, natural light. Show the neighborhood and nearby amenities if they're selling points—parks, public transit, shopping, schools. Be honest about size and condition—photos that oversell the property lead to disappointed prospects and wasted showings. Include photos of any included appliances, storage areas, and parking. Goal: Attract qualified tenants who will be happy with what they're getting, not disappointed by unmet expectations.
Luxury properties may warrant professional photography despite the techniques in this guide being sufficient for most properties. High-end properties ($1M+) often benefit from professional photography, drone footage, video tours, and twilight shots that require specialized equipment and expertise. However, the principles in this guide still apply—professional photographers use the same composition, lighting, and staging principles, just with more sophisticated equipment. When to hire a pro for luxury properties: When the property's price point justifies the $500-1,000+ investment in professional photography, when you need drone footage for large estates or properties with significant land, when you want video tours or 3D virtual tours, or when the property has unique architectural features that require specialized photography skills. When DIY is sufficient: For luxury condos or homes where interior photography is the primary need, when you're confident in your photography skills and have good equipment, or when budget is a concern and you can create quality photos yourself.
Fixer-upper and as-is property photography requires a different approach that focuses on potential rather than current condition. When selling a property that needs work, your photos need to honestly show the condition while helping buyers see the potential. Approach: Document the property's current condition honestly—don't hide problems or try to make it look better than it is. Focus on good bones—highlight solid structure, good layout, desirable location, or features that will remain valuable after renovation. Show the property empty if possible—furniture and belongings often make fixer-uppers look worse. Capture before photos that renovation-minded buyers can use to plan their projects. Include photos of any recent updates or systems in good condition (roof, HVAC, electrical, plumbing). Consider including a few virtually staged photos showing the potential after renovation, clearly labeled as "virtual staging - potential after renovation." Goal: Attract buyers who are looking for renovation projects and can see past current condition to future potential.
Vacant property photography is challenging because empty rooms lack scale, warmth, and context. Empty spaces photograph poorly and make it difficult for buyers to imagine how furniture would fit or how the space would feel when lived in. Solutions: Use virtual staging to add furniture and decor digitally—this helps buyers visualize the space and makes photos much more appealing. Shoot from corners to maximize the sense of space and show room dimensions. Include measurements in your listing description to help buyers understand scale. Emphasize architectural features, natural light, and built-in elements that show the property's character. Take extra care with composition and lighting since you can't rely on staging to create appeal. Consider adding a few simple staging elements like a plant, a chair, or artwork if virtual staging isn't an option. Goal: Help buyers visualize the space's potential despite it being empty.
Small space photography requires techniques that maximize the sense of space and avoid making rooms look cramped. Small condos, studios, and compact homes need careful photography to show their best qualities. Techniques: Wide-angle lens is essential—use your phone's widest setting without creating distortion. Shoot from corners to capture maximum room in each shot. Declutter ruthlessly—small spaces look even smaller when cluttered. Emphasize clever storage solutions and space-saving features. Show how spaces multi-function (dining area that doubles as workspace, Murphy bed, etc.). Capture vertical space—high ceilings, tall windows, or vertical storage make small spaces feel larger. Include photos showing how furniture fits to help buyers understand scale. Emphasize natural light and bright, airy feel. Goal: Show that the space is small but functional, well-designed, and doesn't feel cramped.
Unique features and selling points deserve special attention in your photography. Every property has something that makes it special—your job is to identify these features and showcase them prominently. Examples: Stunning views—capture from multiple rooms and angles, including detail shots looking out windows. Architectural details—crown molding, exposed beams, vaulted ceilings, unique windows. Outdoor living spaces—patios, decks, outdoor kitchens, fire pits, pools. High-end finishes—granite countertops, custom tile work, hardwood floors, designer fixtures. Smart home features—show control panels, automated systems, modern technology. Historical character—original hardwood, vintage fixtures, period details. Location advantages—walkability, views, proximity to amenities. Approach: Give these features dedicated shots that highlight them as focal points, not just background elements in room shots. These are the features that justify your property's price and differentiate it from comparable listings.
Adapting your approach to the specific property type and purpose ensures your photos serve their intended goal—whether that's selling a home, renting an apartment, booking vacation stays, or attracting renovation-minded buyers. The fundamental principles remain the same (lighting, composition, staging, editing), but the emphasis and approach shift based on what matters most for each property type and target audience.
Conclusion: Your Action Plan for Better Real Estate Photos
Professional-quality real estate photography is not a mysterious art reserved for those with expensive equipment and formal training. It's a learnable skill based on understanding and applying fundamental principles: proper lighting, thoughtful composition, careful staging, and consistent editing. The techniques covered in this guide are the same ones professional real estate photographers use—you now have the knowledge to create listing photos that compete with professional work and help properties sell faster and for higher prices.
The key takeaways that will transform your real estate photography are lighting (shoot during daytime with all lights on, open all curtains, use HDR mode), composition (shoot from corners at chest height, keep camera level, show room flow), staging (declutter ruthlessly, clean thoroughly, create neutral appeal), and editing (brighten, enhance contrast, adjust colors, maintain consistency). These four pillars form the foundation of professional real estate photography. Master them, and you'll create photos that make buyers want to schedule showings.
Your action plan for implementing what you've learned starts now:
Step 1: Gather your equipment. You probably already have everything you need—a smartphone with a decent camera. If you want to invest in optimal results, add a smartphone tripod ($15-30) and possibly a wide-angle lens attachment ($20-50). Total investment: $0-80.
Step 2: Prepare your next property thoroughly. Before you even think about taking photos, spend 2-4 hours decluttering, deep cleaning, and staging. Remove personal items and excess furniture, clean every surface and window, open all curtains and blinds, turn on every light, and add simple touches like fresh flowers or a bowl of fruit. This preparation is where professional results are created.
Step 3: Shoot during optimal time. Schedule your photo session for mid-morning to early afternoon (10am-2pm) when natural light is brightest. Avoid early morning, late afternoon, or evening when light is dim or creates harsh shadows. Overcast days are actually ideal for even, flattering light.
Step 4: Follow composition guidelines systematically. Enable the grid overlay on your camera. Shoot from corners at chest height (about 5 feet). Keep your camera level using the grid lines. Capture each room from the angle that shows maximum space and best features. Take 25-40 photos covering exterior, all rooms, and special features.
Step 5: Edit consistently for professional polish. Use a free editing app like Snapseed or Lightroom Mobile. For each photo: straighten and crop, adjust brightness to make it inviting, add slight contrast, adjust white balance to warm and natural, and sharpen subtly. Apply the same adjustments to all photos for consistency.
Step 6: Consider AI enhancement for professional results with less effort. If you want professional-quality results without mastering editing, use an AI enhancement platform like Glowup. Upload your photos and let AI automatically optimize brightness, contrast, color, and sharpness with consistent, professional results.
Step 7: Review and refine. Look at your edited photos as a complete set. Do they flow logically through the property? Are they consistently bright and well-composed? Do they make you want to see the property in person? If any photos don't meet your standards, reshoot or remove them. Quality matters more than quantity.
The ROI of better real estate photography is immediate and substantial. Properties with professional-quality photos sell 32% faster and command prices up to 47% higher than those with amateur photos. Even if you're selling just one property, the difference between amateur snapshots and professional-looking photos can mean thousands of dollars in higher sale price and weeks less time on market. For realtors, the ability to create professional-quality photos for every listing without the $200-500 per-property expense of hiring photographers represents significant cost savings and competitive advantage.
Continuous improvement comes with practice. Your first property might take longer and the results might not be perfect—that's normal. With each property you photograph, you'll get faster and better. You'll develop an instinctive sense for lighting, composition, and what makes a compelling real estate photo. You'll build a workflow that becomes second nature. The investment you make in learning these skills pays dividends with every property you photograph for years to come.
When to hire a professional photographer despite having these skills: High-value properties ($750K+) where the investment in professional photography is easily justified by the property's price, luxury listings where buyers expect the highest quality presentation, properties with unique architectural features that require specialized photography expertise, when you need drone footage for large estates or properties with significant land, when you want 3D virtual tours or video walkthroughs that require specialized equipment, or when you simply don't have time to photograph the property yourself and the cost of professional photography is worth the time savings. For most properties, the techniques in this guide will serve you well. For special situations, professional photography remains a valuable option.
Final encouragement: You can create professional-quality real estate photos that help properties sell faster and for higher prices. The barrier isn't equipment or innate talent—it's knowledge and practice. You now have the knowledge. The practice will come with each property you photograph. Start with your next listing. Apply these principles systematically. Review your results and learn from each shoot. Within a few properties, you'll be creating photos that compete with professional work and deliver real results in faster sales and higher prices. The investment of time in learning these skills will pay for itself many times over throughout your real estate career.
Your properties deserve professional presentation. Your clients deserve photos that showcase their homes at their best. And you deserve the competitive advantage and cost savings that come from creating professional-quality real estate photography yourself. Now you have the knowledge and action plan to make it happen. Go create photos that sell properties.