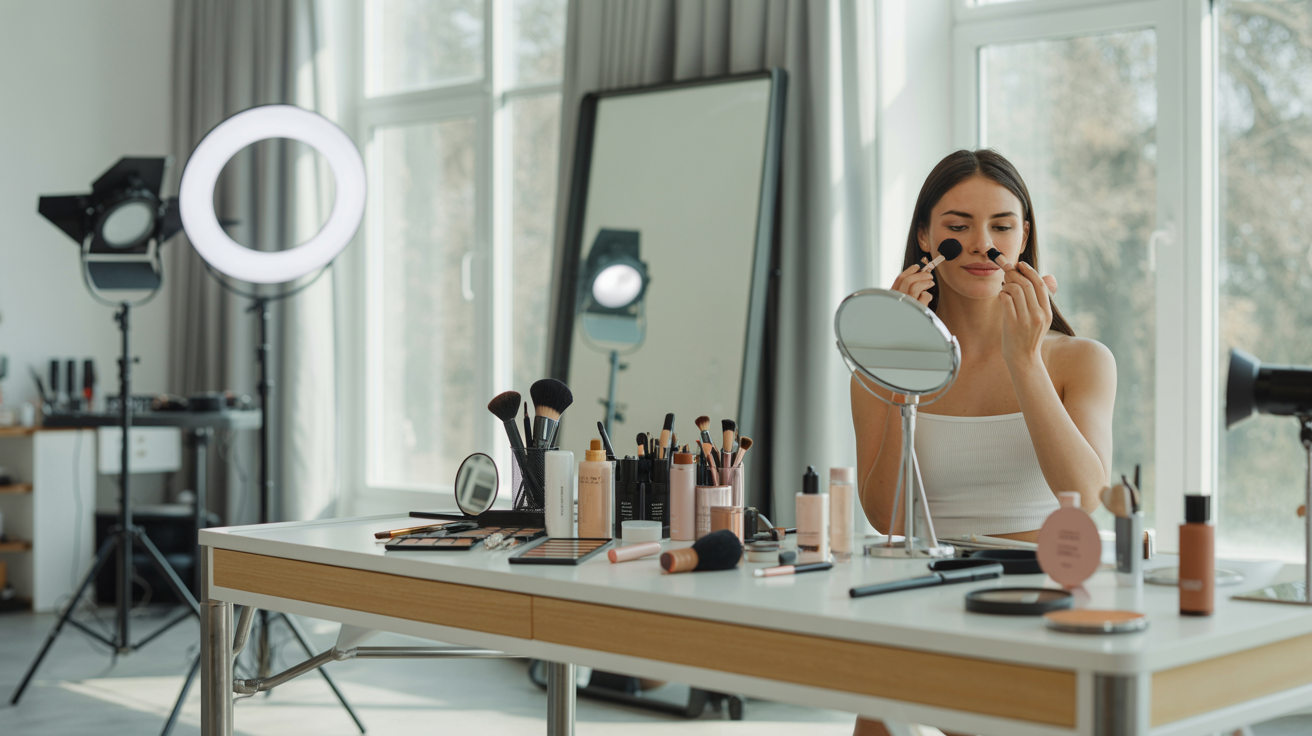
You've booked the photoshoot. Maybe it's a professional headshot for your LinkedIn profile or company website. Maybe you're a small business owner preparing for brand photos that will live on your homepage for the next two years. Perhaps you're a content creator shooting a month's worth of social media content in a single day, or a professional updating your portfolio. Whatever the occasion, there's one thing every person preparing for a photo session has in common: you want to look your absolute best when the camera clicks.
Here's what most people don't realize: the difference between photos where you look polished, glowing, and confident versus photos where you look tired, shiny, or blotchy often has nothing to do with the photographer, the lighting, or even the outfit. It comes down to what you did — and didn't do — to your skin in the days leading up to the shoot. Cameras are unforgiving in ways that mirrors aren't. They capture texture, uneven tone, shine, and puffiness with clinical precision. But they also capture healthy, hydrated, well-prepped skin beautifully.
This guide gives you a complete, timeline-based pre-photoshoot skincare routine — starting one week out and walking you through to the morning of your session. It's designed for everyone: professionals, entrepreneurs, content creators, social media managers, and anyone who wants their photos to represent their best self. The advice is gender-neutral, practical, and grounded in what actually works for camera-ready skin. No complicated 15-step routines, no expensive treatments required — just smart, strategic preparation that makes a real difference in your photos.
Why Skincare Matters More Than You Think for Photos
Cameras see your skin differently than the human eye does. In person, our brains automatically adjust for lighting variations, skin texture, and minor imperfections — we see the whole person, not just the surface details. A camera lens doesn't make those adjustments. It captures exactly what's there: every dry patch, every oily highlight, every shadow under tired eyes, every bit of redness or uneven tone.
This isn't a reason to panic — it's a reason to prepare. The good news is that well-hydrated, well-prepped skin photographs beautifully regardless of your skin type, age, or natural complexion. Cameras love smooth texture, even tone, and a healthy glow. These qualities aren't about having "perfect" skin; they're about having skin that's been properly cared for in the days before your shoot.
Consider what happens at the extremes. Dehydrated skin looks dull and flat in photos — it lacks the subtle luminosity that makes skin look healthy and alive. Overly oily skin creates distracting shine that draws the eye and can make you look sweaty or uncomfortable. Irritated, red skin looks inflamed and draws attention away from your expression and presence. Dry, flaky patches catch light in unflattering ways and create texture that's difficult to edit out. None of these issues require expensive treatments to address — they require timing and the right approach.
The other critical factor is that cameras interact with light differently than our eyes do. Skin that reflects light evenly looks smooth and healthy in photos. Skin with uneven texture or tone creates micro-shadows and highlights that emphasize imperfections. This is why professional photographers and makeup artists spend so much time on skin prep — because the foundation of a great photo is literally the skin it's shot on.
For professionals updating headshots, this matters enormously. Your LinkedIn photo, company bio image, or portfolio headshot may be seen by thousands of people over several years. For small business owners, brand photos represent your company's professionalism and attention to detail. For content creators, your face is part of your brand — and consistent, healthy-looking skin builds audience trust and engagement. The investment of a few days of intentional skincare prep pays dividends every time someone sees those photos.
One Week Before Your Photoshoot: Build Your Foundation
The week before your photoshoot is when you lay the groundwork for great skin. This isn't the time for dramatic interventions or trying new products — it's the time to build hydration, address any ongoing concerns gently, and set your skin up for success.
Start (or Intensify) Your Hydration Routine
Hydration is the single most important factor in how skin photographs. Well-hydrated skin has a natural plumpness and luminosity that cameras love. Dehydrated skin looks flat, dull, and emphasizes fine lines and texture. Starting a week out, focus on layering hydration into your routine.
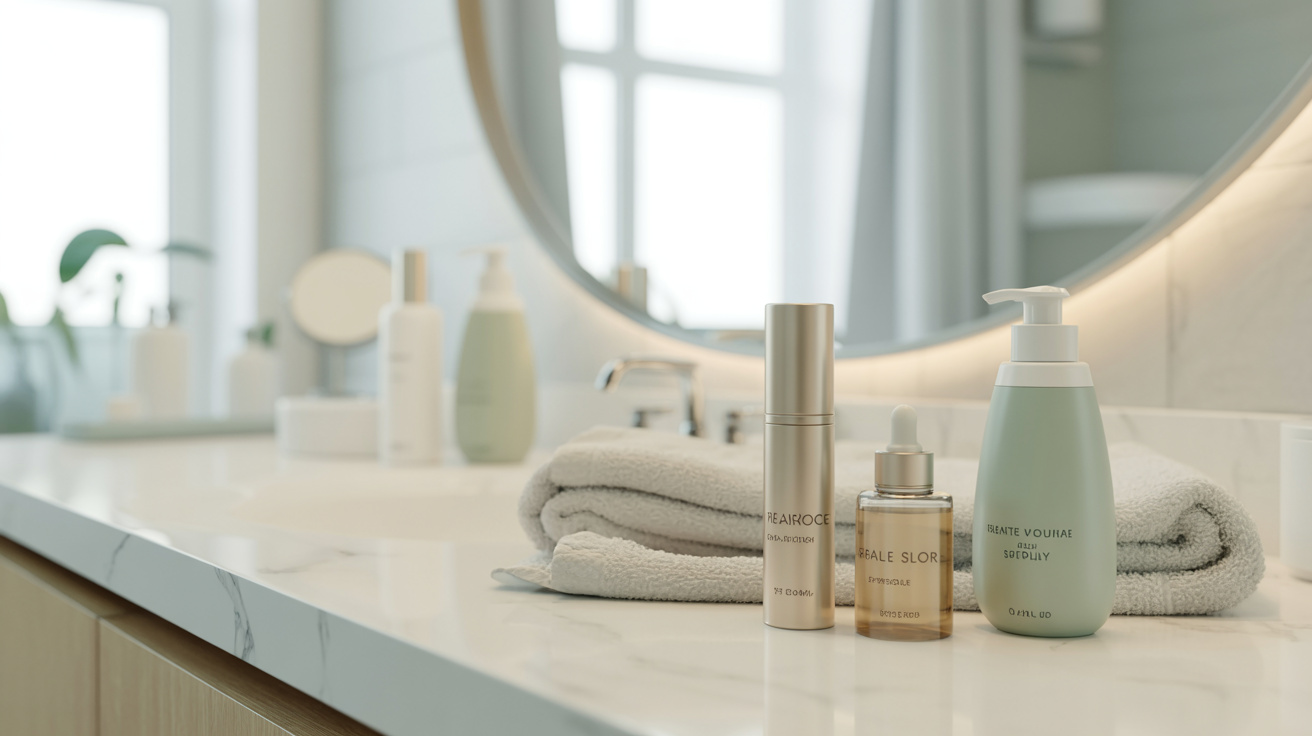
If you use a hyaluronic acid serum, this is the time to be consistent with it — apply it to damp skin morning and evening before your moisturizer. Hyaluronic acid draws moisture into the skin and holds it there, creating that plump, healthy look that photographs beautifully. Follow with a moisturizer that suits your skin type: something richer if you tend toward dryness, something lighter and non-comedogenic if you're oily or acne-prone.
Don't forget internal hydration. Drinking adequate water (aim for 8+ glasses daily) genuinely affects how your skin looks and photographs. Dehydration shows up in skin before you feel thirsty — dullness, increased fine lines, and a lack of that healthy glow are all signs your skin needs more water. Start the week before your shoot with a conscious effort to stay well-hydrated.
Time Your Exfoliation Correctly
Exfoliation is important for smooth, even-textured skin — but timing matters enormously. Exfoliating too close to your shoot can leave skin sensitized, red, or irritated. Exfoliating too far in advance means the benefits have faded.
The ideal timing for exfoliation is 5-7 days before your photoshoot. This gives your skin time to reveal the fresh, smooth layer underneath while allowing any potential sensitivity to fully resolve. Use a gentle chemical exfoliant (AHA like glycolic or lactic acid, or BHA like salicylic acid) rather than a harsh physical scrub, which can cause micro-tears and irritation. After exfoliating, follow with extra hydration to support your skin's recovery.
If you're not already using exfoliants regularly, don't start a new one the week before your shoot. Introducing a new active ingredient can cause unexpected reactions. Stick with what your skin knows, or skip exfoliation entirely and focus on hydration instead.
Treatments to Start — and Stop
Start: If you have any targeted treatments for concerns like hyperpigmentation, uneven tone, or dullness (vitamin C serums, niacinamide, gentle retinol if you're already using it), continue using them consistently through the week. These ingredients work cumulatively and will contribute to a more even, glowing complexion by shoot day.
Stop: This is critical — stop using any new, strong, or potentially irritating treatments at least 5-7 days before your shoot. This includes: new retinoids or retinol products (can cause peeling and sensitivity), strong acids at higher concentrations, any treatment you haven't used before, and anything that has previously caused redness or irritation. The week before a photoshoot is not the time to experiment. Stick to your established routine and proven products.
Also stop any facial hair removal methods that cause irritation (waxing, threading, depilatory creams) at least 5-7 days before your shoot to allow any redness or sensitivity to fully resolve.
48-72 Hours Before: The Critical Window
The two to three days before your photoshoot are the most critical period for skin prep. Decisions you make during this window have the most direct impact on how your skin looks on shoot day.
What to Avoid in This Window
Alcohol: Alcohol is one of the most dehydrating substances for skin. Even moderate consumption causes visible puffiness (especially around the eyes and face), dullness, and dehydration that shows up clearly in photos. Avoid alcohol for at least 48 hours before your shoot — 72 hours is even better if you want to look your absolute best.
Salty foods: High-sodium foods cause water retention and puffiness, particularly around the eyes and face. In the 48-72 hours before your shoot, minimize processed foods, restaurant meals (which tend to be high in sodium), salty snacks, and anything that typically makes you feel bloated. Focus on whole foods, vegetables, lean proteins, and plenty of water.
New skincare products: Never introduce a new product in the days before a photoshoot. Even products that seem gentle can cause unexpected reactions — redness, breakouts, or irritation — in some people. Stick exclusively to products your skin knows and tolerates well.
Aggressive treatments: No chemical peels, microdermabrasion, laser treatments, or any procedure that causes downtime or skin sensitivity. These treatments require recovery time that you don't have in the days before a shoot.
Excessive sun exposure: Sun exposure causes redness, inflammation, and uneven tone that can take days to resolve. If you'll be outdoors in the days before your shoot, wear SPF 30+ sunscreen and protective clothing. A sunburn right before a photoshoot is a disaster that's very difficult to work around.
Picking or squeezing blemishes: This is tempting but counterproductive. Picking at blemishes causes inflammation, redness, and potential scarring that makes the situation worse, not better. Leave blemishes alone and treat them with targeted spot treatments instead.
What to Do in This Window
Double down on hydration: Apply your hydrating serum and moisturizer consistently morning and evening. Consider adding a hydrating face mask 48 hours before your shoot — sheet masks or overnight hydrating masks are excellent options that deliver an extra boost of moisture without risk of irritation.
Get adequate sleep: Sleep is when your skin repairs and regenerates. Poor sleep shows up immediately in photos: dark circles, puffiness, dullness, and a generally tired appearance. Aim for 7-9 hours of quality sleep in the nights before your shoot. If you struggle with sleep, start winding down earlier, avoid screens before bed, and keep your room cool and dark.
Stay active (but not excessively): Moderate exercise improves circulation and gives skin a healthy glow. A walk, yoga session, or light workout in the days before your shoot can contribute to that healthy, vibrant look. However, avoid extremely intense workouts that leave you exhausted or cause significant muscle soreness — you want to feel energized and comfortable on shoot day.
Manage stress: Stress triggers cortisol, which can cause breakouts, inflammation, and a generally tired appearance. In the days before your shoot, prioritize stress management: adequate sleep, gentle movement, time in nature, or whatever helps you decompress. This isn't just about mental wellbeing — it directly affects how your skin looks.
The Night Before: Final Prep
The evening before your photoshoot is about gentle, thorough preparation — not dramatic interventions. Your goal is to go to bed with deeply hydrated, clean, calm skin.
Cleanse thoroughly but gently. Remove all makeup, sunscreen, and the day's buildup with a gentle cleanser. Double cleansing (an oil-based cleanser followed by a water-based cleanser) is excellent for ensuring your skin is completely clean without stripping it. Clean skin absorbs your subsequent products more effectively.
Apply your hydrating serum and a slightly richer moisturizer than usual. Tonight is a good night to use a more nourishing moisturizer or a sleeping mask if you have one. These products work overnight while you sleep, delivering extra hydration that will show up as plumpness and glow in the morning.
Eye cream is worth applying tonight. The under-eye area is one of the first places fatigue and dehydration show up in photos. Apply a hydrating eye cream or gel before bed, and consider keeping a chilled eye mask or cold spoons in the refrigerator to use in the morning.
Prepare everything you need for the morning. Lay out your skincare products, outfit, and anything else you'll need so the morning is calm and unhurried. Stress and rushing in the morning shows up on your face — a calm, organized morning routine makes a real difference.
Get to bed early. Even if you don't fall asleep immediately, being in bed earlier gives you more opportunity for quality sleep. Aim for at least 7-8 hours. Set your alarm with enough time to complete your morning routine without rushing.
Avoid: Heavy, rich foods late at night (can cause puffiness), alcohol, excessive screen time (disrupts sleep quality), and anything that might cause stress or anxiety.
Morning of the Photoshoot: Day-Of Routine
The morning of your photoshoot, your goal is to enhance what you've built over the past week — not to introduce anything new or dramatic. Keep your routine simple, focused, and calm.
Cleanse and Moisturize
Start with a gentle cleanse to remove any overnight products and refresh your skin. Use lukewarm water — hot water can cause redness and strip moisture, while cold water can cause temporary puffiness. Pat (don't rub) your skin dry with a clean towel.
Apply your hydrating serum to slightly damp skin, then follow with your moisturizer. Give your moisturizer a few minutes to fully absorb before applying anything else. Well-moisturized skin looks plump and healthy in photos and provides a smooth base for any makeup or finishing products.
Apply SPF if you'll be shooting outdoors or near windows. Choose a formula that doesn't leave a white cast or heavy residue — many modern SPF formulas are lightweight and invisible on skin. Protecting your skin from UV exposure on shoot day also prevents any redness or inflammation from sun exposure.
Managing Shine and Oiliness
Shine is one of the most common challenges in photography, and it affects people of all skin types — not just those with naturally oily skin. Camera lights and flash can make even normal skin look shiny. Here's how to manage it:
Primer: A mattifying primer applied after moisturizer creates a smooth, shine-free base that lasts through a long shoot. Look for primers with silica or kaolin clay, which absorb oil and blur the appearance of pores. Apply a thin layer to the T-zone (forehead, nose, chin) and any other areas prone to shine.
Setting powder: A translucent setting powder is your best friend for controlling shine in photos. Apply it lightly with a large, fluffy brush to set your moisturizer or makeup and create a matte finish. Translucent powder works for all skin tones and doesn't add color or coverage — it simply reduces shine and helps everything stay in place.
Blotting papers: Keep blotting papers on hand throughout your shoot. These thin papers absorb excess oil without disturbing your skin or any makeup. Press (don't rub) them gently against shiny areas as needed. They're small, inexpensive, and incredibly effective for maintaining a matte finish throughout a long session.
What to avoid: Heavy, greasy moisturizers or primers on shoot day if you're prone to shine. Touching your face throughout the day (transfers oil from your hands). Skipping moisturizer in an attempt to reduce shine — dehydrated skin actually produces more oil to compensate, making shine worse.
Under-Eye and Puffiness Fixes
Puffiness and dark circles are among the most common concerns before a photoshoot, and they're often the result of the previous night's sleep quality, hydration, and diet. Here's how to address them on the morning of your shoot:
Cold compress: Apply a cold compress, chilled eye mask, or cold spoons to the under-eye area for 5-10 minutes. Cold constricts blood vessels and reduces puffiness quickly. This is one of the most effective morning-of treatments for tired-looking eyes.
Caffeine eye products: Eye creams or gels containing caffeine are specifically formulated to reduce puffiness and dark circles. Apply one after your cold compress and let it absorb fully. The caffeine constricts blood vessels and reduces the appearance of puffiness and darkness.
Elevate your head: If you wake up with significant puffiness, spend 10-15 minutes sitting upright (or even standing) before your routine. Lying flat allows fluid to pool in the face; being upright helps it drain.
Facial massage: A gentle lymphatic drainage massage using your fingertips can help reduce puffiness by encouraging fluid movement. Use light, sweeping motions from the center of your face outward and downward toward your neck. This takes just 2-3 minutes and can make a noticeable difference.
> Ready to see how great your photos can look? Glowup's AI photo platform enhances your images to professional quality — perfect for headshots, brand photos, social media content, and more. Try it free at https://glowuplab.app/
Grooming Essentials Beyond Skincare
Great skin prep is the foundation, but a complete pre-photoshoot routine covers more than just skincare. These grooming details make the difference between photos that look polished and professional versus photos that look slightly off without you being able to pinpoint why.
Hair Prep
Your hair is one of the most prominent elements in any photo, and its condition and styling significantly affect your overall appearance. Here's how to prepare:
Wash timing: For most hair types, washing your hair the day before (not the morning of) your shoot gives it time to settle into its natural texture and movement. Hair that's been washed too recently can look flat or overly shiny; hair that hasn't been washed recently enough can look limp or greasy. The day-before wash is the sweet spot for most people.
Condition well: Use a good conditioner or hair mask the wash before your shoot to ensure your hair is smooth, hydrated, and manageable. Frizzy, dry, or unruly hair is difficult to style and distracting in photos.
Style for the camera: Hair that looks great in person doesn't always translate well to photos. Avoid very elaborate styles that might look overdone on camera, and avoid styles that cast shadows on your face. Simple, polished styles that frame your face well tend to photograph best. If you're getting a professional blowout or styling, schedule it for the morning of or evening before your shoot.
Flyaways and frizz: Use a small amount of hair serum, pomade, or hairspray to tame flyaways and frizz. These small details are very visible in photos. A light-hold product applied to the surface of your hair can smooth everything down without making it look stiff or unnatural.
Nails and Hands
Hands appear in more photos than most people realize — especially for small business owners, professionals, and content creators who photograph products, workspaces, or lifestyle content. Well-groomed nails and hands signal attention to detail and professionalism.
Trim and file: Ensure nails are trimmed to a consistent length and filed smooth. Uneven or jagged nails are noticeable in close-up shots.
Cuticle care: Apply cuticle oil or cream in the days before your shoot and push back cuticles gently. Dry, ragged cuticles are distracting in photos.
Nail polish: If you wear nail polish, apply a fresh coat 1-2 days before your shoot to allow it to fully cure and harden. Chipped nail polish is very noticeable in photos. If you prefer bare nails, a clear coat adds shine and polish without color.
Hand moisturizer: Apply a good hand cream consistently in the days before your shoot. Dry, cracked hands photograph poorly and can look older than they are. On shoot day, apply hand cream but allow it to fully absorb before the session begins.
Eyebrows and Facial Hair
Eyebrows frame the face and have an enormous impact on how polished and put-together you look in photos. Facial hair, whether you have a beard, mustache, or prefer clean-shaven, should be intentionally groomed before your shoot.
Eyebrows: Have your eyebrows shaped (waxed, threaded, or tweezed) 3-5 days before your shoot — not the day before, as this can leave redness or irritation. Well-shaped brows that suit your face frame your eyes and give your face structure in photos. If you shape your own brows, do so carefully and conservatively — over-plucked brows are difficult to fix quickly.
Beard and mustache: If you have facial hair, trim and shape it 1-2 days before your shoot. This gives any minor irritation time to resolve while ensuring your facial hair looks intentional and well-maintained. Use a beard oil or balm to condition and tame facial hair — dry, wiry facial hair looks unkempt in photos.
Clean-shaven: If you prefer clean-shaven, shave the morning of your shoot for the smoothest result. Use a sharp blade, proper shaving cream or gel, and follow with a soothing aftershave balm (not alcohol-based, which can cause redness). Shave with the grain to minimize irritation.
Nose and ear hair: Check and trim any visible nose or ear hair before your shoot. These details are very visible in photos and easy to overlook in your regular routine.
Common Skin Concerns and Quick Fixes
Even with the best preparation, skin concerns can arise. Here's how to handle the most common issues that come up before a photoshoot.
Redness and Irritation
Redness is one of the most common pre-photoshoot skin concerns, and it can be caused by many things: sensitivity, rosacea, post-exfoliation irritation, or simply stress. Here's how to address it:
Reduce inflammation: Apply a cold compress to red areas for 5-10 minutes. Cold reduces inflammation and constricts blood vessels, visibly reducing redness quickly.
Green-tinted primer or color corrector: Green color corrects red tones on the skin. A green-tinted primer or color corrector applied under foundation or tinted moisturizer can neutralize redness effectively. This works for all skin tones and is a professional makeup technique used specifically for photography.
Avoid triggers: In the days before your shoot, avoid anything that triggers your redness — spicy foods, hot beverages, extreme temperatures, alcohol, and any skincare products that cause flushing.
Niacinamide: If you're not already using it, niacinamide (vitamin B3) is a gentle, well-tolerated ingredient that reduces redness and inflammation over time. It's safe to use consistently in the week before your shoot and can make a noticeable difference in overall skin tone.
Breakouts
A breakout before a photoshoot is stressful, but it's manageable. The key is to treat it without making it worse.
Spot treatment: Apply a targeted spot treatment containing benzoyl peroxide, salicylic acid, or sulfur directly to blemishes. These ingredients reduce inflammation and help blemishes resolve faster. Apply at night and allow to fully absorb.
Don't pick: Picking or squeezing blemishes causes inflammation, potential scarring, and makes them more visible, not less. Leave them alone and let your spot treatment work.
Reduce inflammation: Ice wrapped in a clean cloth applied to a blemish for a few minutes can reduce swelling and redness quickly. Do this the morning of your shoot for any particularly inflamed spots.
Color correction: A peach or orange color corrector (depending on your skin tone) applied under concealer can neutralize the redness of a blemish effectively. This is a professional technique that makes blemishes much less visible in photos.
Concealer: A full-coverage concealer matched to your skin tone, applied with a small brush and set with powder, can make blemishes nearly invisible in photos. Apply in thin layers and blend carefully at the edges.
Dry Patches
Dry, flaky patches catch light in unflattering ways and create texture that's very visible in photos. Here's how to address them:
Gentle exfoliation: If you have dry patches, gently exfoliate them 3-5 days before your shoot using a soft washcloth or gentle chemical exfoliant. This removes the flaky surface layer and allows your moisturizer to penetrate more effectively.
Intensive moisturizing: Apply a richer moisturizer or facial oil to dry patches consistently in the days before your shoot. Occlusives like shea butter, squalane, or facial oils seal moisture in and help resolve dry patches quickly.
Avoid: Harsh cleansers, hot water, and anything that strips moisture from already-dry skin. Switch to a cream or oil cleanser if you're experiencing dryness.
Day-of fix: If dry patches persist on shoot day, apply a thin layer of facial oil or balm to the affected areas before your moisturizer. This creates a smooth, hydrated surface that photographs much better than dry, flaky skin.
How AI Photo Enhancement Complements Good Skincare Prep
Here's an important truth: even with perfect skincare prep, photos sometimes need a little help. Lighting conditions, camera settings, and the inherent limitations of photography mean that even well-prepped skin can look less than its best in certain shots. This is where AI photo enhancement becomes a powerful complement to your preparation.
Platforms like Glowup use artificial intelligence to enhance photos in ways that look natural and professional — not over-edited or artificial. AI enhancement can even out skin tone, reduce the appearance of shine, smooth minor texture issues, and optimize lighting to make skin look its best. For professionals, small business owners, and content creators, this means that your carefully prepped skin gets the best possible presentation in your final photos.
The key distinction is that AI enhancement works best when it has good source material to work with. Well-prepped, hydrated skin that's been properly cared for in the days before a shoot responds beautifully to AI enhancement — the results look natural and polished. Poorly prepped skin with significant texture, shine, or uneven tone requires more aggressive editing that can start to look artificial. Your skincare prep and AI enhancement work together: you bring the best possible version of your skin to the shoot, and AI tools optimize the final result.
For small business owners using brand photos across websites, social media, and marketing materials, this combination is particularly powerful. Consistent, professional-looking photos that represent your brand well are achievable without expensive professional photography sessions — with the right preparation and the right tools.
Content creators benefit similarly. When you're shooting a month's worth of content in a single day, your skin needs to look consistently good across dozens of photos taken over several hours. Good skincare prep ensures your skin holds up throughout a long shoot, and AI enhancement ensures every photo in your content library looks polished and professional.
For professionals updating headshots — whether for LinkedIn, company websites, conference speaker profiles, or portfolio pages — the combination of proper skincare prep and AI enhancement means you can achieve headshot quality that rivals expensive professional photography sessions. Your headshot is often the first impression you make on potential clients, employers, or collaborators. It deserves the same care and attention you'd give to any other professional presentation.
Your Pre-Photoshoot Skincare Timeline: Quick Reference
Here's your complete timeline at a glance:
One week before:
- Begin consistent hydration routine (hyaluronic acid serum + moisturizer morning and evening)
- Exfoliate once (5-7 days before shoot)
- Stop any new or potentially irritating treatments
- Schedule eyebrow shaping (3-5 days before)
- Increase water intake
48-72 hours before:
- Avoid alcohol, salty foods, and new products
- Apply hydrating face mask
- Prioritize sleep (7-9 hours)
- Manage stress
- Trim and shape facial hair (if applicable)
Night before:
- Double cleanse thoroughly
- Apply hydrating serum + richer moisturizer or sleeping mask
- Apply eye cream
- Prepare everything for the morning
- Get to bed early
Morning of:
- Gentle cleanse with lukewarm water
- Hydrating serum + moisturizer + SPF
- Cold compress for under-eye puffiness
- Mattifying primer and/or setting powder for shine control
- Tame hair flyaways and frizz
- Final grooming check (nails, brows, facial hair)
- Keep blotting papers on hand throughout the shoot
The investment of time and attention in this routine is minimal compared to the impact it has on your photos. Whether you're shooting professional headshots, brand content, social media photos, or any other type of photography, showing up with well-prepped skin gives you a significant advantage. You'll feel more confident, your photographer will have better material to work with, and your final photos will represent the best version of you.
> Want to take your photos to the next level? Glowup's AI photo platform helps professionals, entrepreneurs, and content creators create stunning, polished images — no expensive photoshoot required. Start your free trial at https://glowuplab.app/signup
Final Thoughts
Great photos start before the camera ever comes out. The skincare and grooming preparation you do in the week before your photoshoot is as important as the shoot itself — arguably more so, because no amount of editing can fully compensate for poorly prepped skin. But with the right timeline-based approach, anyone can show up to their photoshoot with skin that looks healthy, hydrated, and camera-ready.
Remember the key principles: build hydration over the week before your shoot, avoid anything new or potentially irritating in the days leading up to it, get adequate sleep and stay hydrated, and keep your morning-of routine simple and focused. Address specific concerns like shine, puffiness, or redness with targeted solutions rather than dramatic interventions. And pair your preparation with smart tools like AI photo enhancement to ensure your final images look their absolute best.
Whether you're a professional updating your headshot, a small business owner creating brand content, a content creator building your social media library, or anyone else who wants to look great in photos — this routine works. Your photos are an investment in how the world sees you and your work. They deserve the same care and preparation you'd give to any other important professional presentation.