Most people approach photo wardrobe planning backwards. They wait until the day before a professional headshot, scramble to find something appropriate, panic-buy a new outfit they'll wear once, and repeat this cycle every time they need photos. The result? Closets stuffed with single-use "photo outfits" that cost hundreds of dollars collectively but never quite work together, and the nagging anxiety that comes with never feeling truly prepared when photo opportunities arise.
Here's what professional photographers, content creators, and personal branding experts know: you don't need a massive wardrobe for great photos. You need a strategic one. With just 10-15 carefully selected, versatile pieces, you can handle every photo situation you'll encounter—professional headshots, team photos, social media content, business marketing materials, personal branding shoots, and everything in between.
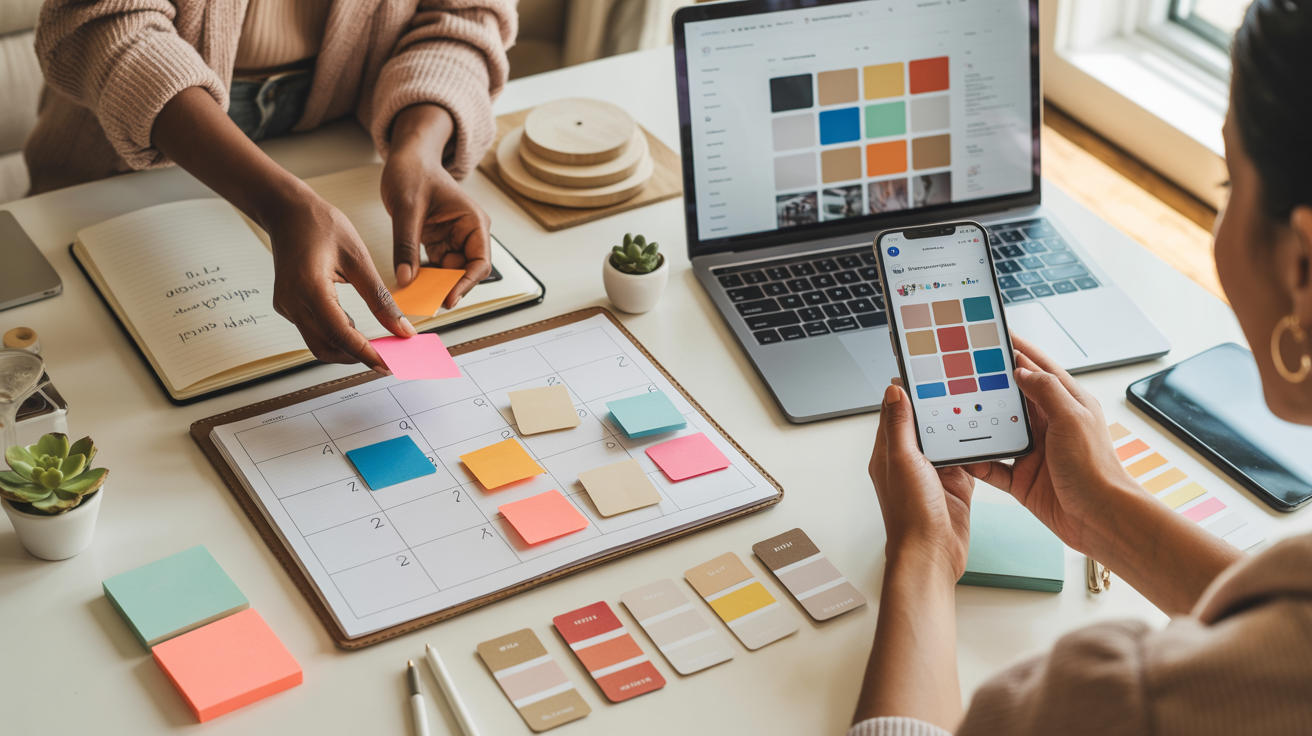
This comprehensive guide will teach you how to build a photo-ready wardrobe that serves multiple purposes, creates dozens of outfit combinations, and ensures you're always prepared when photo opportunities arise. Whether you're a professional building your personal brand, a content creator planning regular social media posts, a small business owner who needs marketing photos, or simply someone who wants to look great in photos without wardrobe stress, this minimalist approach will transform how you think about photo preparation.
The best part? This isn't about buying an entirely new wardrobe. It's about identifying the essential pieces that work hardest for you, filling strategic gaps, and learning to mix and match for maximum versatility. You'll save money, reduce decision fatigue, and gain the confidence that comes from knowing you're always photo-ready. Let's build your photo-ready wardrobe.
Why a Photo-Ready Wardrobe Beats Random Shopping
The reactive approach to photo wardrobe—buying something new every time you need photos—seems logical in the moment but becomes expensive and inefficient over time. You spend $80 on a blazer for a headshot, $60 on a dress for team photos, $50 on a shirt for social media content, and before you know it, you've invested hundreds in pieces that don't work together and rarely get worn outside of photos.
A strategic photo-ready wardrobe flips this model. By investing in 10-15 versatile, high-quality pieces that work together, you create exponential outfit possibilities. The math is simple: 5 tops and 3 bottoms create 15 outfit combinations. Add 2 layers (blazers, cardigans) and you're at 45 combinations. Include accessories and styling variations, and you easily surpass 50 distinct looks from a minimal wardrobe.
Beyond the financial benefits, a photo-ready wardrobe provides psychological advantages. There's immense value in "photo confidence"—knowing you can handle any photo opportunity without scrambling. When a last-minute headshot request comes in, when you need to create a week of social media content, when your business needs updated marketing photos, you're ready. This preparedness reduces stress and allows you to focus on the actual photography rather than wardrobe anxiety.
Professional consistency is another crucial benefit. When your photos—across LinkedIn, your website, social media, and marketing materials—feature coordinated, cohesive styling, you create a recognizable visual brand. People subconsciously register this consistency as professionalism and intentionality. A photo-ready wardrobe built around a cohesive color palette and style naturally creates this consistency without requiring conscious effort for each photo session.
The environmental and practical benefits matter too. Buying fewer, higher-quality pieces that serve multiple purposes is more sustainable than constant consumption of single-use items. You'll have less closet clutter, easier decision-making, and pieces you actually wear regularly rather than items gathering dust between photo sessions.
The Foundation: 5 Essential Neutral Pieces
Every photo-ready wardrobe starts with a foundation of neutral, versatile pieces that work across contexts, seasons, and styling approaches. These five essentials form the backbone of countless outfit combinations.
1. The Perfect White Button-Down Shirt
The white button-down is the single most versatile piece in any photo wardrobe. It works for professional headshots, casual social media content, business team photos, and everything in between. Styled with a blazer, it's corporate-appropriate. Worn alone with jeans, it's smart casual. Layered under a sweater with just the collar showing, it adds polish to casual looks.
What to look for: Fit is everything. The shirt should fit smoothly across the shoulders without pulling, have sleeves that hit at your wrist bone, and provide enough room in the body to move comfortably without looking baggy. For photos, a slightly fitted silhouette photographs better than oversized styles. Choose a fabric with some body—quality cotton poplin or oxford cloth—that holds its shape and doesn't wrinkle excessively. Collar style matters: a classic point collar is most versatile, while button-down collars work for casual looks.
Budget considerations: You can find excellent white button-downs at every price point. Mid-range options ($40-80) from brands like Everlane, J.Crew, or Banana Republic offer quality that photographs well and lasts through multiple wears. If you're investing in one piece, make it this one—a perfectly fitted white shirt is worth tailoring if needed.
Gender-neutral styling: White button-downs work across all gender presentations. Focus on fit that flatters your body type rather than gendered styling rules. Some prefer a more structured, tailored fit; others prefer a relaxed, oversized look. Both photograph well when intentionally styled.
2. Classic Dark Jeans or Tailored Pants
Well-fitted dark bottoms are the foundation of both professional and casual photo outfits. Dark jeans (in black, dark indigo, or charcoal) bridge the gap between casual and professional, working for everything from lifestyle content to smart casual business photos. Tailored pants in neutral colors (black, navy, gray, khaki) lean more professional but remain versatile.
The versatility factor: Dark jeans work with literally everything in your wardrobe—white shirts, colored sweaters, blazers, casual tees. They photograph well in all lighting conditions (unlike light-wash denim, which can look washed out), and they're appropriate for 80% of photo contexts. Tailored pants elevate any look instantly, making even a simple tee look intentional and polished.
Fit considerations for photos: Fit matters more than style. Avoid extremes—jeans that are too baggy add visual bulk and look sloppy, while jeans that are too tight create unflattering lines and look uncomfortable. For photos, a straight leg or slight taper is most universally flattering. The rise (where the waistband sits) should be comfortable and proportional to your torso. For full-body photos, ensure the length is correct—jeans should hit at your ankle bone or just below, not bunch at your shoes.
Styling for different photo types: For professional headshots (typically waist-up), your bottom choice matters less, but dark jeans or tailored pants ensure you're prepared if the photographer wants full-body shots. For social media and lifestyle content, dark jeans are perfect—professional enough to look intentional, casual enough to feel authentic. For business and team photos, tailored pants are the safer choice, though dark jeans work in many modern workplace contexts.
3. Neutral Blazer or Structured Jacket
A well-fitted blazer is the fastest way to elevate any outfit from casual to professional. It instantly communicates polish, intentionality, and professionalism—crucial for headshots, business photos, and personal branding content. Even over a simple tee and jeans, a blazer creates a put-together look that photographs beautifully.
Color choices: Navy is the most versatile blazer color—it works with everything, photographs well, and suits all skin tones. Gray (charcoal or medium gray) is a close second, offering slightly more modern, creative energy. Black is classic but can feel harsh in photos; if you choose black, ensure it's a true black, not faded. Camel or tan blazers work beautifully for warmer seasons and creative industries but are less versatile than navy or gray.
Fit is everything: An ill-fitting blazer looks worse than no blazer at all. The shoulders should align with your natural shoulder line (not extend beyond or fall short). The sleeves should hit at your wrist bone, showing about half an inch of shirt cuff. The body should be fitted enough to show your shape but loose enough to button comfortably without pulling. If you're investing in one blazer, budget for tailoring—a $100 blazer that fits perfectly photographs better than a $500 blazer that doesn't.
Casual vs. formal styling: For professional headshots and corporate photos, wear your blazer fully buttoned or with one button fastened, over a button-down shirt. For personal branding and creative content, wear it unbuttoned over a tee or with sleeves pushed up for a relaxed, approachable look. For social media content, drape it over your shoulders or wear it with casual bottoms to balance professional and approachable.
4. Simple Crew Neck or V-Neck Tee (in neutral colors)
Quality basic tees are the unsung heroes of a photo wardrobe. They work alone for casual content, layer under blazers and cardigans for smart casual looks, and provide a neutral foundation that lets other pieces shine. The key word is quality—cheap tees look cheap in photos, while well-made tees in good fabrics look intentional and polished.
Why quality matters: Fabric and fit separate a $10 tee from a $30 tee. Look for tees with some weight and structure—thin, flimsy fabrics cling unflattering and show every imperfection. Cotton or cotton-blend fabrics with a bit of stretch hold their shape and drape well. The fit should be fitted but not tight, hitting at your hip bone, with sleeves that end mid-bicep (not at your elbow or shoulder).
Color selection: Build a collection of neutral tees—white, black, heather gray, and navy. These four colors work with everything in your wardrobe and create different moods. White is fresh and clean, perfect for bright, energetic content. Black is classic and slimming, ideal for dramatic or professional looks. Gray is the most forgiving and versatile, working in nearly any context. Navy adds subtle color while remaining neutral and professional.
Styling versatility: Wear tees alone with jeans for casual lifestyle content. Layer under blazers for smart casual professional photos. Pair with statement jewelry or scarves for personality-driven social media content. Tuck into high-waisted pants for a polished, proportional silhouette in full-body shots. The simplicity of a quality tee makes it endlessly adaptable.
5. Versatile Dress or Jumpsuit (for those who wear them)
For those who wear dresses or jumpsuits, one versatile piece can replace multiple outfit combinations. A well-chosen dress or jumpsuit is a complete outfit in one piece—no coordination required—making photo prep incredibly efficient.
Styles that photograph well: Midi-length dresses (hitting mid-calf) are universally flattering and appropriate for both professional and casual contexts. A-line silhouettes work for many body types, creating a defined waist and flowing skirt. Wrap dresses are adjustable and flattering, with a V-neckline that elongates. Shirt dresses bridge professional and casual, working for business photos and lifestyle content. Jumpsuits create a modern, polished look with the ease of a dress.
Color and pattern considerations: For maximum versatility, choose solid colors in your signature palette or classic neutrals (navy, black, forest green, burgundy, camel). If you want pattern, choose large-scale, simple patterns—wide stripes, large florals, bold geometric shapes—that don't create visual noise. Avoid small, busy patterns that distract from your face and date quickly.
Professional to casual styling: Style a dress or jumpsuit professionally with a blazer, structured bag, and classic shoes for headshots and business photos. Style casually with a denim jacket, minimal jewelry, and relaxed shoes for lifestyle content. The same piece creates multiple looks through accessories and layers, maximizing versatility from a single item.
Adding Color and Personality: 3-5 Statement Pieces
Once you have your neutral foundation, add 3-5 statement pieces that inject color, personality, and visual interest into your photo wardrobe. These pieces should reflect your personal style and brand while remaining versatile enough to work with your neutral foundation.
Choosing Your Signature Colors
Color psychology in photos is powerful. Colors communicate mood, energy, and personality before you say a word. Choosing 2-3 signature colors that flatter your skin tone and align with your brand creates visual consistency across your photos and helps you stand out.
Selecting colors that flatter your skin tone: Warm skin tones (golden, peachy, yellow undertones) are flattered by warm colors—coral, rust, olive green, warm browns, gold, peach. Cool skin tones (pink, red, blue undertones) are flattered by cool colors—jewel tones (emerald, sapphire, amethyst), true red, navy, cool grays, icy blues. Neutral skin tones can wear both warm and cool colors—experiment to see what makes you feel confident.
Building a cohesive color palette: Choose 2-3 accent colors that work together and with your neutral foundation. For example: navy (neutral) + coral + cream, or gray (neutral) + forest green + burgundy, or black (neutral) + cobalt blue + blush pink. This limited palette ensures all your statement pieces work together, creating mix-and-match flexibility.
Avoiding colors that photograph poorly: Very bright neon colors can overwhelm in photos and reflect unflattering color casts onto skin. Pure white can blow out in bright lighting (off-white and cream are safer). Very dark colors (deep purple, dark brown) can photograph as black and lose detail. Test colors in natural light and with your phone camera before committing to statement pieces.
Statement Piece Options
Statement pieces add personality without requiring a complete wardrobe overhaul. Choose pieces that align with your style and photo needs:
Colored blazer or cardigan: A blazer or cardigan in one of your signature colors instantly elevates neutral outfits. A coral blazer over a white tee and jeans, a forest green cardigan over a gray dress, a cobalt blue blazer over black pants—these combinations create visual interest while remaining professional and polished.
Patterned shirt or blouse: If you want pattern, choose large-scale, simple designs. A shirt with wide stripes, large florals, or bold geometric shapes adds visual interest without overwhelming. Wear patterned pieces with neutral bottoms and minimal accessories to keep the focus balanced.
Bold-colored dress or jumpsuit: A dress or jumpsuit in a signature color becomes a go-to piece for social media content, personal branding photos, and situations where you want to stand out. Choose a style that flatters your body type and a color that makes you feel confident.
Textured sweater or knit: Texture adds dimension to photos without requiring bold colors or patterns. A cable-knit sweater, a ribbed turtleneck, or a chunky cardigan in a neutral or signature color creates visual interest and works across seasons.
How to choose based on your brand and style: If your brand is bold and energetic, lean into bright colors and statement pieces. If your brand is minimalist and modern, choose subtle textures and muted tones. If your brand is warm and approachable, choose soft colors and comfortable fabrics. Your statement pieces should feel like an authentic extension of your style, not a costume.
> Want to perfect your photo-ready wardrobe with AI-enhanced images? Glowup's AI platform helps you look your best in every photo, no matter what you're wearing. Transform good photos into stunning professional images in seconds.
Accessories That Elevate Your Photos
Accessories add personality, visual interest, and polish to photos without requiring wardrobe investment. Strategic accessory choices elevate simple outfits and create variety across multiple shots.
Minimal jewelry: Simple, classic jewelry enhances photos without distraction. Small stud earrings, a delicate necklace, a simple bracelet, or a classic watch add polish without overwhelming. Avoid large, dangly earrings that create movement and distraction, statement necklaces that compete with your face, or multiple rings that draw attention to hands. In photos, less is more—choose one or two pieces that enhance rather than dominate.
Watches and timepieces: A classic watch communicates professionalism and attention to detail. Choose simple, timeless styles over trendy smartwatches or overly sporty designs. A leather or metal band watch in silver, gold, or rose gold works across contexts and adds a subtle touch of sophistication.
Scarves and neckwear: A scarf in a signature color or simple pattern adds visual interest to neutral outfits and creates variety from the same base pieces. A silk scarf tied at the neck elevates a simple tee, a lightweight scarf draped over shoulders adds color to a blazer, a patterned scarf adds personality to an all-neutral outfit. Choose scarves in your color palette for maximum versatility.
Belts: For full-body photos, a belt defines your waist and creates proportional silhouette. A simple leather belt in brown or black works with jeans and tailored pants. A statement belt in a signature color adds visual interest to dresses or high-waisted pants. Ensure the belt fits properly—not too tight, not too loose—and complements rather than competes with your outfit.
Shoes for full-body photos: If your photos include your feet, shoes matter. Choose classic, clean styles that don't distract—simple sneakers (white or neutral), loafers, ankle boots, classic heels, or dress shoes. Avoid overly trendy styles, bright colors (unless intentional), or worn, dirty shoes. Shoes should complement your outfit and look intentional, not accidental.
What NOT to accessorize with: Avoid logos and branding (unless intentional product placement), busy patterns that create visual noise, trendy pieces that will date your photos quickly, anything that creates glare or reflection (highly reflective jewelry, mirrored sunglasses), and over-accessorizing (wearing too many pieces at once creates clutter and distraction).
Fabrics and Textures That Photograph Well
Beyond color and style, the fabrics and textures you choose dramatically affect how clothing photographs. Understanding how different materials behave on camera helps you select pieces that look professional and polished.
Cotton: the reliable workhorse: Cotton is the most reliable fabric for photography. It photographs true to color, holds its shape, doesn't create unwanted shine, and works in all lighting conditions. Cotton button-downs, tees, and casual dresses are photo wardrobe staples. Choose quality cotton with some weight and structure—thin, cheap cotton looks flimsy in photos.
Linen: texture with character: Linen has natural texture and wrinkles that create casual, authentic looks. Rather than fighting linen's tendency to wrinkle, embrace it—the texture adds visual interest and communicates relaxed confidence. Linen works beautifully for lifestyle content, creative industries, and warm-weather photos. Choose linen in neutral or muted colors for maximum versatility.
Wool and knits: adding dimension: Wool sweaters, cardigans, and knits add texture and dimension that prevent flat, boring photos. The texture creates visual interest without distraction, and wool's natural drape photographs beautifully. Choose fitted or semi-fitted knits rather than oversized styles that add bulk. Merino wool is particularly photo-friendly—soft, drapey, and available in beautiful colors.
Silk and satin: when to use (and when to avoid): Silk and satin create elegant, elevated looks but can produce unwanted shine in certain lighting. Use silk and satin for professional headshots and controlled lighting situations where you can manage reflections. Avoid them for outdoor photos in bright sunlight or situations with harsh lighting. If you choose silk or satin, opt for matte finishes over high-shine versions.
Denim: always appropriate in the right wash: Denim is universally appropriate and photographs well in medium to dark washes. Dark denim (black, dark indigo, charcoal) is most versatile and professional. Light-wash denim can look washed out in photos and feels more casual. Avoid distressed denim with excessive rips or fading—it photographs as messy rather than stylish.
Fabrics to avoid: Shiny synthetic fabrics create unflattering reflections and look cheap in photos. Very thin fabrics can be transparent or cling unflattering. Fabrics with excessive texture (thick corduroy, heavy fleece) add visual bulk. Cheap materials with poor drape look obviously inexpensive on camera. Invest in quality fabrics that photograph well rather than cheap pieces that undermine your image.
Texture layering for visual interest: Combining different textures in one outfit creates depth and dimension. Examples: smooth cotton shirt under textured knit cardigan, silk blouse with denim jacket, linen pants with cotton tee. Texture contrast prevents flat, one-dimensional looks while maintaining cohesive, intentional aesthetics.
Building Outfits for Different Photo Types
Different photo purposes require different outfit approaches. Understanding how to style your wardrobe pieces for specific photo types ensures you're always appropriately dressed.
Professional Headshots and LinkedIn Photos
Professional headshots require polished, credible styling that communicates competence and approachability. The outfit formula: neutral base + structured layer.
Examples: White button-down + navy blazer, gray tee + black blazer, light blue shirt + charcoal blazer. These combinations are professional without being stuffy, polished without being unapproachable.
Neckline considerations for headshots: Since headshots are typically shoulders-up, necklines matter significantly. V-necks and open collars elongate the neck and create flattering lines. Crew necks work but can feel boxy—balance with a blazer or jacket. Avoid high turtlenecks (unless that's your signature style) and very low necklines (unprofessional for most contexts).
Color choices for credibility and approachability: Navy, gray, and white communicate professionalism and credibility. Adding one accent color (a colored shirt under a neutral blazer, a subtle scarf) adds personality and approachability. Avoid all-black (can feel harsh) and very bright colors (can overwhelm in headshots).
Social Media and Personal Branding Content
Social media and personal branding photos allow more creativity and personality while maintaining intentionality. The outfit formula: neutral base + color or texture.
Examples: Dark jeans + colored sweater, white tee + patterned blazer, neutral dress + statement jewelry, black pants + textured cardigan. These combinations feel authentic and personal while looking polished and intentional.
Balancing personality with professionalism: Your social media content should reflect your authentic style while maintaining the professionalism appropriate to your industry and brand. Creative professionals can lean into bold colors and unique pieces. Corporate professionals should stay closer to business casual with subtle personality touches.
Creating visual consistency across content: Use your signature colors and style consistently across social media content. This doesn't mean wearing the same outfit repeatedly—it means creating a recognizable aesthetic through color palette, styling approach, and overall vibe. Your photo-ready wardrobe's cohesive color palette naturally creates this consistency.
Team Photos and Business Marketing
Team photos and business marketing materials require coordinated, professional styling that looks polished without being overly formal. The outfit formula: business casual with cohesive colors.
Coordinating without matching: For team photos, coordinate color palette and formality level without everyone wearing identical outfits. If the team agrees on "business casual with navy and gray," everyone can interpret that within their personal style while creating visual cohesion.
Examples: Dark jeans + button-down, blazer + neutral pants, dress + cardigan, tailored pants + quality tee. These combinations are professional and polished while remaining approachable and modern.
Looking polished but approachable: Business marketing photos should communicate professionalism and credibility while remaining warm and approachable. Avoid overly stiff corporate styling (all suits, all the time) in favor of smart casual that feels current and accessible.
Lifestyle and Casual Content
Lifestyle content captures authentic moments and activities, styled intentionally but appearing natural and candid. The outfit formula: comfortable pieces that still look intentional.
Examples: Fitted tee + jeans, casual dress, sweater + pants, button-down + casual bottoms. These combinations are comfortable and authentic while avoiding the "just rolled out of bed" look.
Avoiding "too casual": There's a difference between casual and sloppy. Avoid loungewear (sweatpants, pajamas), athletic wear (unless you're specifically creating fitness content), and anything wrinkled, stained, or ill-fitting. Casual lifestyle content should look effortlessly put-together, even though it requires intentional styling.
Authenticity vs. sloppiness: The goal is authentic, relatable content that still looks polished and intentional. Your outfit should feel like something you'd actually wear in that context, not a costume, but it should be the best version of that outfit—clean, fitted, coordinated, and photo-ready.
Mix-and-Match: Creating 50+ Outfits from 15 Pieces
The power of a photo-ready wardrobe lies in versatility. With strategic pieces that work together, you create exponential outfit possibilities from minimal items.
The math of versatile wardrobes: If you have 5 tops, 3 bottoms, and 2 layers, you can create 30 outfit combinations (5 x 3 x 2). Add accessories and styling variations (tucked vs. untucked, sleeves rolled vs. down, different shoes), and you easily surpass 50 distinct looks.
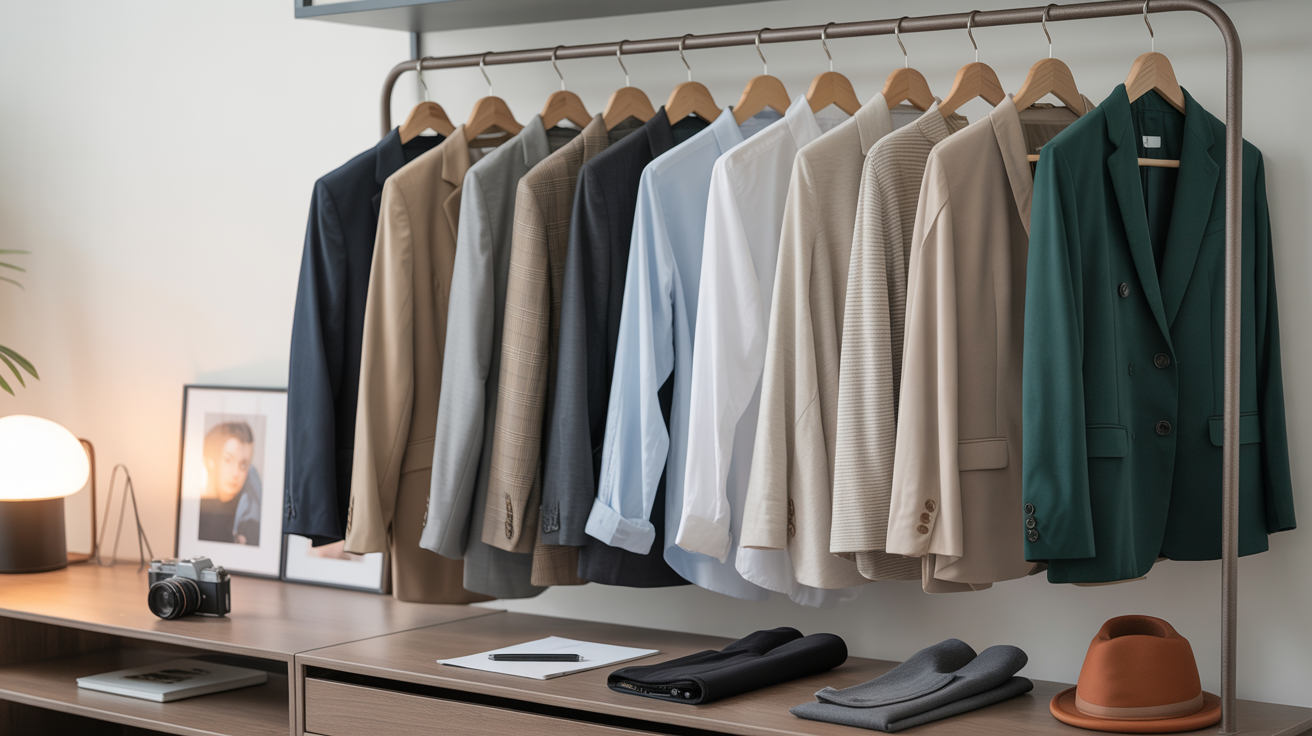
Sample wardrobe breakdown (15 pieces):
- Tops: white button-down, black tee, gray tee, navy tee, colored sweater
- Bottoms: dark jeans, black tailored pants, neutral dress
- Layers: navy blazer, neutral cardigan
- Accessories: simple watch, neutral scarf, minimal jewelry, belt, classic shoes
From these 15 pieces, you can create:
1. White shirt + dark jeans + navy blazer (professional headshot)
2. Gray tee + black pants + navy blazer (smart casual professional)
3. Black tee + dark jeans + neutral cardigan (casual social media)
4. Colored sweater + black pants (personal branding)
5. White shirt + dark jeans + neutral scarf (lifestyle content)
6. Navy tee + dark jeans + belt (casual professional)
7. Neutral dress + navy blazer (business meeting)
8. Neutral dress + neutral cardigan (approachable professional)
9. Neutral dress alone + statement jewelry (social media)
10. White shirt + black pants (classic professional)
And that's just 10 combinations from 15 pieces—you can see how quickly options multiply.
Seasonal adaptations: Layer for versatility across seasons. In warm weather, wear tees and dresses alone. In cool weather, add blazers, cardigans, and scarves. The same base pieces work year-round with strategic layering.
How to plan outfits in advance: Before photo sessions, lay out 2-3 complete outfit options including accessories. Try them on, photograph them in natural light, and assess what works. This advance planning eliminates day-of stress and ensures you have backup options if something doesn't work as expected.
Budget Considerations: Where to Invest vs. Save
Building a photo-ready wardrobe doesn't require unlimited budget. Strategic investment in key pieces and smart saving on others creates a high-quality wardrobe at reasonable cost.
Investment pieces worth the cost: Blazer (a well-fitted blazer lasts years and elevates everything), quality jeans (good denim is worth the investment), classic shoes (quality shoes last and photograph well), white button-down (a perfect white shirt is endlessly versatile). These pieces are worn frequently, photographed often, and last for years—invest in quality.
Where to save: Basic tees (mid-range tees work as well as luxury versions), trendy accent pieces (if a color or style is trendy, it may not last—buy affordable versions), accessories (you can find beautiful scarves, jewelry, and belts at all price points). Save on pieces that are less visible in photos or that you'll replace more frequently.
Cost-per-wear analysis: A $200 blazer worn 50 times costs $4 per wear. A $50 trendy piece worn twice costs $25 per wear. When building your photo wardrobe, consider cost-per-wear rather than upfront cost. Quality pieces that serve multiple purposes and last for years are better investments than cheap pieces that wear out or go unworn.
Affordable brands for photo-ready basics: Everlane (quality basics, transparent pricing), Uniqlo (affordable, well-made essentials), J.Crew Factory (professional pieces at accessible prices), Banana Republic (classic professional wardrobe), COS (minimalist, quality pieces), & Other Stories (unique pieces at mid-range prices). These brands offer quality that photographs well without luxury price tags.
Thrifting and secondhand for quality pieces: Thrift stores, consignment shops, and online secondhand platforms (Poshmark, ThredUp, Depop) offer quality pieces at fraction of retail cost. Look for natural fabrics, classic styles, and quality construction. A secondhand $300 blazer for $50 is an incredible investment.
Tailoring: the secret to expensive-looking photos: A $100 blazer that fits perfectly photographs better than a $500 blazer that doesn't. Budget $20-50 for tailoring key pieces—hemming pants, taking in a blazer, adjusting sleeve length. Proper fit is the difference between looking polished and looking sloppy, regardless of what you spent.
Maintaining Your Photo-Ready Wardrobe
A photo-ready wardrobe only works if pieces are actually photo-ready when you need them. Proper maintenance ensures your investment lasts and performs.
Proper care for longevity: Follow care instructions—wash delicate fabrics gently, dry clean when recommended, air dry knits to prevent shrinking. Store pieces properly—hang blazers and button-downs, fold knits to prevent stretching, use shoe trees for leather shoes. Proper care extends the life of your pieces significantly.
Keeping pieces photo-ready: Address stains immediately (the longer they sit, the harder to remove), repair minor issues promptly (loose buttons, small tears, fallen hems), and steam or press pieces before photo sessions. Keep a lint roller, stain remover pen, and portable steamer accessible for quick fixes.
When to replace vs. refresh: Replace pieces when they're worn out (fabric pilling, fading, irreparable damage) or no longer fit. Refresh pieces when they're still quality but need updating—a new belt, different styling, or pairing with new pieces can make old favorites feel fresh.
Seasonal rotation and storage: Rotate seasonal pieces to keep your closet manageable. Store off-season items properly (clean, in breathable garment bags or containers) to prevent damage. This rotation also helps you rediscover pieces and create fresh combinations.
Pre-photo prep checklist: Before any photo session, check your outfit: steam or press to remove wrinkles, lint roll to remove pet hair and dust, check for stains or damage, ensure proper fit (buttons close, zippers work, nothing too tight), and try on complete outfit including accessories and shoes. This 10-minute prep prevents photo-day disasters.
Common Photo Wardrobe Mistakes to Avoid
Even with the best intentions, certain mistakes can undermine your photo wardrobe. Avoiding these common pitfalls ensures your photos look professional and intentional.
Buying trendy pieces that date quickly: Trendy colors, cuts, and styles look current now but date your photos quickly. A photo taken in 2026 shouldn't look obviously "2026" in 2028. Choose classic styles and timeless pieces for your photo wardrobe foundation, saving trendy pieces for social media content that's meant to be timely.
Ignoring fit: Ill-fitting clothing is the fastest way to look unprofessional in photos. Too tight creates unflattering lines and looks uncomfortable. Too loose looks sloppy and adds visual bulk. Proper fit—fitted but comfortable, showing your shape without clinging—is non-negotiable for photo-ready pieces.
Wearing busy patterns or logos: Small, intricate patterns create visual noise and distract from your face. Logos and branding (unless intentional) look unprofessional and date photos. If you want pattern, choose large-scale, simple designs. Otherwise, stick to solids and subtle textures.
Choosing colors that clash with your skin tone: Colors that don't flatter your skin tone make you look washed out, tired, or sallow. Test colors in natural light and with your phone camera before committing. If a color doesn't make you look healthy and vibrant, don't include it in your photo wardrobe.
Over-accessorizing: Too many accessories create visual clutter and distract from your face. In photos, less is more. Choose one or two accessories that enhance your outfit, not five that compete for attention.
Wearing wrinkled or poorly maintained clothing: Wrinkles, stains, pilling, and general wear look sloppy in photos. The camera captures details the eye might miss. Ensure every piece in your photo wardrobe is clean, pressed, and well-maintained before photo sessions.
Forgetting about the bottom half: Even if you're planning headshots, photographers often take full-body shots for variety. Wearing professional tops with sweatpants or pajama bottoms is a rookie mistake. Always dress completely for photo sessions—you never know when you'll need a full-body shot.
Wearing the same outfit in every photo: While consistency is good, wearing identical outfits in every photo looks lazy and one-dimensional. Use your photo-ready wardrobe to create variety—different combinations, different styling, different accessories—while maintaining visual consistency through color palette and style.
Adapting Your Wardrobe for Different Industries and Contexts
Different industries and professional contexts have different visual expectations. Adapt your photo-ready wardrobe to align with your field while maintaining your personal style.
Corporate and finance: Conservative, polished choices communicate credibility and professionalism. Lean toward tailored pants over jeans, blazers over cardigans, button-downs over tees. Stick to classic colors (navy, gray, white, black) with minimal accent colors. The goal is polished, authoritative, and trustworthy.
Creative industries: More color and personality communicate creativity and innovation. You have flexibility for bold colors, unique pieces, and personal style expression. Balance creativity with professionalism—interesting doesn't mean sloppy. Use your statement pieces and signature colors to showcase personality.
Tech and startups: Smart casual, modern styling communicates innovation and approachability. Think quality tees with blazers, dark jeans with button-downs, minimal accessories, and clean lines. The goal is professional but not stuffy, current but not trendy.
Service industries: Approachable, professional styling builds trust and connection. Choose colors and styles that feel warm and accessible—soft colors, open necklines, friendly styling. Avoid overly formal or intimidating looks. The goal is competent and trustworthy but approachable.
Small business owners: Balance brand and professionalism. Your photos should reflect your business's personality while maintaining credibility. A boutique owner might lean more creative and colorful, while a consultant might lean more classic and professional. Align your photo wardrobe with your brand identity.
Content creators: Personality-driven, on-brand styling creates recognizable, engaging content. Your photo wardrobe should reflect your content niche and personal brand. Consistency in color palette and style helps followers recognize your content instantly. Balance authenticity with intentionality.
> Ready to build your photo-ready wardrobe and create stunning images? Sign up for Glowup and transform every photo into professional-quality content. Perfect your images with AI enhancement that makes you look your best, every time.
Your Photo-Ready Wardrobe Action Plan
You now have comprehensive knowledge about building a photo-ready wardrobe. Here's your actionable plan to implement this knowledge.
Step 1: Audit your current wardrobe: Go through your closet and identify pieces that work for photos. Pull out items that fit well, photograph well, and align with the essential pieces outlined in this guide. You likely already own some photo-ready pieces—identify them and build from there.
Step 2: Identify gaps: Based on your audit, determine which essential pieces you're missing. Do you need a white button-down? A navy blazer? Quality dark jeans? A neutral dress? Make a list of gaps, prioritizing pieces that will have the most impact and versatility.
Step 3: Create a shopping list: Prioritize your gaps by need and budget. If you have professional headshots scheduled, prioritize pieces for that context. If you create daily social media content, prioritize versatile casual pieces. Don't try to buy everything at once—strategic, thoughtful purchases build better wardrobes than rushed shopping sprees.
Step 4: Invest strategically: Start with one or two key pieces and build from there. If budget is limited, begin with the most versatile items—a white button-down and dark jeans, for example—and add pieces over time. Quality over quantity always wins for photo wardrobes.
Step 5: Practice outfit combinations: Before you need photos, experiment with outfit combinations. Lay out complete outfits, try them on, photograph them in natural light, and assess what works. This practice eliminates stress when you actually need photos and helps you discover new combinations.
Step 6: Maintain and care for your pieces: Implement the maintenance practices outlined in this guide. Keep pieces clean, pressed, and repaired. Store them properly. Treat your photo wardrobe as an investment that requires care to perform.
Step 7: Schedule regular wardrobe reviews: Every season, review your photo wardrobe. What's working? What needs replacing? What gaps have emerged? Are your pieces still aligned with your brand and needs? Regular reviews keep your wardrobe current and functional.
Conclusion
Building a photo-ready wardrobe isn't about owning hundreds of pieces or spending thousands of dollars. It's about strategic selection of 10-15 versatile, high-quality items that work together, serve multiple purposes, and ensure you're always prepared when photo opportunities arise.
The freedom that comes from being photo-ready is invaluable. No more last-minute shopping trips, no more wardrobe anxiety, no more closets full of single-use items. Instead, you have a curated collection of pieces you love, that work together effortlessly, and that make you look and feel confident in every photo.
The cost-effectiveness of this approach compounds over time. Rather than spending $50-100 every time you need photos, you invest once in quality pieces that serve you for years. The math is simple: a $200 blazer worn in 50 photo sessions costs $4 per session. That's better than any reactive purchase.
Most importantly, a photo-ready wardrobe gives you confidence. You know you can handle any photo opportunity—professional headshots, team photos, social media content, business marketing, personal branding shoots—without stress or scrambling. This confidence shows in your photos, creating images where you look relaxed, authentic, and genuinely yourself.
Start building your photo-ready wardrobe today. You don't need to buy everything at once. Start with one essential piece—a white button-down, a navy blazer, quality dark jeans—and build from there. Each strategic addition multiplies your outfit possibilities and brings you closer to true photo readiness.
Great photos start with great preparation, and your wardrobe is the foundation. With the knowledge from this guide and strategic implementation, you'll create a photo-ready wardrobe that serves you for years, saves you money, and ensures you always look your best when it matters most.
Your photo-ready wardrobe awaits. Start building it today.