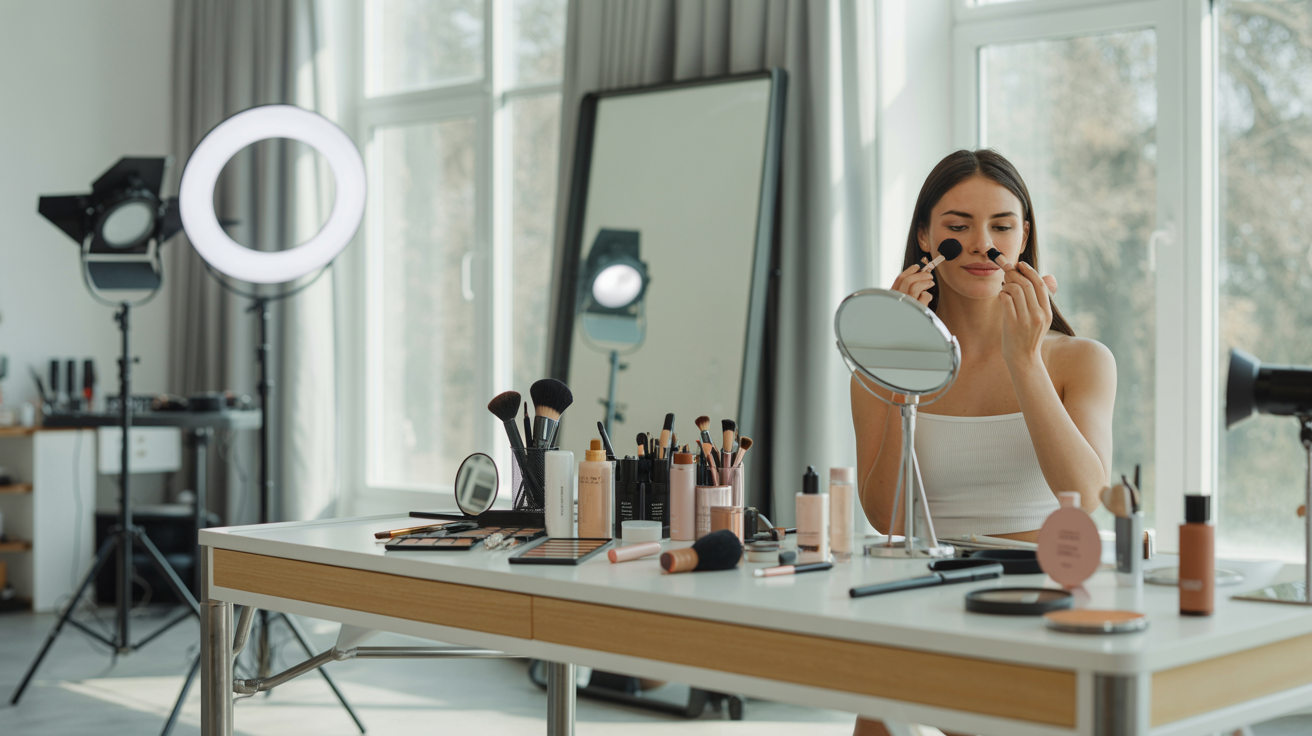
You've seen them—those photos that stop you mid-scroll. The portrait that draws you in. The landscape that takes your breath away. The product shot that makes you want to buy immediately. The professional headshot that radiates confidence. What separates these captivating images from the thousands of forgettable snapshots you scroll past every day? It's not a $3,000 camera. It's not professional lighting equipment. It's not even Photoshop magic. The secret is composition—the art of arranging elements within your frame to create visual impact.
Most people take photos by pointing their camera at a subject and pressing the shutter button, hoping for the best. They wonder why their photos look "off" compared to professional images, assuming it's because they don't have expensive equipment or formal training. But here's the truth that professional photographers know: composition matters far more than your camera. A well-composed smartphone photo will always outperform a poorly composed DSLR image. The difference between amateur snapshots and professional-looking photos isn't what you shoot with—it's how you compose your shot.
This comprehensive guide teaches you the fundamental composition rules that professional photographers use instinctively. Whether you're taking LinkedIn headshots for personal branding, creating social media content, photographing products for your small business, or simply want better photos for any purpose, these principles apply universally. They work for portraits, landscapes, products, architecture, and everything in between. They work with smartphones, DSLRs, and any camera. Best of all, they're completely learnable—no artistic talent or photography degree required. Once you understand these rules, you'll see immediate improvement in every photo you take. You'll develop an eye for composition that transforms ordinary moments into compelling images. Let's dive into the essential composition rules every photographer should know.
Why Composition Matters More Than Your Camera
The photography industry has convinced us that better equipment equals better photos. Camera manufacturers advertise megapixels, lens quality, and sensor size as if these technical specifications are what create stunning images. While equipment quality does matter at professional levels, it's far less important than most beginners believe. The uncomfortable truth is that composition—how you arrange elements within your frame—has a dramatically larger impact on image quality than the camera you use.
Consider this: A professional photographer can create a compelling, publishable image with a basic smartphone by applying strong composition principles. Meanwhile, an amateur with a $5,000 DSLR and professional lenses will produce mediocre results if they don't understand composition. The camera is just a tool. Composition is the skill that makes the tool effective. It's the difference between someone who owns expensive kitchen knives and someone who knows how to cook—the equipment matters, but the knowledge and technique matter far more.
Composition is how you guide your viewer's eye through your image. When you look at a photo, your eye doesn't wander randomly—it follows a path determined by the photographer's compositional choices. Strong composition creates a clear visual hierarchy that tells viewers where to look first, where to look next, and what the focal point is. It creates balance, harmony, and visual interest that keeps viewers engaged. Weak composition creates confusion, with no clear subject or visual path, causing viewers to quickly lose interest and scroll past.
Professional photographers follow composition rules instinctively because they've practiced them so extensively that they've become second nature. When a pro photographer approaches a scene, they're not thinking "I need to apply the rule of thirds here." They're automatically seeing the scene in terms of lines, balance, framing, and visual weight. This instinctive compositional awareness is what separates professional work from amateur snapshots. The good news? This awareness is completely learnable through understanding the rules and practicing them deliberately until they become automatic.
The impact of composition is immediately visible when you compare the same subject photographed with different compositional approaches. A portrait centered in the frame with a cluttered background looks amateur. The exact same person photographed using the rule of thirds with a clean background and intentional framing looks professional. A product shot straight-on with no context looks like a catalog photo. The same product photographed with leading lines, negative space, and thoughtful framing becomes an aspirational lifestyle image. Same subject, same lighting, same camera—completely different impact based solely on composition.
The Rule of Thirds: The Foundation of Great Composition
The rule of thirds is the single most important composition principle you can learn. It's the foundation that underlies most professional photography, and it's simple enough to apply immediately. Here's how it works: Imagine dividing your frame into nine equal sections using two horizontal lines and two vertical lines, creating a 3x3 grid. The rule of thirds states that you should position your most important elements along these lines or at the four points where the lines intersect, rather than centering them in the frame.
Why does this work so much better than centering your subject? Centered compositions feel static and predictable. Your eye goes straight to the center, sees the subject, and has nowhere else to go. There's no visual journey, no discovery, no interest. Off-center compositions following the rule of thirds create dynamic tension and visual interest. Your eye is drawn to the subject positioned on a grid line or intersection point, but then it explores the rest of the frame, creating a more engaging viewing experience. This slight asymmetry feels more natural and visually pleasing than perfect symmetry.
Applying the rule of thirds is straightforward once you enable the grid overlay on your camera. Every smartphone camera has this feature in settings—it displays the 3x3 grid on your screen while you're composing your shot. With the grid visible, simply position your key elements along the lines or at the intersection points. For portraits, place the subject's eyes on the upper horizontal line, roughly at one of the upper intersection points. This creates a natural, engaging composition that draws viewers into the subject's gaze. For landscapes, position the horizon along either the upper or lower horizontal line rather than cutting the frame in half. If the sky is interesting, place the horizon on the lower third to emphasize the sky. If the foreground is more compelling, place the horizon on the upper third.
For product photography, position your product at one of the four intersection points rather than dead center. This creates visual interest and leaves room for negative space that makes the product feel premium and uncluttered. For social media content, position yourself or your subject on one of the vertical lines, leaving space on the other side for text overlay or simply for visual breathing room. The rule of thirds works for virtually any subject or photo type because it creates natural, balanced compositions that feel professional.
When should you break the rule of thirds? Like all composition rules, it's meant to be understood and then broken intentionally for specific effects. Centered compositions work beautifully for symmetrical subjects—architectural shots of buildings, formal portraits, patterns, and reflections all benefit from centered framing. Centering can also create impact and emphasis when you want to make a bold, direct statement. The key is breaking the rule intentionally for a specific purpose, not accidentally because you didn't think about composition.
Practice exercise: Take the same photo twice—once with your subject centered, once with your subject positioned according to the rule of thirds. Compare the results. You'll immediately see how the rule of thirds version feels more dynamic, professional, and visually interesting. This simple before-and-after comparison will train your eye to see the difference and naturally compose using the rule of thirds.
> Want professional-quality photos without mastering every technique? Glowup's AI creates stunning, well-composed images for personal branding, business, and social media. Try it free at https://glowuplab.app/
Leading Lines: Guide Your Viewer's Eye
Leading lines are one of the most powerful composition tools for creating depth, movement, and visual interest in your photos. These are lines within your image—either natural or man-made—that draw the viewer's eye through the frame, typically toward your main subject or deeper into the scene. Leading lines create a visual path that guides viewers exactly where you want them to look, transforming a static two-dimensional image into a dynamic visual journey.
Leading lines can be anything that creates a line in your image: roads, pathways, sidewalks, railroad tracks, rivers, fences, walls, hallways, staircases, rows of trees, architectural elements like columns or beams, shadows, or even implied lines created by the direction people are looking or pointing. The key is recognizing these lines in your environment and positioning yourself so they lead toward your subject or into your frame in a compelling way.
How to use leading lines effectively: Position yourself so the lines start in the foreground (bottom or sides of your frame) and lead toward your subject or into the background. Diagonal lines are particularly dynamic and create a sense of movement and energy. Horizontal lines create calm and stability. Vertical lines create strength and power. Curved lines create grace and flow. The direction and type of line you choose affects the mood and energy of your image.
For business interior photography, use hallways, rows of tables, or architectural elements to lead the eye through your space. A photo of a restaurant hallway leading to the dining area creates depth and invites viewers to imagine walking through your space. For outdoor portraits, use pathways, roads, or natural elements like fallen logs or streams to lead toward your subject. This creates context and environmental storytelling while keeping focus on the person. For product photography, use table edges, shadows, or arranged elements to create lines that lead to your product, drawing attention exactly where you want it.
Leading lines work exceptionally well for creating depth in images. A road stretching into the distance, a hallway receding toward a vanishing point, or a fence line extending through a landscape all create a strong sense of three-dimensional depth in your two-dimensional photo. This depth makes images feel immersive and draws viewers into the scene rather than keeping them at a distance as passive observers.
Real estate and architectural photography rely heavily on leading lines. Photographing down a hallway, along a row of windows, or using the lines of a building's facade creates professional, compelling images that show space and dimension. For social media content creators, leading lines add visual interest and professionalism to what might otherwise be simple snapshots. A photo of you walking down a tree-lined path is far more compelling than a photo of you standing against a blank wall, even though both show you clearly.
The beauty of leading lines is that once you start looking for them, you'll see them everywhere. Every environment has potential leading lines—you just need to train your eye to recognize them and position yourself to use them effectively. Practice by deliberately seeking out leading lines in your environment and experimenting with different angles and positions to see how they change the impact of your composition.
Framing: Create Focus and Context
Framing is the technique of using elements within your scene to create a "frame within a frame" around your subject. This compositional tool draws attention to your subject, adds depth and context to your image, and creates a more sophisticated, layered composition that feels professional and intentional. Natural frames exist everywhere once you start looking for them—you just need to recognize and use them.
Common framing elements include doorways, windows, arches, tree branches, architectural elements like columns or beams, mirrors, fences, and even people's arms or hands. The key is positioning yourself so these elements surround or partially surround your subject, creating a visual frame that draws the eye directly to what you want viewers to see. The frame doesn't need to completely encircle your subject—even partial framing on one or two sides creates the effect.
Why framing works so effectively: It creates a clear focal point by literally pointing to your subject. When viewers see a frame within the image, their eye is naturally drawn to what's inside that frame. Framing also adds depth by creating distinct foreground and background layers. The framing element exists in the foreground, your subject in the middle ground, and the background beyond, creating a three-dimensional feel. Additionally, framing provides context and environmental storytelling without distracting from your subject. A person framed by a doorway tells you they're indoors. A product framed by hands tells you about scale and use. A landscape framed by tree branches tells you about the environment.
For professional headshots and personal branding photos, framing can be subtle but effective. Photograph someone through a doorway or window to add architectural interest and context. Use natural elements like tree branches to frame an outdoor portrait, creating a organic, environmental feel. For product photography, frame your product with hands holding it, other products surrounding it, or environmental elements that provide context about use or scale. This transforms a simple product shot into a lifestyle image that tells a story.
Business photography benefits enormously from framing. Photograph your storefront through the frame of the front door or window. Show your team framed by architectural elements of your space. Capture your workspace framed by equipment or tools of your trade. These framed compositions feel more professional and intentional than simple straight-on shots. For social media content, framing adds visual interest and sophistication. A selfie framed by a mirror, a landscape framed by a cave opening, or a food photo framed by the table setting all create more engaging compositions than unframed alternatives.
The key to effective framing is ensuring the frame enhances rather than distracts. The framing element should be less visually prominent than your subject—typically darker, less detailed, or slightly out of focus. If the frame is too bright, too detailed, or too visually interesting, it competes with your subject rather than highlighting it. Experiment with different framing elements and positions to find what works best for your specific subject and message.
Symmetry and Patterns: Order and Visual Harmony
Symmetry and patterns create a sense of order, harmony, and visual satisfaction that appeals to our innate human preference for balance and organization. While the rule of thirds emphasizes asymmetry, symmetrical compositions have their own powerful impact, particularly for subjects that are naturally symmetrical or when you want to convey professionalism, stability, and calm.
Symmetry in photography means creating balance where the left and right sides of your image mirror each other, or where top and bottom are balanced. This can be perfect symmetry (exact mirror image) or approximate symmetry (balanced but not identical). Symmetrical compositions work beautifully for architecture, formal portraits, product photography, and any subject where you want to emphasize order and professionalism. A symmetrical photo of a building facade, a centered portrait with balanced elements on both sides, or a product shot with symmetrical arrangement all create a calm, professional, trustworthy feeling.
When to use symmetry: For professional branding and LinkedIn headshots, symmetrical compositions convey competence and stability. For product photography, symmetrical arrangements create a premium, organized aesthetic perfect for ecommerce. For architectural and interior photography, symmetry emphasizes design and structure. For social media content, symmetrical compositions stand out in feeds full of asymmetrical images, creating visual variety and impact.
Patterns take the concept of symmetry further by creating repetition throughout your image. Patterns can be natural (rows of trees, waves on water, flower petals) or man-made (windows on a building, tiles on a floor, products arranged in rows). Our brains find patterns visually satisfying and pleasing. A photo that captures a strong pattern creates instant visual interest and a sense of order.
The power of breaking patterns: While patterns themselves are visually appealing, intentionally disrupting a pattern creates an even stronger focal point. If you photograph a row of identical products with one different product in the middle, the eye is immediately drawn to the disruption. If you capture a pattern of windows with one window lit differently, that becomes your focal point. This technique combines the visual satisfaction of pattern with the attention-grabbing power of disruption, creating highly effective compositions.
For small business photography, patterns and symmetry create professional, polished images. Photograph your products arranged in symmetrical or patterned displays. Capture the pattern of your retail shelving, restaurant seating, or office layout. These compositions communicate organization and professionalism. For personal branding, symmetrical portraits convey stability and trustworthiness, while pattern-based backgrounds add visual interest without distraction.
The key to using symmetry and patterns effectively is recognizing when they serve your message. Symmetry creates calm and order—perfect for professional contexts. Asymmetry creates energy and interest—better for dynamic, creative contexts. Patterns create visual satisfaction—great for showing organization and abundance. Choose the approach that aligns with what you want to communicate.
Negative Space: Less is More
Negative space—the empty or unoccupied space around your subject—is one of the most misunderstood and underutilized composition techniques. Many beginners try to fill every inch of their frame, believing that more content equals a better photo. In reality, negative space is a powerful tool that gives your subject room to breathe, creates a minimalist aesthetic, and paradoxically makes your subject more prominent by isolating it from distractions.
What negative space actually is: It's the area of your image that doesn't contain your main subject. This could be empty sky, a plain wall, a clean surface, water, or any relatively uniform, undetailed area. Negative space doesn't have to be completely empty—it just needs to be visually simple and uncluttered so it doesn't compete with your subject for attention. The space itself becomes an active element of your composition, creating balance and emphasis.
Why negative space matters: It creates visual breathing room that makes your subject feel premium and important rather than cramped and cluttered. It draws the eye directly to your subject by eliminating competing visual elements. It creates a minimalist, modern aesthetic that feels professional and sophisticated. It provides space for text overlay in social media posts, marketing materials, or website headers. And it communicates confidence—you're so sure of your subject's impact that you don't need to fill the frame with distractions.
How much negative space to use depends on your message and medium. For professional headshots and personal branding, moderate negative space creates a polished, professional look without feeling too sparse. For product photography, generous negative space creates a premium, high-end aesthetic perfect for ecommerce and marketing. For social media content, negative space provides room for captions, text overlay, or simply creates a clean, scroll-stopping aesthetic. For minimalist branding, maximum negative space creates a distinctive, modern look.
Common mistakes with negative space: The most frequent error is not using enough—cramming your subject into a cluttered frame with no breathing room. This makes images feel amateur and chaotic. The opposite error is using too much negative space without intention, making your subject feel lost or insignificant. The balance depends on your subject and message, but as a general rule, your subject should occupy roughly one-third to one-half of the frame, with the rest being negative space.
Applications across photo types: For portraits, negative space above and to one side of your subject creates a professional, editorial look. For products, placing your item on a clean surface with plenty of empty space around it creates an aspirational, premium feel. For landscapes, using sky or water as negative space emphasizes your main subject (a tree, building, or person) and creates dramatic impact. For business photography, negative space makes your space, products, or team look organized and professional rather than cluttered and chaotic.
Practice using negative space by deliberately simplifying your compositions. Instead of filling the frame, place your subject in one portion and leave the rest empty. Experiment with different amounts of negative space to see how it changes the feel and impact of your image. You'll quickly develop an intuition for how much space creates the effect you want.
Depth and Layers: Creating Three-Dimensional Photos
Photography is a two-dimensional medium capturing a three-dimensional world. One of the key challenges—and opportunities—in composition is creating a sense of depth that makes your flat images feel three-dimensional and immersive. Depth transforms photos from simple documentation into images that viewers feel they could step into. The technique for creating depth is layering—including distinct foreground, middle ground, and background elements in your composition.
Foreground elements are objects or details in the front of your frame, closest to the camera. These might be flowers, grass, architectural details, or any element that exists between your camera and your main subject. Including foreground elements creates immediate depth by establishing a clear front layer. Middle ground is where your main subject typically lives—the person, product, or focal point of your image. Background is everything behind your subject—the environment, sky, walls, or distant elements.
Why layering creates depth: When your image contains distinct elements at different distances from the camera, your brain interprets this as three-dimensional space. A portrait with a person (middle ground) and a blurred background (background) has some depth. Add a foreground element like a plant or architectural detail, and suddenly the image has three distinct depth layers that create a much stronger sense of dimension and immersion.
Techniques for creating depth through layering: Include foreground elements by getting low and shooting through grass, flowers, or other ground-level details. Use architectural elements like doorways or windows as foreground frames. Position yourself so there are elements at multiple distances—a table in the foreground, your subject in the middle, and a wall or window in the background. Use shallow depth of field (portrait mode on smartphones) to blur the background, which creates separation between layers and emphasizes depth.
For product photography, create depth by including environmental context at different distances. Instead of photographing a product on a plain surface, include foreground elements (perhaps other products or props) and background elements (a wall, window, or environmental context) to create layers. For portraits and personal branding photos, position yourself with some distance from the background, include foreground elements when possible, and use portrait mode to blur the background, creating clear separation between layers.
Business and interior photography benefit enormously from depth and layering. When photographing your space, include foreground elements (a table, plant, or architectural detail), your main subject in the middle ground (seating area, products, or workspace), and background elements (walls, windows, or distant areas of your space). This creates an immersive view that helps potential customers visualize being in your space. For real estate photography, layering is essential—shoot through doorways to include the door frame as foreground, the room as middle ground, and windows or distant rooms as background.
The key to effective layering is ensuring each layer is distinct and contributes to the composition without creating clutter. Foreground elements should typically be less detailed or slightly out of focus so they don't distract from your main subject. Background elements should provide context without competing for attention. Your middle ground subject should be the clear focal point. This hierarchy of visual importance across layers creates depth while maintaining a clear compositional focus.
Balance and Visual Weight: Creating Harmony
Balance in composition isn't about making both sides of your image identical—it's about distributing visual weight so your image feels harmonious and intentional rather than lopsided or awkward. Understanding visual weight and how to balance it is what separates compositions that feel "right" from those that feel "off," even if you can't immediately articulate why.
Visual weight is how much attention an element in your image attracts. Larger objects have more visual weight than smaller ones. Brighter elements have more weight than darker ones. Colorful objects have more weight than neutral ones. High-contrast areas have more weight than low-contrast areas. Objects with faces or eyes have enormous visual weight because humans are hardwired to notice faces. Understanding these factors helps you predict where viewers' eyes will be drawn and how to balance your composition.
Symmetrical balance is the simplest form—equal visual weight on both sides of your frame. This creates a formal, stable, calm feeling. A centered portrait with similar elements on both sides, a symmetrical architectural shot, or a product centered with equal space on both sides all use symmetrical balance. This approach works well for professional, formal, or traditional subjects where you want to convey stability and order.
Asymmetrical balance is more dynamic and interesting—different elements on each side of the frame that balance each other through visual weight rather than identical placement. For example, a large dark object on one side balanced by a smaller bright object on the other side. A person on one side balanced by negative space on the other. A group of small objects on one side balanced by one large object on the other. Asymmetrical balance creates energy and interest while still feeling harmonious and intentional.
How to achieve balance in your compositions: Start by identifying the visual weight of elements in your frame. Where is the heaviest visual weight? If it's all on one side, your composition will feel unbalanced. Add visual weight to the other side by including another element, using negative space intentionally, or repositioning yourself to change the balance. Check your composition by imagining a fulcrum in the center of your frame—would the visual weight balance, or would one side tip down?
For portraits and personal branding photos, balance is often achieved by positioning the subject on one side (following the rule of thirds) and balancing with negative space on the other side. The person has significant visual weight (especially their face and eyes), so they can be balanced by empty space. For product photography, balance might mean positioning your product on one side with complementary products or props on the other, or balancing a single product with generous negative space.
Business photography requires careful attention to balance. When photographing your space, ensure visual weight is distributed throughout the frame rather than concentrated in one area. When photographing products or displays, create balance through arrangement—symmetrical for formal, stable feeling, or asymmetrical for dynamic, interesting feeling. For social media content, balanced compositions feel professional and intentional, while unbalanced compositions feel accidental and amateur.
Common balance mistakes: Placing all visual weight on one side with nothing to balance it creates an awkward, lopsided feeling. Placing your subject dead center with equal empty space on both sides can feel static and boring (though this works for intentionally symmetrical compositions). Ignoring the visual weight of bright spots, colors, or faces in your background can create unintentional imbalance that distracts from your subject.
Common Composition Mistakes and How to Fix Them
Even with knowledge of composition rules, certain mistakes are common among beginners. Recognizing these pitfalls and knowing how to fix them accelerates your improvement and helps you avoid the most obvious amateur errors.
Centering everything is the most common composition mistake. Beginners instinctively place their subject dead center in the frame, creating static, predictable compositions. Fix: Apply the rule of thirds. Position your subject on one of the grid lines or intersection points instead of center. This immediately creates more dynamic, professional-looking compositions. The only time to center intentionally is for symmetrical subjects or when you want to make a bold, direct statement.
Cutting off important elements happens when you crop too tightly or don't pay attention to frame edges. Cutting through joints (elbows, knees, wrists) looks awkward. Cutting off the tops of heads looks amateur. Cutting off important parts of products or text looks careless. Fix: Leave breathing room around your subject. When photographing people, crop at natural breaks (above or below joints, not through them) or include the full body. Check all four edges of your frame before shooting to ensure you're not accidentally cutting off important elements.
Tilted horizons are one of the most obvious signs of amateur photography. A horizon line that's not level looks unprofessional and distracting. Fix: Use your camera's grid overlay to align the horizon with one of the horizontal grid lines. If you miss it while shooting, straighten the horizon in editing—every photo editing app has a straighten/rotate tool. This simple fix makes an enormous difference in how professional your photos look.
Cluttered backgrounds distract from your subject and make compositions feel chaotic. Poles or trees appearing to "grow" from people's heads, busy patterns behind products, or messy environments in business photos all detract from your message. Fix: Before shooting, scan your entire frame, not just your subject. Look specifically at the background. Can you change your angle to simplify it? Can you move your subject to a cleaner background? Can you use a wider aperture (portrait mode) to blur the background? Can you physically clean up or remove distracting elements? A clean background makes your subject stand out and creates a professional look.
Too much empty space is the opposite problem—your subject gets lost in the frame because there's too much negative space without intention. This makes subjects feel insignificant or makes the composition feel incomplete. Fix: Get closer to your subject, either physically or by zooming. Crop tighter in editing. Or, if you want to keep the negative space, ensure it's intentional and balanced—position your subject using the rule of thirds so the space feels purposeful rather than accidental.
Ignoring the background entirely leads to distracting elements you didn't notice while shooting. You were focused on your subject and didn't see the trash can, the unflattering sign, the random person, or the distracting bright spot in the background. Fix: Develop a pre-shot checklist: subject positioned well, background clean and simple, no distracting elements, horizon level, composition balanced. Scan the entire frame systematically before pressing the shutter. This habit prevents most background mistakes.
No clear focal point creates confusion—viewers don't know where to look or what the photo is about. This happens when you try to include too much or don't use composition techniques to create hierarchy. Fix: Identify your main subject before shooting. Use composition rules (rule of thirds, leading lines, framing, negative space) to make that subject the clear focal point. Ensure other elements support rather than compete with your main subject. Every photo should have one clear answer to "What is this photo about?"
> Skip the learning curve and get professional photos instantly. Glowup's AI creates perfectly composed images for any purpose. Get started at https://glowuplab.app/signup
Putting It All Together: Composition Workflow
Understanding individual composition rules is valuable, but the real skill is combining them into a systematic workflow that you apply to every photo. This workflow transforms composition from a random collection of techniques into a repeatable process that consistently produces professional results.
Before shooting checklist: Before you press the shutter button, ask yourself these questions: What is my main subject? Where should it be positioned in the frame (rule of thirds)? What's in the background, and is it clean and simple? Are there leading lines I can use to guide the eye? Are there framing elements I can incorporate? Is there negative space, and is it intentional? Is the composition balanced? Is the horizon level? This mental checklist takes seconds once it becomes habit, but it ensures you're composing intentionally rather than accidentally.
Practice routine for developing your eye: Take the same subject and photograph it multiple ways—centered, rule of thirds, with leading lines, with framing, with different amounts of negative space, symmetrical, asymmetrical. Review all versions and compare them. Which composition is most effective? Why? This deliberate practice trains your eye to see compositional options and understand which techniques work best for different subjects and messages. Do this exercise regularly with different subjects until compositional thinking becomes automatic.
Developing your eye through study: Look at photos you love—whether from professional photographers, social media, magazines, or anywhere else. Don't just appreciate them; analyze them. What composition techniques are being used? Where is the subject positioned? How is the eye guided through the frame? What creates the visual impact? This active analysis trains your brain to recognize effective composition and internalize the principles. Over time, you'll start seeing the world in terms of composition—noticing leading lines, framing opportunities, and balanced compositions everywhere you go.
Breaking rules intentionally: Once you understand composition rules, you can break them for creative effect. Centered compositions can create bold impact. Tilted horizons can create energy and dynamism. Cluttered backgrounds can tell environmental stories. Extreme negative space can create artistic minimalism. The key is breaking rules intentionally for a specific purpose, not accidentally because you didn't think about composition. Understanding the rules gives you the foundation to break them effectively.
Continuous improvement through review: After every photo session, review your images critically. Which compositions work best? Which feel off? What would you do differently? This reflection turns every photo session into a learning opportunity. Over time, you'll notice patterns in what works for you and develop your own compositional style and preferences. Composition is a skill that improves with practice—the more you shoot with intentional composition, the better your eye becomes.
Adapting composition to your purpose: Different photo purposes benefit from different compositional approaches. Professional headshots and LinkedIn photos work well with rule of thirds, clean backgrounds, and balanced compositions. Social media content benefits from negative space for text overlay, eye-catching compositions that stand out in feeds, and variety in compositional approaches. Product photography works well with negative space, clean backgrounds, and compositions that create premium aesthetics. Business photography benefits from leading lines, framing, and compositions that show space and context. Adapt your compositional choices to your specific purpose and audience.
The goal is to make composition second nature—something you do instinctively rather than laboriously. This happens through understanding the principles, practicing them deliberately, and reviewing your results. Over time, you'll develop an eye for composition that makes every photo you take more compelling, professional, and effective.
Conclusion
Composition is the difference between snapshots and photographs, between images people scroll past and images that stop them in their tracks. The rules you've learned in this guide—the rule of thirds, leading lines, framing, symmetry and patterns, negative space, depth and layers, and balance—are the foundation of professional photography. They work for any subject, any camera, and any purpose. They transform ordinary moments into compelling images and elevate your photography from amateur to professional-looking.
The key takeaways to remember: Position subjects using the rule of thirds rather than centering them. Use leading lines to guide viewers' eyes through your images. Incorporate framing elements to add depth and focus. Embrace negative space to give subjects breathing room. Create depth through foreground, middle ground, and background layers. Balance visual weight for harmonious compositions. And always check your entire frame—subject, background, and edges—before shooting.
Your action steps are straightforward: Enable the grid overlay on your smartphone camera today. Practice one composition rule at a time—spend a day focusing on the rule of thirds, then a day on leading lines, then on framing, and so on. Review your photos and compare different compositional approaches to the same subject. Study photos you admire and identify the composition techniques being used. Most importantly, shoot regularly with intentional composition rather than hoping for good results.
Remember that composition is a learnable skill, not an innate talent. Every professional photographer started as a beginner who didn't understand these principles. The difference between them and amateur photographers is that they learned the rules, practiced them deliberately, and developed an eye for composition through repetition and review. You can do the same. With each photo you take using these principles, your compositional eye improves. Your photos become more compelling. Your visual communication becomes more effective.
Whether you're building a personal brand, creating social media content, photographing products for your small business, or simply want better photos for any purpose, composition is the skill that makes the difference. Start applying these principles today, and watch your photography transform from ordinary snapshots into images that captivate, communicate, and convert.