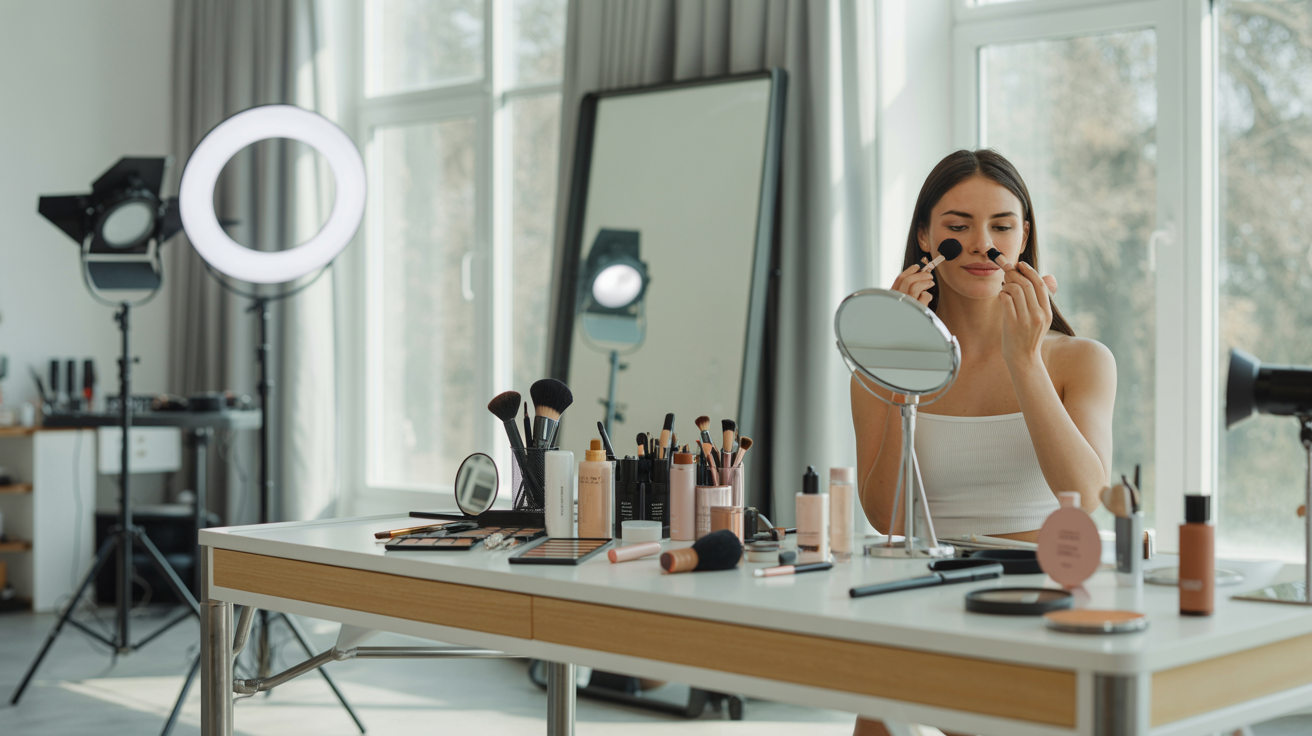
You've seen them—those stunning photos with soft, glowing light that makes everything look effortlessly beautiful. Professional headshots with perfectly lit faces. Product photos that showcase every detail without harsh shadows. Content creator selfies with that coveted "natural glow." You assume they require expensive lighting equipment, a professional studio, or at minimum, a ring light and softbox setup.
Here's the truth that professional photographers don't always advertise: the most beautiful, flattering, professional-looking photos are often created with nothing more than a window. That's right—the windows in your home or workspace are capable of producing lighting quality that rivals thousand-dollar studio setups. Window light is the secret weapon behind countless professional portraits, product photos, and social media content that looks effortlessly polished.
Natural window light creates the soft, diffused, authentic illumination that artificial lighting struggles to replicate. It's free, accessible to everyone, and once you understand how to use it, it transforms your photography immediately—whether you're shooting professional headshots, product photos for your small business, content for social media, or simply want better photos of yourself.
This comprehensive guide will teach you everything you need to know about mastering window light photography. You'll learn how to find the best light in your space, position subjects for flattering illumination, modify and control natural light, troubleshoot common problems, and create professional-quality photos without spending a cent on lighting equipment. Whether you're a content creator, small business owner, professional building your personal brand, or anyone who wants better photos, window light photography is your most powerful tool.
Why Window Light Is Better Than Expensive Lighting Equipment
Before investing hundreds or thousands in lighting gear, understand why window light often produces superior results—and why professional photographers frequently choose it over artificial alternatives.
Soft, flattering quality: Large windows act as massive softboxes, diffusing harsh sunlight into gentle, even illumination that flatters skin tones, minimizes imperfections, and creates beautiful gradients from light to shadow. This soft quality is particularly important for portraits and headshots, where harsh lighting emphasizes texture and creates unflattering shadows. The larger the window, the softer and more flattering the light—a principle that would require enormous (and expensive) modifiers to replicate with artificial lighting.
Natural, authentic appearance: Window light creates images that look natural and authentic rather than artificially lit. The color temperature, quality, and direction of natural light feel familiar and comfortable to viewers because it's how we see the world in real life. Artificial lighting, even when technically correct, often has a "studio" quality that can feel sterile or overly produced. For personal branding, social media content, and authentic business photography, natural light creates connection and relatability.
Free and universally accessible: Every home, office, and workspace has windows. You don't need to purchase, transport, set up, or learn complex equipment. Window light is available to everyone, regardless of budget, making professional-quality photography accessible to small business owners, freelancers, content creators, and individuals who can't justify expensive lighting investments.
Easier learning curve: Mastering artificial lighting requires understanding inverse square law, color temperature, light ratios, and complex multi-light setups. Window light simplifies the learning process—you're working with one light source that behaves predictably. You can focus on positioning, timing, and basic modification rather than technical lighting theory. This accessibility means you can create professional results immediately, even as a complete beginner.
Professional photographers' choice: Many renowned portrait photographers, product photographers, and content creators use window light as their primary or exclusive light source. They choose it not because they can't afford artificial lighting, but because it produces superior results for their aesthetic. If professionals who own thousands of dollars in lighting equipment still prefer window light, that tells you everything about its quality and effectiveness.
Understanding Window Light: The Basics
To master window light photography, you need to understand how natural light behaves when it enters through a window and what factors affect its quality and characteristics.
How window light works: When sunlight enters through a window, the window frame and glass act as a modifier, shaping and diffusing the light. The window essentially becomes your light source—a large, rectangular softbox. The quality of this light depends on several factors: the size of the window, whether sunlight is direct or diffused, the time of day, and what's outside the window (buildings, trees, open sky).
Window direction matters: The direction your window faces dramatically affects the light you receive throughout the day.
- North-facing windows (in the Northern Hemisphere) receive indirect light all day, never getting direct sunlight. This creates consistent, soft, cool-toned light that's ideal for photography requiring even illumination and minimal variation. North light is prized by artists and photographers for its reliability and gentle quality.
- South-facing windows receive the most direct sunlight throughout the day, creating bright, warm light that varies significantly from morning to evening. South windows provide abundant light but require more management (diffusion, timing) to avoid harshness.
- East-facing windows receive direct morning sunlight, creating warm, directional light in the morning that becomes softer and more diffused as the day progresses. Ideal for morning shoots with golden, energizing light.
- West-facing windows receive direct afternoon and evening sunlight, providing dramatic, warm, golden light in the late afternoon and evening. Perfect for that coveted "golden hour" glow without leaving your home.
Direct vs. diffused light: Direct sunlight streaming through a window creates hard, dramatic light with strong shadows and high contrast—beautiful for artistic portraits but challenging for flattering, even illumination. Diffused light (from overcast skies, sheer curtains, or indirect window positions) creates soft, even illumination with gentle shadows—ideal for most photography applications. Understanding this distinction helps you choose the right conditions or modify light appropriately.
Hard light vs. soft light characteristics: Hard light (small, direct source) creates defined shadows, high contrast, and emphasizes texture—dramatic but potentially unflattering. Soft light (large, diffused source) creates gradual shadows, lower contrast, and minimizes texture—flattering and forgiving. Window size affects this: larger windows create softer light; smaller windows create harder light. Distance also matters: the closer your subject to the window, the softer the light (the window appears larger relative to the subject).
Color temperature throughout the day: Natural light's color temperature changes throughout the day. Morning light tends cooler (bluer), midday light is neutral, and afternoon/evening light becomes warmer (golden/orange). This affects the mood and feel of your photos. Understanding these shifts helps you plan shoots for desired aesthetics and adjust white balance appropriately.
Size of light source matters: In lighting, the size of the light source relative to the subject determines light quality. A large window close to your subject creates soft, flattering light. The same window from far away creates harder light. This principle—often called "apparent size"—is crucial for controlling light quality. Want softer light? Move closer to the window or use a larger window. Want more dramatic light? Move farther away or use a smaller window.
Finding the Best Window Light in Your Space
Not all windows are created equal for photography. Learning to evaluate and identify your best window light sources transforms your results.
Evaluating windows in your home or workspace: Walk through your space at different times of day, observing how light enters each window. Notice the quality (soft or harsh), direction (where shadows fall), color (warm or cool), and intensity (bright or dim). Take test photos near different windows to see how they render on camera—what looks good to your eye may photograph differently.
Best windows for different times of day: Match your shooting schedule to your windows' optimal times. East-facing windows shine in the morning (literally), west-facing windows excel in late afternoon and evening, north-facing windows provide consistency all day, and south-facing windows offer abundant light but may require diffusion during midday. If you have flexibility in shooting times, choose windows that provide the best light when you're available.
Seasonal considerations: The sun's angle changes dramatically with seasons, affecting which windows receive direct light and when. A window that's perfect in summer might be too dim in winter, or vice versa. In winter, the sun is lower in the sky, creating longer, more directional light even at midday. In summer, the sun is higher, creating more overhead light. Observe your windows across seasons and adjust your shooting locations accordingly.
Urban vs. suburban environments: Your environment affects window light quality. Urban settings may have buildings blocking or reflecting light, creating unique challenges and opportunities. Suburban and rural settings typically have more open sky, providing cleaner, more direct light. Reflections from nearby buildings can actually enhance light (bouncing additional illumination into your space) or create problems (unwanted color casts from colored buildings). Work with your environment rather than fighting it.
Creating a dedicated photo spot: Once you identify your best window, create a semi-permanent setup nearby. This might be a corner of your bedroom, a spot in your home office, or a section of your living room. Having a dedicated location makes photography quick and repeatable—you know exactly where to position yourself or products for optimal light. This consistency also helps you develop a recognizable visual style across your content.
What to look for in ideal window light: The perfect window for photography is large (for soft light), unobstructed (no trees or buildings blocking light), receives indirect or diffused light (or can be easily diffused), and is in a space where you can position subjects at various distances and angles. You also want neutral-colored walls nearby (white, gray, beige) that can bounce light without adding color casts. If your windows aren't ideal, don't worry—the modification techniques later in this guide will help you work with what you have.
The Best Times of Day for Window Light Photography
Timing is everything in natural light photography. The same window produces dramatically different light quality throughout the day.
Morning light characteristics: The first few hours after sunrise provide cool, soft, directional light that's ideal for fresh, energizing photos. Morning light tends to be cleaner and crisper than afternoon light (less atmospheric haze), creating clear, vibrant images. If you're a morning person or need to shoot before work, morning window light is your friend. It's particularly beautiful for portraits, creating a fresh, awake appearance.
Midday challenges and solutions: Midday light (roughly 10 AM to 3 PM) is typically the most challenging for window light photography. The sun is high and intense, creating harsh, overhead light that produces unflattering shadows and high contrast. However, midday isn't impossible—it just requires strategy. North-facing windows excel at midday, providing soft indirect light when other windows are too harsh. Alternatively, use sheer curtains or diffusion to soften direct midday sun, or position subjects farther from the window to reduce intensity.
Afternoon and evening light: Late afternoon and evening light (the few hours before sunset) provides warm, golden, dramatic illumination that's highly sought-after for its flattering quality. This is when west-facing windows truly shine, offering that coveted "golden hour" glow indoors. The warm color temperature is universally flattering for skin tones and creates a cozy, inviting mood. If you can only shoot at one time of day, late afternoon is often the best choice for beautiful, forgiving light.
Overcast days: the secret weapon: Don't wait for sunny days—overcast skies are actually ideal for window light photography. Cloud cover acts as a giant diffuser, creating soft, even light throughout the day without harsh shadows or bright hotspots. On overcast days, you can shoot at any time without worrying about harsh midday sun or limited golden hour windows. The light is consistent, flattering, and forgiving. Many professional photographers actually prefer overcast days for this reliability and soft quality.
Seasonal variations in daylight hours: Daylight hours vary dramatically by season and latitude. In summer, you might have beautiful light from 6 AM to 8 PM. In winter, your window might be limited to 9 AM to 4 PM. Plan your photography schedule around seasonal daylight availability. Winter's shorter days and lower sun angle can actually create beautiful, directional light even at midday, while summer's long days give you more flexibility but require managing harsh overhead light.
Planning shoots around optimal light: Once you understand your windows' best times, schedule important shoots accordingly. For professional headshots, product photography, or content that needs to look its best, shoot during your window's optimal time. For quick daily content or less critical photos, you can work with whatever light is available and use modification techniques to improve it.
> Want to enhance your natural light photos even further? Glowup's AI platform can perfect lighting, remove distractions, and create professional-quality images from your window light photos. Transform good photos into stunning ones in seconds.
Positioning Your Subject Relative to the Window
How you position your subject (yourself, products, or others) relative to the window determines the lighting pattern, mood, and overall quality of your photos.
The 45-degree angle: classic portrait lighting: Position your subject at approximately 45 degrees to the window—not directly facing it, not perpendicular to it, but angled between the two. This creates the classic "Rembrandt lighting" pattern used in professional portraiture: one side of the face is well-lit, the other side has gentle shadow, creating dimension and depth. This angle is universally flattering and works for nearly everyone. It's the safest, most reliable positioning for portraits and headshots.
Side lighting for drama and dimension: Position your subject perpendicular to the window (90 degrees) for dramatic side lighting. Half the face or product is illuminated, half is in shadow, creating strong contrast and mood. This technique is powerful for artistic portraits, dramatic product photography, or content that needs visual impact. Side lighting emphasizes texture and shape, creating three-dimensional depth. It's less universally flattering than 45-degree lighting but more visually striking.
Backlighting for ethereal, glowing effects: Position your subject between the camera and the window, with the window behind them. This creates backlighting—a halo of light around the subject with the face or front in relative shadow. Backlighting creates ethereal, dreamy, glowing images that feel romantic and artistic. It's challenging to expose correctly (you'll need to increase exposure to properly light the face, which may blow out the background), but the results are stunning. Use backlighting for creative portraits, lifestyle content, and artistic product photography.
Front lighting for even, flattering illumination: Position your subject facing the window directly, with the camera between the subject and window. This creates flat, even lighting with minimal shadows—ideal for product photography requiring even illumination, headshots needing maximum clarity, or situations where you want to minimize texture and imperfections. Front lighting is the most forgiving and easiest to execute, though it can lack the dimension of angled lighting.
Distance from window affects light quality: The closer your subject to the window, the softer and more intense the light. Move closer for soft, glowing, high-key images. Move farther away for more even, less intense light with harder shadows. Experiment with distance to find the sweet spot for your desired look. For portraits, 3-6 feet from the window is often ideal. For products, you might go closer (1-3 feet) for soft, even illumination.
Height considerations: Window height relative to your subject matters. Ideally, the center of the window should be roughly at your subject's face level (for portraits) or product level (for product photography). If the window is too high, light comes from above, creating shadows under eyes and nose. If too low, light comes from below, creating an unnatural, unflattering upward lighting. Adjust your subject's height (standing, sitting, raising products on boxes) to align with the window's center.
Specific positioning for different photo types:
- Headshots and portraits: 45-degree angle, 3-5 feet from window, window at face height, slight turn toward the light
- Product photography: Front or 45-degree lighting, 1-3 feet from window, window at product height, white surface to bounce light underneath
- Flat lays and overhead shots: Position products directly in front of window with camera shooting from above, or shoot on a surface perpendicular to window with light coming from the side
- Full-body photos: Farther from window (6-10 feet) for even illumination across entire body, 45-degree angle for dimension
- Video content and calls: Face window directly or at 45 degrees, 3-4 feet away, window at face height, diffused light for even, flattering illumination
Modifying and Controlling Window Light
Raw window light is beautiful, but learning to modify and control it gives you creative flexibility and solves common problems.
Using sheer curtains as diffusers: Sheer white curtains are the simplest, most effective window light modifier. They diffuse harsh direct sunlight, creating soft, even illumination perfect for portraits and products. When direct sun is too harsh, simply close sheer curtains to instantly soften the light. The thicker the curtain, the more diffusion (and light reduction). White curtains maintain neutral color; colored curtains will add a color cast. If you don't have sheer curtains, white bedsheets, shower curtains, or even white paper taped to the window work as DIY diffusers.
Reflectors to fill shadows: Reflectors bounce light back into shadowed areas, reducing contrast and creating more even illumination. Professional reflectors are inexpensive ($15-30), but DIY options work beautifully: white foam board (available at craft stores for $5), white poster board, aluminum foil wrapped around cardboard (for more intense reflection), white bedsheets, or even white walls. Position the reflector opposite the window to bounce light into shadows. The closer the reflector to your subject, the more fill light it provides.
Blocking and shaping light: Sometimes you want to reduce light or create more defined shadows. Use black fabric, dark cardboard, or even dark clothing to block light from certain directions. This technique, called "negative fill," increases contrast and creates more dramatic lighting. You can also use blockers to shape light—creating a narrow beam by blocking the top and bottom of a window, for example.
Creating directional light from diffused sources: Even on overcast days or with north-facing windows, you can create directional light by blocking light from certain angles. Close curtains on part of the window, use blockers to limit light direction, or position your subject so they receive light from only one side of the window. This creates more dimension and interest than completely even illumination.
Bouncing light off walls and ceilings: Light-colored walls and ceilings near your window act as natural reflectors, bouncing light and creating softer, more even illumination. Position subjects near white or light-colored walls to maximize this effect. You can even intentionally bounce light off walls instead of using direct window light—aim your subject away from the window but near a white wall that's receiving window light. The wall becomes a large, soft light source.
DIY light modifiers you can make at home: Beyond curtains and reflectors, you can create various modifiers:
- Diffusion panels: Stretch white fabric over a frame (PVC pipe, wood, or even a hula hoop) to create a portable diffuser you can position anywhere
- Bounce cards: Tape white paper or foam board to stands or chairs to create portable reflectors
- Flags: Black fabric or cardboard on stands to block and shape light
- Scrims: Translucent white fabric to soften light without fully diffusing it
When to modify vs. when to use light as-is: Not every situation requires modification. Beautiful, soft window light on an overcast day needs nothing. Gentle morning or evening light often works perfectly unmodified. Modify when: direct sun is too harsh, shadows are too deep, contrast is too high, or you need more control over light direction and quality. Start with unmodified light and add modification only when needed.
Camera Settings for Window Light Photography
Understanding basic camera settings helps you capture window light at its best, whether you're using a smartphone or professional camera.
Smartphone settings: Modern smartphones are remarkably capable for window light photography. Key settings and techniques:
- Tap to focus and expose: Tap on your subject's face (for portraits) or the most important area (for products) to set focus and exposure. This ensures your subject is properly exposed even if the window is bright.
- Exposure compensation: After tapping to focus, slide up or down to adjust exposure. For backlit situations, slide up to brighten the subject. For high-key looks, slide up to create bright, airy images.
- HDR mode: Enable HDR (High Dynamic Range) for scenes with both bright windows and darker subjects. HDR captures multiple exposures and blends them, preserving detail in both highlights and shadows.
- Portrait mode: Use portrait mode for headshots and portraits to create background blur (bokeh) that mimics professional cameras.
- Lock exposure and focus: Hold your finger on the screen until "AE/AF Lock" appears. This locks exposure and focus, preventing the camera from readjusting as you compose your shot.
DSLR and mirrorless settings: If you're using a dedicated camera, these settings optimize window light photography:
- Aperture: Use f/2.8-f/5.6 for portraits (creates background blur and subject separation) or f/8-f/11 for products (ensures everything is in focus). Wider apertures (lower f-numbers) create more blur; narrower apertures (higher f-numbers) create more depth of field.
- Shutter speed: Use at least 1/125 second for handheld portraits to avoid motion blur, faster (1/250+) for moving subjects. For products on a tripod, shutter speed is less critical.
- ISO: Keep ISO as low as possible (100-400) for cleanest image quality. Window light is usually bright enough for low ISO. Increase ISO only if you need faster shutter speeds and can't open your aperture wider.
White balance for natural color: Auto white balance works well for most window light situations, but manual white balance gives you more control:
- Daylight/Sunny (5500K): For direct sunlight through windows
- Cloudy (6500K): For overcast days or shaded window light (adds warmth)
- Shade (7500K): For very cool light (adds even more warmth)
- Custom white balance: For perfect accuracy, use a gray card to set custom white balance
Exposure for highlights vs. shadows: Window light creates high dynamic range—bright windows and darker subjects. Decide whether to expose for highlights (preserving window detail but darkening subject) or shadows (properly exposing subject but potentially blowing out windows). For portraits and products, expose for your subject and accept that windows may be overexposed. For scenes where window view matters, expose for highlights and use fill light or reflectors to illuminate your subject.
Using exposure lock and focus lock: Lock exposure and focus separately for maximum control. Focus on your subject, then adjust exposure for proper brightness. This prevents the camera from changing settings as you recompose.
RAW vs. JPEG for editing flexibility: Shoot in RAW format (if your camera supports it) for maximum editing flexibility. RAW files capture more information, allowing you to adjust exposure, white balance, and color in post-processing without degrading image quality. JPEG is fine for quick sharing but limits editing capability.
Common mistakes and how to avoid them:
- Underexposing subjects: Don't let bright windows fool your camera into underexposing your subject. Use exposure compensation or manual exposure to properly expose your subject.
- Incorrect white balance: Auto white balance can struggle with mixed light. Check your images and adjust white balance if colors look too warm or cool.
- Too slow shutter speed: Handholding at slow shutter speeds creates blur. Use faster shutter speeds or a tripod for sharp images.
Window Light Techniques for Different Photo Types
Different photography applications require different window light approaches. Here's how to optimize window light for specific photo types.
Portrait and Headshot Photography
Window light is ideal for portraits and professional headshots, creating soft, flattering illumination that rivals expensive studio setups.
Positioning for flattering face lighting: Use the 45-degree angle positioning described earlier—subject angled toward the window, creating gentle shadows that define facial structure without being harsh. Position the window at face height or slightly above (never below, which creates unflattering upward lighting). Distance of 3-5 feet from the window typically provides soft, flattering light for most faces.
Avoiding harsh shadows under eyes and nose: If shadows under eyes and nose are too dark, you have several solutions: move closer to the window (softer light reduces shadow depth), use a reflector below the face to fill shadows, diffuse the light with sheer curtains, or shoot on an overcast day when light is naturally softer.
Creating catchlights in eyes: Catchlights—the bright reflections in eyes—make portraits come alive. Window light naturally creates beautiful rectangular catchlights. Ensure your subject is facing generally toward the window (even if angled) so light reflects in their eyes. The catchlight should appear in the upper portion of the eye (10 o'clock or 2 o'clock position) for the most natural, appealing look.
Soft vs. dramatic portrait lighting: For soft, flattering portraits (professional headshots, personal branding), use large windows, diffused light, close positioning, and reflectors to fill shadows. For dramatic, artistic portraits, use smaller windows or position farther away, embrace deeper shadows, use side or backlighting, and skip the reflector for higher contrast.
Product Photography
Window light excels for product photography, creating professional ecommerce images without expensive equipment.
Even lighting for ecommerce products: For clean, even product photos (ideal for online stores), position products facing the window or at a 45-degree angle, 1-3 feet from the window. Use white surfaces (foam board, white paper) below and beside the product to bounce light and eliminate shadows. Shoot on overcast days or with diffused light for the most even illumination.
Creating depth and dimension: For more artistic product photography, use side lighting (product perpendicular to window) to create shadows and dimension. This approach emphasizes texture and shape, making products look more three-dimensional and interesting. Balance shadows with a reflector on the opposite side to maintain detail in shadowed areas.
Avoiding harsh shadows and hotspots: Harsh shadows and bright hotspots (reflections) are common problems in product photography. Solutions: diffuse direct sunlight with curtains, use reflectors to fill shadows, position products farther from the window for more even light, and adjust product angle to minimize reflections on shiny surfaces.
White background techniques with window light: To create clean white backgrounds for ecommerce, position your product on white paper or foam board in front of a window. Overexpose slightly to blow out the background to pure white while keeping the product properly exposed. Alternatively, use a white backdrop (paper, fabric, or foam board) behind the product and position it close to the window so the backdrop receives enough light to appear white.
Flat Lay and Overhead Photography
Flat lay photography (overhead shots of products, food, or styled arrangements) requires specific window light techniques.
Using window light for flat lays: Position your flat lay surface (table, floor, board) directly in front of or perpendicular to a window. Shoot from directly above with the window providing side light across the scene. This creates even illumination with gentle shadows that add dimension without being distracting.
Avoiding your own shadow in the frame: When shooting overhead, your body can block window light and cast shadows on your scene. Solutions: shoot with the window to your side rather than behind you, use a longer lens or zoom to shoot from farther away, or position yourself so your shadow falls outside the frame.
Creating even illumination across the frame: For completely even flat lay lighting, shoot on overcast days or with heavily diffused window light. Position your setup so the window illuminates the entire scene evenly. Use white boards or reflectors on the opposite side of the window to bounce light and eliminate shadows.
Best window positions for overhead shots: Side lighting (window perpendicular to your flat lay surface) typically works best, creating gentle directional shadows that add depth. Front lighting (window behind you as you shoot) creates flatter, more even illumination. Experiment with both to see which suits your style.
Content Creation and Social Media
For content creators and social media managers, window light provides consistent, beautiful lighting for daily content.
Consistent lighting for video calls and content: Set up your workspace near your best window, facing the window or at a 45-degree angle. This creates consistent, flattering lighting for video calls, talking-head videos, and selfie content. Diffuse with sheer curtains for soft, even light that doesn't change dramatically throughout your shoot.
Quick setups for daily content: Once you identify your best window light spot, create a semi-permanent setup with your camera position, background, and any reflectors or modifiers. This allows you to create content quickly and consistently without setting up from scratch each time. Consistency in lighting creates a cohesive visual brand across your content.
Maintaining brand consistency with natural light: While natural light changes throughout the day and across seasons, you can maintain consistency by: shooting at the same time of day, using the same window and positioning, applying consistent editing (presets or filters), and using diffusion to minimize variation. This creates a recognizable visual style even when using natural light.
Batch shooting with optimal light: When you have perfect window light, maximize it by batch shooting multiple pieces of content. Change outfits, props, or setups but keep the same lighting. This efficiency allows you to create a week's worth of content in one optimal lighting session.
Troubleshooting Common Window Light Problems
Even with great windows, you'll encounter challenges. Here's how to solve the most common window light problems.
Too harsh or direct: When direct sunlight creates harsh shadows and high contrast:
- Solution 1: Diffuse with sheer curtains, white sheets, or diffusion panels
- Solution 2: Shoot at a different time when light is less direct
- Solution 3: Move subject farther from window to reduce intensity
- Solution 4: Wait for clouds to diffuse the sun naturally
Too dim or dark: When window light isn't bright enough:
- Solution 1: Move subject closer to the window
- Solution 2: Use reflectors to bounce and amplify available light
- Solution 3: Increase camera ISO or open aperture wider
- Solution 4: Shoot at a brighter time of day
- Solution 5: Use multiple windows if available
Uneven lighting: When one side is too bright and the other too dark:
- Solution 1: Use a reflector on the dark side to fill shadows
- Solution 2: Position subject closer to window for softer, more even light
- Solution 3: Use a second window or white wall to provide fill light
- Solution 4: Adjust camera exposure to balance highlights and shadows
Color casts from surroundings: When colored walls, furniture, or outdoor elements create unwanted color tints:
- Solution 1: Adjust white balance in camera or post-processing
- Solution 2: Use neutral-colored reflectors and backgrounds
- Solution 3: Position subject away from colored surfaces
- Solution 4: Embrace the color cast if it enhances your aesthetic
Changing light during shoot: When light quality changes as you shoot (clouds, sun movement):
- Solution 1: Shoot quickly during optimal light
- Solution 2: Use consistent camera settings and adjust in post-processing
- Solution 3: Embrace variation and shoot multiple looks
- Solution 4: Shoot on overcast days for more consistent light
Limited window options: When you don't have ideal windows:
- Solution 1: Maximize what you have with reflectors and diffusion
- Solution 2: Shoot at optimal times for your available windows
- Solution 3: Use white walls to bounce and spread available light
- Solution 4: Consider shooting in different locations (near friend's windows, outdoors, etc.)
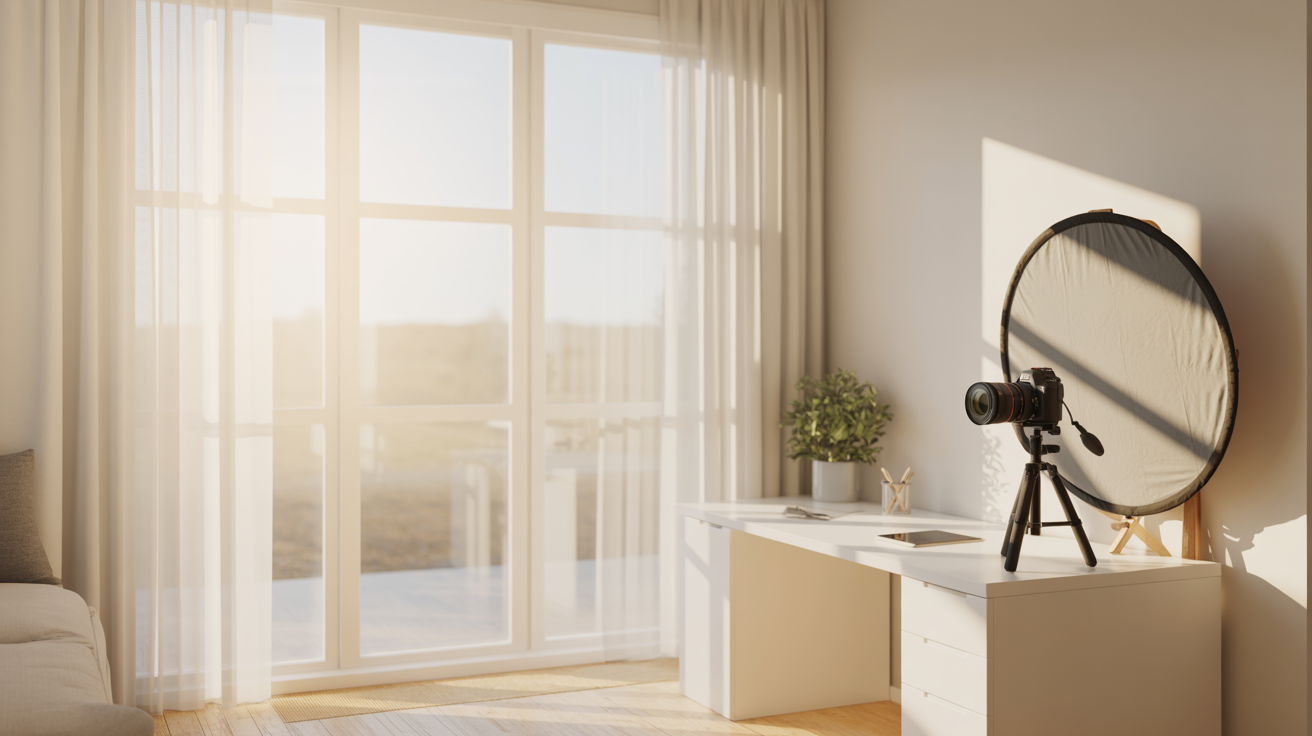
Creating a Dedicated Window Light Setup at Home
Transform window light photography from occasional activity to regular practice by creating a dedicated setup.
Choosing the best location in your space: Select a spot near your best window where you can leave equipment semi-permanently or set up quickly. Consider: proximity to your best window, space for positioning at various distances, neutral background options, minimal clutter, and accessibility for regular use. A corner of your bedroom, home office, or living room often works well.
Minimal equipment needed: You don't need much to create a professional window light setup:
- Reflector ($15-30 or DIY with foam board): For filling shadows
- Backdrop ($20-50 or DIY with fabric/paper): For clean backgrounds
- Diffusion (sheer curtains or white fabric): For softening harsh light
- Tripod ($20-50): For consistent framing and hands-free shooting
- Total investment: Under $50 with DIY options, under $150 for purchased equipment
Organizing for quick, repeatable setups: Create a system that allows you to set up quickly:
- Mark your optimal camera position with tape on the floor
- Store reflectors and backdrops nearby for easy access
- Keep a checklist of your preferred settings and positioning
- Take reference photos of your setup for consistency
Storage solutions for small spaces: If you can't leave equipment set up permanently:
- Lean reflectors behind furniture or in closets
- Roll backdrops and store vertically
- Use collapsible reflectors that fold small
- Keep everything in one designated spot for quick access
Making it work in apartments, small homes, shared spaces: Even in limited spaces, you can create effective window light setups:
- Use temporary setups you assemble and disassemble quickly
- Coordinate with roommates or family for shooting times
- Utilize multi-purpose spaces (bedroom, living room) during optimal light
- Keep equipment minimal and easily stored
Budget-friendly setup under $50:
- White foam board reflector: $5
- White poster board backdrop: $5
- Sheer curtain for diffusion: $10
- Smartphone tripod: $15
- Clips and tape for securing: $5
- Total: $40
> Ready to take your window light photography to the next level? Sign up for Glowup and transform your natural light photos into professional-quality images with AI-powered enhancement. Perfect lighting, every time.
Window Light Photography Examples and Inspiration
Learning from others accelerates your window light mastery. Here's where to find inspiration and examples.
Professional photographers who use primarily window light: Many renowned photographers built their careers on window light:
- Peter Hurley: Headshot photographer known for window light portraits
- Elena Shumilova: Fine art photographer creating magical images with natural light
- Jillian Harris: Lifestyle photographer and influencer using window light for authentic content
- Brandon Woelfel: Portrait photographer creating dreamy window light images
Study their work to see how they position subjects, modify light, and create different moods with the same basic tool—a window.
Different styles achievable with window light: Window light isn't one-size-fits-all. You can create:
- Bright and airy: High-key images with soft shadows and light backgrounds
- Dark and moody: Low-key images with deep shadows and dramatic contrast
- Warm and golden: Late afternoon light with warm color temperature
- Cool and crisp: Morning or north light with cooler tones
- Ethereal and dreamy: Backlit images with glowing, soft quality
Instagram accounts and resources for inspiration:
- Search hashtags: #windowlight #naturallightphotography #windowlightportrait
- Follow photographers who specialize in natural light
- Study before/after posts showing window light setups
- Join photography communities focused on natural light
How to develop your own window light style: Experiment with different:
- Window positions and times of day
- Subject positioning and angles
- Modification techniques (diffusion, reflection)
- Editing styles and color grading
- Subjects (portraits, products, lifestyle)
Over time, you'll develop preferences and techniques that become your signature style. Consistency in your approach creates a recognizable aesthetic across your work.
Conclusion
Window light photography is one of the most powerful, accessible, and beautiful techniques available to anyone with a camera and a window. It requires no expensive equipment, no complex technical knowledge, and no professional studio—just an understanding of how natural light works and how to position subjects to make the most of it.
The key principles to remember: find your best windows and learn their light throughout the day. Position subjects at flattering angles (45 degrees is your friend). Modify light when needed with simple tools like curtains and reflectors. Shoot at optimal times or create optimal conditions with diffusion. Practice regularly to develop intuition and style.
Whether you're creating professional headshots for your personal brand, photographing products for your small business, producing content for social media, or simply want better photos of yourself and your life, window light gives you professional-quality results without professional-level investment.
The beauty of window light is its universality—it works for everyone, regardless of budget, experience, or equipment. A content creator with a smartphone and a bedroom window can create images as beautiful as a professional with thousands of dollars in gear. The difference isn't the equipment; it's the knowledge of how to use light.
Start this week. Walk through your space and identify your best window. Observe how light changes throughout the day. Take test shots at different times, positions, and distances. Experiment with a simple reflector (even just white paper). You'll be amazed at how quickly your photos improve once you understand and harness window light.
The best camera is the one you have, and the best light is the one streaming through your window right now. Master window light, and you master one of photography's most essential and beautiful tools. Your windows aren't just sources of natural light—they're your personal photography studio, always available, always free, always capable of creating stunning images.
Now go find your light and start creating.