Good lighting is the single most transformative element in any photo or video. It can make the difference between a headshot that looks polished and professional and one that looks tired and flat. It can make a video call feel like a boardroom meeting or a poorly lit basement. It can elevate a social media post from forgettable to scroll-stopping. And yet, most people — professionals, entrepreneurs, content creators, and small business owners alike — never learn the fundamentals of face lighting. They rely on whatever ambient light happens to be in the room and wonder why their photos never quite look the way they imagined.
This guide changes that. Whether you're preparing for a professional headshot session, showing up to video calls with clients, building a social media presence, or creating content for your small business, understanding how to light your face is one of the highest-leverage skills you can develop. The good news: you don't need expensive studio equipment. You need to understand a few core principles and know how to apply them with whatever tools you have available — from a window to a $30 ring light to a professional softbox setup.
This is a practical, step-by-step guide for everyone: professionals updating their headshots, entrepreneurs building their personal brand, content creators shooting social media content, small business owners photographing their team, and anyone who wants to look their best on camera. The principles are universal, the setups are scalable, and the results are immediate.
Why Lighting Matters More Than Any Other Element
Before diving into specific setups, it's worth understanding why lighting has such an outsized impact on how you look in photos and on camera.
How Light Shapes Your Face
Light doesn't just illuminate — it sculpts. The direction, quality, and color of light determine how your facial features appear in photos. Light coming from directly in front of you flattens features and minimizes shadows, creating an even, approachable look. Light from the side creates depth and dimension, emphasizing bone structure. Light from below creates unflattering shadows that make anyone look sinister. Light from above mimics natural sunlight and generally looks natural and flattering.
The quality of light matters just as much as direction. Hard light (from a small, direct source like a bare bulb or direct sunlight) creates sharp, defined shadows that emphasize texture — every pore, wrinkle, and imperfection becomes more visible. Soft light (from a large, diffused source like a window with a sheer curtain, a softbox, or a ring light) wraps around the face, minimizing shadows and creating a smooth, flattering look. For most portrait and headshot situations, soft light is your friend.
Color temperature is the third variable. Light has a color — from warm orange-yellow (like candlelight or incandescent bulbs) to cool blue-white (like overcast daylight or some LED lights). Warm light is generally flattering for skin tones, creating a healthy, golden glow. Cool light can look clinical or harsh. Mixed color temperatures — like a warm lamp on one side and cool window light on the other — create color casts that look unnatural and are difficult to correct in editing.
What Bad Lighting Does to Photos
Understanding what bad lighting looks like helps you identify and fix it quickly. The most common lighting problems:
Overhead lighting (the "office ceiling" problem): Most indoor spaces are lit from above by ceiling fixtures. This creates harsh shadows under the eyes, nose, and chin — the "raccoon eye" effect that makes everyone look tired and older. It's the default lighting in most offices, homes, and meeting rooms, and it's almost universally unflattering for faces.
Backlighting: When the brightest light source is behind you — a window, a bright wall, a lamp — your face appears as a dark silhouette. Your camera or phone tries to expose for the bright background, leaving your face underexposed and dark. This is one of the most common mistakes people make when setting up for video calls or photos at home.
Mixed color temperatures: Combining a warm lamp with cool window light creates a split-tone effect where one side of your face looks warm and the other looks cool. This looks unnatural and is a telltale sign of amateur lighting.
Single harsh source: A bare bulb or direct flash creates hard, unflattering shadows and emphasizes skin texture. It's the lighting equivalent of a mugshot.
No fill light: Even with a good key light, if there's no fill light to soften the shadows on the opposite side of your face, the contrast can be too extreme — creating a dramatic look that works for artistic portraits but not for professional headshots or video calls.
The Three-Light Concept (Simplified for Real Life)
Professional photographers use a three-light setup: key light, fill light, and backlight (or hair light). You don't need three separate lights to achieve great results — but understanding the concept helps you use whatever light sources you have more effectively.
Key light: Your primary light source. This is the main light illuminating your face. It should be positioned slightly to one side and slightly above eye level — typically at about a 45-degree angle from your face. This creates natural-looking shadows that add dimension without being harsh.
Fill light: A secondary, softer light on the opposite side from your key light. Its job is to soften the shadows created by the key light without eliminating them entirely. Fill light can be another light source, a reflector (even a white piece of cardboard), or simply a light-colored wall that bounces light back onto your face.
Backlight/separation light: A light behind you that separates you from the background, creating depth and a professional look. This is optional for most situations but makes a significant difference in professional headshots and video content.
In practice, for most people in most situations, you need: one good key light and some form of fill. That's it. Everything else is refinement.
Window Light: The Best Free Lighting Tool You Already Have
Natural window light is the gold standard for portrait photography. It's soft, flattering, and free. Learning to use it well is the single highest-impact lighting skill you can develop.
Finding the Right Window
Not all windows are equal. The best windows for portrait lighting are:
North-facing windows (in the Northern Hemisphere): These receive indirect light throughout the day — no direct sunlight, just soft, diffused daylight. This creates beautifully even, consistent light that's ideal for portraits and headshots. If you have a north-facing window, use it.
Large windows: Bigger windows create softer light. A floor-to-ceiling window creates much softer, more flattering light than a small bathroom window. The larger the light source relative to your face, the softer the light.
Windows with sheer curtains or frosted glass: Direct sunlight through a clear window is hard light — it creates harsh shadows. A sheer curtain or frosted glass diffuses the light, making it soft and flattering. If you're shooting near a window with direct sunlight, hang a white sheet or sheer curtain to diffuse it.
How to Position Yourself at a Window
For the most flattering look: Sit or stand at a 45-degree angle to the window, with the window to your side. This creates a classic "Rembrandt" or "loop" lighting pattern — soft shadows on one side of your face that add dimension without being harsh. Your key light is the window; the room's ambient light acts as fill.
For a clean, even look: Face the window directly. This creates flat, even lighting with minimal shadows — great for a bright, approachable look. It works particularly well for video calls and social media content where you want to look friendly and accessible.
What to avoid: Never sit with a window behind you. This creates backlighting that silhouettes your face. If the only window in your space is behind your desk, either reposition your desk or use artificial lighting to compensate.
Managing Window Light Throughout the Day
Window light changes throughout the day. Morning light is often soft and warm; midday light can be harsh and bright; afternoon light is warm and golden. Overcast days provide the most consistent, flattering window light — the clouds act as a giant diffuser. Direct sunlight through a window is harder to work with but can be managed with diffusion.
For consistency — important if you're shooting multiple sessions or want your content to look cohesive — shoot at the same time of day and in the same position relative to your window. This creates a consistent look across all your photos and videos.
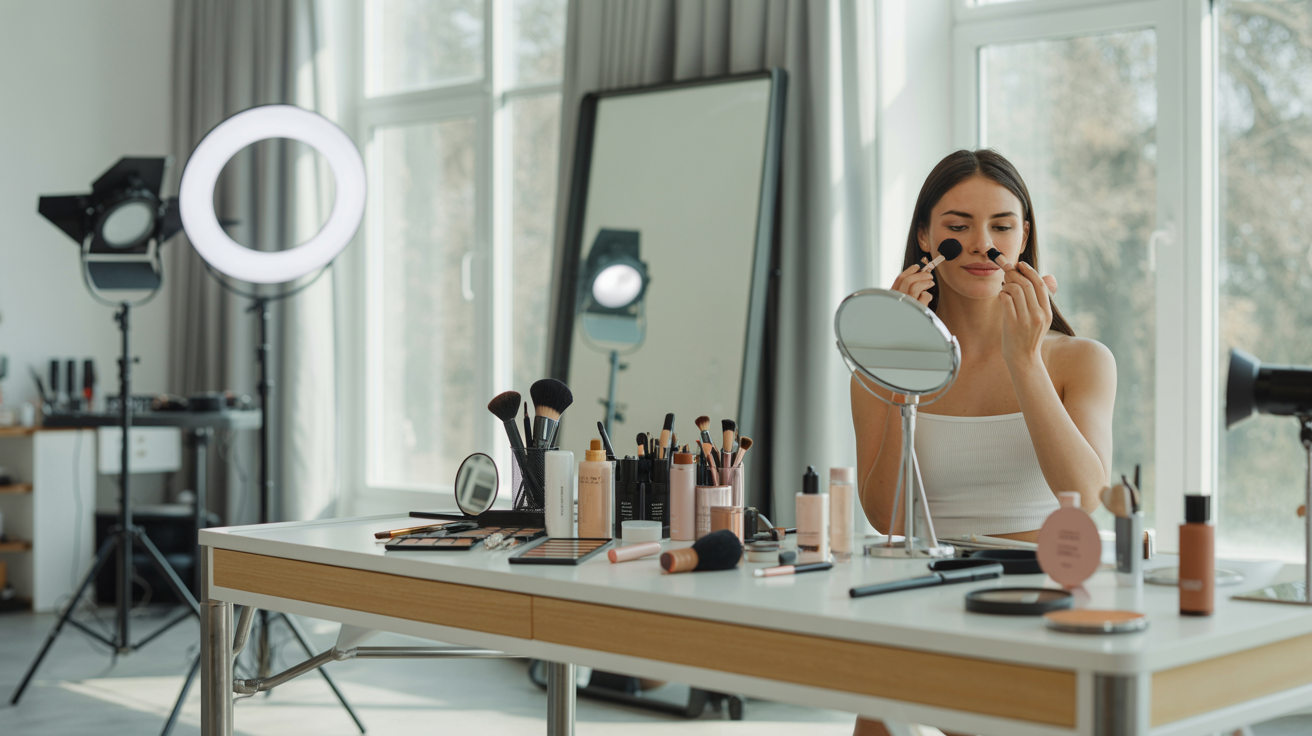
Ring Lights: The Content Creator's Essential Tool
Ring lights have become ubiquitous for good reason: they're affordable, easy to use, and create a distinctive, flattering light that works well for a wide range of situations. Understanding their strengths and limitations helps you use them effectively.
What Ring Lights Do Well
Ring lights create soft, even, frontal lighting that minimizes shadows and creates a bright, clean look. The circular shape produces a distinctive catchlight (the reflection of the light source in the eyes) — a ring of light in the iris that makes eyes look bright and alive. This is the signature look of beauty content, tutorials, and much social media photography.
For video calls, ring lights are excellent: they provide consistent, flattering frontal light that makes you look bright and engaged. For social media content, they create the clean, polished look that performs well on Instagram, TikTok, and YouTube. For headshots, they work well for a bright, approachable look — though they can look slightly flat compared to off-axis lighting.
Ring Light Setup Tips
Position the ring light at eye level or slightly above: The ring should be centered on your face, with your eyes in the center of the ring. Too high creates shadows under the eyes; too low creates an unflattering upward light.
Distance matters: The closer the ring light, the softer and more intense the light. For most situations, 2-3 feet from your face is ideal. Too close and the light is too intense; too far and it loses its softness.
Use the right color temperature: Most ring lights have adjustable color temperature. For skin tones, warm white (around 3200-4000K) is generally most flattering. Cool white (5500-6500K) can look clinical. Daylight-balanced (5000-5500K) works well if you're also using window light.
Add a fill light or reflector: Ring lights create very flat, even lighting. For more dimension, add a secondary light source slightly to one side, or use a reflector to bounce some light from a different angle.
Ring Light Limitations
Ring lights are not ideal for every situation. The flat, frontal lighting they create can look one-dimensional for professional headshots where you want more depth and dimension. The distinctive ring catchlight, while attractive for beauty content, can look artificial in formal professional photos. And ring lights don't work well for full-body shots — they're designed for close-up face and upper-body framing.
For professional headshots, consider pairing a ring light with a secondary light source for more dimension, or use a softbox setup instead.
Softbox Lighting: The Professional's Choice
Softboxes are the workhorses of professional portrait photography. They create large, soft, directional light that's flattering for faces, versatile for different looks, and consistent across sessions. If you're serious about your headshots, video content, or small business photography, a basic softbox setup is worth the investment.
Understanding Softboxes
A softbox is a light modifier — a box with a reflective interior and a diffusion panel on the front — that attaches to a light source (usually a continuous LED light or a strobe). The box spreads and diffuses the light, creating a large, soft source that wraps around the subject. The result is flattering, dimensional light with soft shadows — the look of professional studio photography.
Softboxes come in various sizes. Larger softboxes create softer light; smaller ones create more directional, slightly harder light. For face and portrait photography, a medium softbox (24x24 inches to 36x36 inches) is a versatile starting point.
Basic One-Light Softbox Setup
For professional headshots and portrait photography, a single softbox positioned correctly can produce excellent results:
Position: Place the softbox at a 45-degree angle to your face, slightly above eye level (the light should be angled down at about 30-45 degrees). This creates a classic portrait lighting pattern — often called "Rembrandt" or "loop" lighting — with soft shadows that add dimension and depth.
Distance: 3-5 feet from your face for most situations. Closer creates softer, more intense light; farther creates slightly harder light with more falloff.
Fill: Use a white reflector or foam board on the opposite side to bounce some light back and fill in the shadows. This prevents the shadow side from going too dark.
Background: Position yourself 3-6 feet from the background. This creates separation and allows the background to go slightly out of focus, creating a professional look.
Two-Light Softbox Setup
For the most professional results, a two-light setup gives you complete control:
Key light: Your main softbox at 45 degrees, slightly above eye level. This is your primary light source.
Fill light: A second, smaller softbox or a reflector on the opposite side, set to about half the intensity of the key light. This fills in shadows without eliminating them.
This setup creates the classic professional headshot look: dimensional, flattering, with soft shadows that add depth without being harsh. It's the setup used by professional photographers for corporate headshots, author photos, and professional portraits.
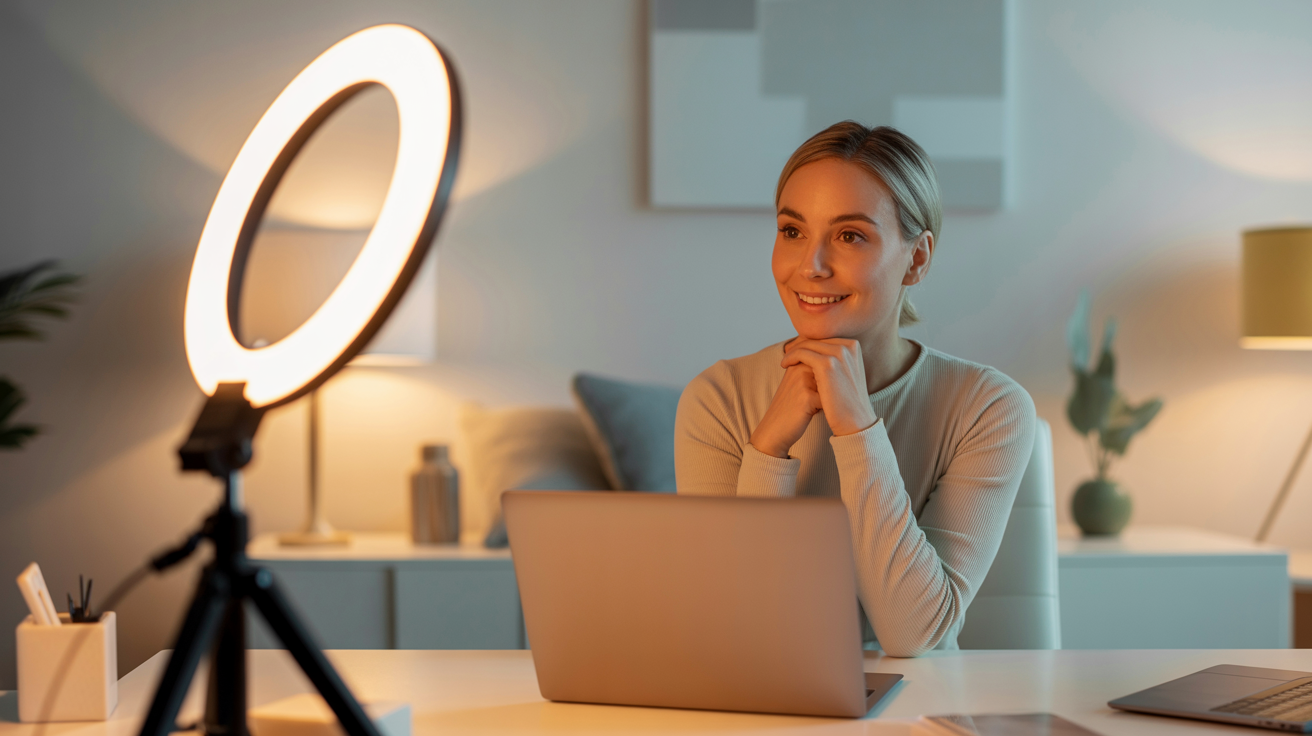
Lighting for Video Calls: Look Professional on Every Call
Video calls have become a permanent fixture of professional life. How you look on camera affects how colleagues, clients, and collaborators perceive you — and lighting is the biggest factor in that perception. Here's how to look your best on every call.
The Fundamental Rule: Light in Front, Not Behind
The most important rule for video call lighting: your light source must be in front of you, not behind you. If you're sitting with a window behind you, you'll appear as a dark silhouette. Move your desk so the window is in front of you or to your side, or use artificial lighting to compensate.
Quick Video Call Lighting Setups
The window setup: Position yourself facing a window or at a 45-degree angle to it. This is the simplest and most effective setup for daytime calls. The window provides soft, flattering light that makes you look engaged and professional.
The ring light setup: Place a ring light directly in front of you at eye level. This creates consistent, flattering light regardless of time of day or ambient conditions. Ideal for people who take calls at varying times or in rooms without good window light.
The desk lamp hack: If you don't have a ring light, position a desk lamp with a warm white bulb in front of you and slightly to one side. Place a white piece of paper or cardboard on the opposite side to act as a reflector. This creates a simple key-and-fill setup that's dramatically better than overhead lighting alone.
Background and Environment
Lighting your face is only half the equation for video calls. Your background matters too. A well-lit, clean background looks professional; a dark, cluttered background looks unprofessional regardless of how good your face lighting is.
If your background is dark, add a lamp or light source behind you to illuminate it. This creates separation between you and the background and makes the overall image look more professional. Avoid virtual backgrounds if possible — they often look artificial and can create edge artifacts that are distracting.
Lighting for Social Media Content: Platform-Specific Tips
Different social media platforms have different aesthetics and audiences, and your lighting approach should reflect that.
Instagram and TikTok
These platforms reward bright, clean, visually appealing content. The ring light aesthetic — bright, even, frontal lighting with that distinctive catchlight — performs well here. For beauty content, tutorials, and talking-head videos, a ring light positioned at eye level creates the polished look that audiences expect.
For lifestyle and brand content, window light creates a more natural, authentic feel that resonates with audiences who are fatigued by overly produced content. The key is consistency: choose a lighting setup and stick with it so your content has a cohesive visual identity.
LinkedIn and Professional Platforms
LinkedIn content benefits from a more professional, dimensional lighting approach. Rather than the flat ring light look, consider a 45-degree softbox or window light setup that creates more depth and dimension. This looks more like professional photography and less like a selfie, which aligns with LinkedIn's professional context.
For LinkedIn profile photos specifically, the quality of your lighting is one of the most important factors in how professional you appear. A well-lit headshot with soft, directional light signals that you take your professional image seriously.
YouTube
YouTube rewards consistency and production quality. A two-light setup (key and fill) with a clean, well-lit background is the standard for professional-looking YouTube content. Invest in a basic softbox kit and spend time dialing in your setup — the consistency will pay dividends as your channel grows.
AI-Enhanced Photos: When Lighting Isn't Perfect
Even with the best lighting setup, not every photo turns out perfectly. Maybe the light shifted, you were in a location you couldn't control, or you simply didn't have time to set up properly. This is where AI photo enhancement tools like Glowup become invaluable.
Glowup's AI platform can enhance photos taken in less-than-ideal lighting conditions, creating professional-quality headshots and portraits from photos you already have. Whether you need a polished LinkedIn headshot, professional brand photos, or social media content, Glowup can transform your existing photos into professional-quality images — no studio required.
This is particularly valuable for small business owners who need professional team photos, product images, or brand visuals but don't have the budget for a professional photographer. It's also useful for professionals who need updated headshots quickly, content creators who want to elevate their visual brand, and anyone who wants to look their best in photos without the complexity of a full lighting setup.
Building Your Lighting Kit: Budget-Based Recommendations
You don't need to spend thousands of dollars to achieve great lighting. Here's a practical guide to building your lighting kit at different budget levels.
Budget: Under $50
What you need: A ring light (12-18 inch, with adjustable color temperature and brightness) and a phone/camera mount. This setup handles video calls, social media content, and basic headshots effectively.
Recommended approach: Position the ring light at eye level, 2-3 feet from your face. Use window light as fill when available. This setup is sufficient for most content creators and professionals who primarily need good lighting for video calls and social media.
Budget: $100-$300
What you need: A medium softbox kit (one or two softboxes with LED lights and stands) and a reflector. This setup produces professional-quality results for headshots, video content, and small business photography.
Recommended approach: Use one softbox as your key light at 45 degrees, and either a second softbox or a reflector as fill. This creates the dimensional, professional look of studio photography at a fraction of the cost.
Budget: $500+
What you need: A professional continuous LED lighting kit with large softboxes, a reflector, and potentially a background system. This setup is appropriate for small business owners who regularly photograph products, team members, or spaces, and for content creators who produce high-volume, high-quality content.
Recommended approach: Invest in quality lights with accurate color rendering (look for CRI 95+) and large softboxes for maximum softness. Add a background system for clean, professional headshots and product photos.
Common Lighting Mistakes and How to Fix Them
Even with good equipment, these common mistakes can undermine your lighting:
Mistake 1: Mixing color temperatures. Combining warm and cool light sources creates unnatural color casts. Fix: Use lights with the same color temperature, or set all lights to the same setting. If using window light, match your artificial lights to daylight temperature (5000-5500K).
Mistake 2: Lighting too far away. Light loses intensity quickly with distance (following the inverse square law). A light that's too far away creates flat, insufficient illumination. Fix: Move your key light closer — 2-4 feet is usually ideal for face lighting.
Mistake 3: No separation from background. When you're the same brightness as your background, you blend in and the image looks flat. Fix: Add a light behind you to illuminate the background, or move farther from the background so it falls into shadow.
Mistake 4: Forgetting about catchlights. Catchlights — the reflection of the light source in the eyes — make eyes look alive and engaged. Without catchlights, eyes look flat and lifeless. Fix: Position your key light so it creates a catchlight in the upper portion of the iris (roughly 10-2 o'clock position).
Mistake 5: Inconsistent setup. Changing your lighting setup between sessions creates inconsistent content that looks disjointed. Fix: Document your setup (take a photo of your light positions, note the settings) so you can recreate it exactly each time.
Take Your Photos to the Next Level with Glowup
Understanding lighting is a powerful skill — but even the best lighting setup has its limits. If you want professional-quality headshots, brand photos, or social media content without the complexity of a full studio setup, Glowup offers an AI-powered solution that transforms your existing photos into polished, professional images.
Whether you're a professional updating your LinkedIn headshot, a small business owner who needs team photos, a content creator building your visual brand, or anyone who wants to look their best in photos, Glowup's AI platform delivers professional results quickly and affordably. Upload your photos, choose your style, and get back professional-quality images that represent you at your best.
Great lighting is the foundation of great photos. Combine it with the right tools, and there's no limit to how good your photos can look.
Conclusion: Light Is Everything
Lighting is the most powerful tool in photography — more impactful than the camera, the lens, or even the subject. Understanding how to light your face for headshots, video calls, and social media content is a skill that pays dividends every time you appear on camera. The principles are simple: soft light is flattering, directional light creates dimension, consistent color temperature looks natural, and your key light should always be in front of you.
Start with what you have — a window, a desk lamp, or an affordable ring light — and apply the principles in this guide. As your needs grow, invest in better equipment. And when you need professional-quality results quickly, tools like Glowup are there to bridge the gap between what you can capture and what you want to present to the world.
Good light changes everything. Now you know how to find it.