If you're a content creator, entrepreneur, or small business owner managing social media, you know the exhausting reality: the content machine never stops. Every day demands fresh photos for Instagram, Facebook, LinkedIn, TikTok, and countless other platforms. You find yourself scrambling for content ideas, rushing to take photos at the last minute, and feeling perpetually behind on your posting schedule.
The daily grind of content creation is unsustainable. It drains your creative energy, creates inconsistent quality, and turns what should be strategic marketing into reactive chaos. You spend more time stressing about what to post than actually growing your business or creating value for your audience.
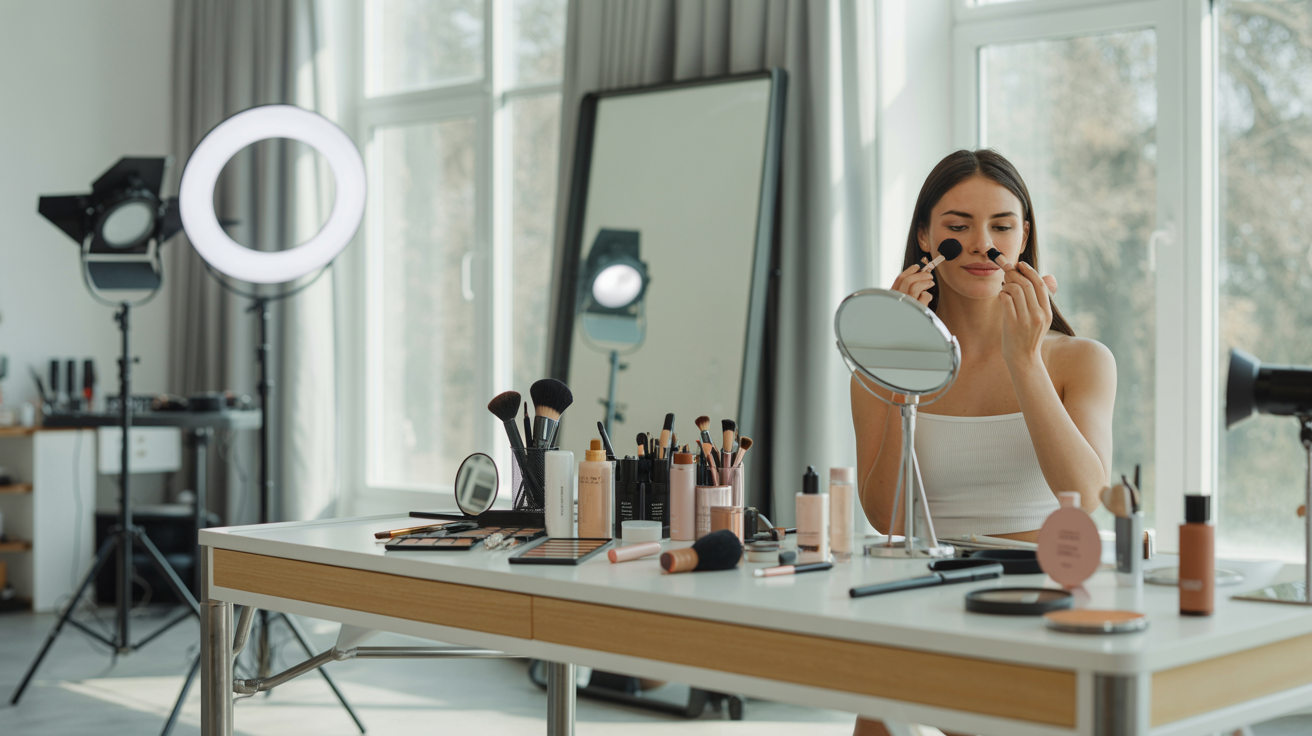
But what if you could flip the script entirely? What if, instead of creating content daily, you could dedicate one focused day to photographing an entire month's worth of social media posts? That's the power of batch photography—a workflow strategy that transforms content creation from a daily burden into an efficient, strategic process.
Batch photography means planning, shooting, and organizing multiple pieces of content in a single concentrated session. Instead of taking one photo when you need it, you create 30, 50, or even 100 photos in one day, giving you a content library that lasts weeks or months. The benefits are transformative: you save enormous amounts of time, create more consistent visual branding, reduce decision fatigue, and free yourself to focus on strategy rather than scrambling for daily content.
This comprehensive guide will teach you exactly how to implement batch photography for your content creation. You'll learn how to plan efficient sessions, set up for maximum productivity, shoot diverse content quickly, organize your photo library, edit for consistency, and schedule posts strategically. Whether you're a solo entrepreneur, small business owner, influencer, or content creator, you'll discover how to create a month of professional social media content in a single day.
The transformation from daily content stress to strategic batch creation is within reach. Let's dive into the exact workflow that will revolutionize your content creation process.
Why Batch Photography is a Game-Changer for Content Creators
The traditional approach to social media content creation is fundamentally broken. Most creators operate in reactive mode: they wake up, realize they need to post something today, scramble to find an idea, rush to take a photo, edit it quickly, write a caption, and post—often hours later than optimal. Then they repeat this exhausting cycle the next day, and the next, and the next.
This daily grind creates multiple problems. First, it's incredibly time-inefficient. The overhead of setting up, getting into the right mindset, finding props or outfits, and cleaning up happens every single day. If you spend 30 minutes on setup and cleanup daily, that's 15 hours per month wasted on repetitive tasks that could be done once.
Second, daily content creation produces inconsistent quality. Some days you're inspired and create great content. Other days you're tired, busy, or uninspired, and your content suffers. Your audience sees this inconsistency, which undermines your brand and professionalism.
Third, the constant pressure to create content daily drains creative energy and creates decision fatigue. Every day requires dozens of micro-decisions: what to photograph, what to wear, which background to use, how to edit. This mental load accumulates, leaving you exhausted and less creative over time.
Fourth, reactive content creation prevents strategic thinking. When you're focused on "what do I post today," you can't think strategically about "what content will grow my audience this month" or "what visual story am I telling across my feed." Strategy requires stepping back, but daily content demands keep you in the weeds.
Batch photography solves all these problems simultaneously. By dedicating one focused session to creating multiple pieces of content, you eliminate repetitive setup and cleanup, create consistent quality across all content, make decisions once rather than daily, and free mental space for strategic thinking.
The time savings alone are remarkable. A well-planned batch photography session can create 30-50 pieces of content in 3-4 hours. That same content, created daily, would require 15-30 hours spread across a month. You're not just saving time—you're reclaiming entire days that can be invested in business growth, client work, or personal life.
Consistency improves dramatically with batch photography. When you shoot all content in one session with the same lighting, editing approach, and creative mindset, your visual brand becomes cohesive. Your Instagram grid looks intentional rather than random. Your audience recognizes your content instantly because it has a consistent aesthetic.
Decision fatigue disappears when you batch. Instead of making content decisions daily, you make them once during planning and execution. What outfits will you wear? Decided during planning. What backgrounds will you use? Set up once. How will you edit? Create a preset and apply it to all images. The mental relief of eliminating daily decisions is profound.
Strategic thinking becomes possible when you're not in daily content survival mode. With a month of content already created, you can focus on analyzing what performs well, engaging with your audience, developing new offerings, or growing your business. Content creation shifts from a daily burden to a strategic asset.
Who benefits most from batch photography? Virtually every content creator, but especially:
Solo entrepreneurs and small business owners who wear multiple hats and can't afford to spend hours daily on content creation. Batch photography lets you create a month of marketing content in one afternoon, freeing you to focus on revenue-generating activities.
Influencers and content creators who need consistent, high-quality content to grow their audience and maintain engagement. Batch photography ensures you never miss a posting day and maintains the visual consistency that algorithms and audiences reward.
Social media managers handling multiple clients or accounts. Batch photography enables you to create content for multiple brands in organized sessions, improving efficiency and client satisfaction.
Product-based businesses that need regular product photography for social media, websites, and marketing materials. Batch photography lets you photograph entire product lines in one session, creating a library of images for various uses.
Personal brands and professionals building thought leadership on LinkedIn, Instagram, or other platforms. Batch photography ensures you have professional content ready to support your expertise and maintain visibility.
The transformation from daily content stress to strategic batch creation is dramatic. Creators who implement batch photography consistently report feeling less stressed, more creative, and more in control of their content strategy. The shift from reactive to proactive content creation changes not just your workflow, but your entire relationship with social media marketing.
Planning Your Batch Photography Session
Successful batch photography starts long before you pick up your camera. The planning phase determines whether your session produces a cohesive month of valuable content or a random collection of disconnected images. Invest time in planning, and your shooting session will be efficient, productive, and stress-free.
Content Calendar Planning
Start by creating a content calendar for the period you're batching—typically 2-4 weeks. Don't just plan "I need 30 photos." Plan what those photos will communicate, what themes they'll cover, and how they'll work together to tell your brand story.
Identify 3-5 content themes or pillars that align with your brand and audience interests. For example, a fitness coach might have themes like "workout demonstrations," "nutrition tips," "motivation and mindset," "client transformations," and "behind-the-scenes." A product-based business might have "product features," "lifestyle usage," "customer testimonials," "behind-the-scenes production," and "educational content."
Within each theme, brainstorm specific content ideas. Don't just write "workout post"—write "demonstration of proper squat form, shot from side angle showing alignment." Specificity during planning eliminates decision-making during shooting.
Plan for variety in content types. Mix educational posts, promotional content, personal/behind-the-scenes content, user-generated content, and engagement-focused posts. A good rule of thumb is 60% value-driven content (educational, entertaining, inspiring), 30% community-building content (behind-the-scenes, personal stories, engagement posts), and 10% promotional content (direct sales, product features).
Consider your posting frequency and platform requirements. If you post once daily on Instagram, you need 30 images for a month. If you also post Stories, Reels, LinkedIn, and Facebook, your needs multiply. Be realistic about what you'll actually post and create accordingly—it's better to have 25 great images you'll use than 50 mediocre images that sit unused.
Map content to specific dates when relevant. Seasonal content, holidays, product launches, or time-sensitive topics should be scheduled appropriately. Leave flexibility for real-time content and trending topics, but plan the foundational content that keeps your feed active regardless of what's happening day-to-day.
Creating Your Shot List
A detailed shot list is your roadmap during the shooting session. It eliminates guesswork, ensures you capture everything needed, and keeps you moving efficiently through your session.
For each piece of content in your calendar, specify:
Subject/focus: What's the main subject? (You in a specific outfit, a product, a flat lay arrangement, etc.)
Composition: How will it be framed? (Close-up, full body, overhead, detail shot, etc.)
Orientation: Vertical for Stories/Reels, square for Instagram feed, horizontal for YouTube thumbnails or blog headers
Props/elements: What additional items are needed? (Coffee cup, laptop, specific background, plants, etc.)
Outfit/styling (if applicable): What will you wear or how will products be styled?
Lighting/mood: Bright and airy, moody and dramatic, natural window light, etc.
Group your shot list by setup rather than chronological posting order. If you're shooting five images with the same outfit and background, group them together so you shoot them consecutively without changing setups. This grouping is crucial for efficiency.
A sample shot list entry might look like:
*Setup 1: White background, natural window light, wearing navy blazer*
- Professional headshot, shoulders up, looking at camera (vertical)
- Three-quarter body shot, arms crossed, confident pose (vertical)
- Sitting at desk with laptop, working pose (horizontal)
- Close-up of hands typing on laptop (square)
*Setup 2: Outdoor location, golden hour, wearing casual outfit*
- Full body walking shot, candid feel (vertical)
- Sitting on bench, relaxed pose (square)
- Close-up portrait, natural smile (vertical)
This grouping means you complete all navy blazer shots before changing outfits, and all outdoor shots during one golden hour session, maximizing efficiency.
Props, Outfits, and Location Preparation
Once your shot list is complete, gather everything you'll need before your shooting day. Nothing kills momentum like realizing mid-session that you're missing a crucial prop or outfit.
Outfits: Select and prepare all outfits in advance. Try them on to ensure they fit and look good on camera. Steam or iron them so they're ready to wear. Lay them out in the order you'll shoot them. If you're shooting 5-7 outfit changes, this preparation saves enormous time during your session.
Choose outfits that align with your brand aesthetic and create variety. Include different colors, styles, and formality levels. Avoid busy patterns or logos unless they're intentional brand elements—solid colors and simple patterns photograph better and have longer shelf life.
Props: Gather all props your shot list requires. Common props for content creators include:
- Coffee cups or water bottles
- Laptops, tablets, or phones
- Books or notebooks
- Plants or flowers
- Products you're featuring
- Seasonal items (pumpkins for fall, flowers for spring, etc.)
- Tools or equipment relevant to your niche
Organize props by setup so you can grab everything needed for each scene quickly.
Locations: Scout and prepare your shooting locations in advance. If you're shooting at home, clean and declutter the areas you'll use. If you're shooting outdoors or at external locations, visit them beforehand to confirm lighting, backgrounds, and accessibility.
Prepare multiple background options for variety. A white wall, a textured wall, outdoor greenery, a clean desk setup, and a neutral-colored backdrop give you diverse looks without requiring multiple locations.
Scheduling Your Session
Choose your shooting day and time strategically. Consider:
Lighting: If you're relying on natural light, schedule during times when your locations have good light. For window light, mid-morning or mid-afternoon often works well. For outdoor shooting, golden hour (hour after sunrise or before sunset) provides beautiful light.
Energy levels: Schedule when you have high energy. Batch photography sessions are intensive—you'll be more productive and creative when you're fresh rather than exhausted.
Uninterrupted time: Block 3-5 hours of completely uninterrupted time. Turn off notifications, inform family or roommates you're unavailable, and protect this time fiercely. Interruptions destroy the flow state that makes batch photography efficient.
Backup plan: Have a backup date in case weather, illness, or unexpected events interfere. If you're relying on outdoor light or specific weather conditions, flexibility is essential.
Consider splitting your session if needed. Some creators prefer two shorter sessions (2-3 hours each) rather than one marathon session. This can maintain energy and creativity while still batching efficiently.
The planning phase requires 1-3 hours depending on how much content you're creating, but this investment pays enormous dividends during shooting. A well-planned session flows smoothly, produces exactly the content you need, and eliminates the stress of figuring things out on the fly.
Setting Up for Maximum Efficiency
The difference between a productive batch photography session and a frustrating one often comes down to setup. Proper preparation of your shooting space, lighting, backgrounds, and equipment creates a smooth workflow where you can focus on creating great content rather than solving technical problems.
Location Selection and Preparation
Choose locations that offer versatility and good light. For most content creators, home-based locations are most practical, but outdoor locations can provide variety and natural beauty.
Indoor locations: Identify 2-3 distinct areas in your home that offer different looks. Common options include:
- A room with large windows for natural light portraits and lifestyle shots
- A clean wall (white, gray, or textured) for simple backgrounds
- A styled desk or workspace for professional/working content
- A kitchen or living area for lifestyle content
Prepare each location by decluttering ruthlessly. Remove anything that doesn't contribute to your shot. Clean surfaces, hide cords and clutter, and create a blank canvas you can style intentionally for each shot.
Outdoor locations: Scout outdoor locations that offer good backgrounds and lighting. Parks, urban areas with interesting architecture, natural settings, or even your backyard can work. Consider:
- Background variety (greenery, walls, interesting textures)
- Lighting at different times of day
- Accessibility and privacy
- Weather backup options
Visit outdoor locations at the time you plan to shoot to see actual lighting conditions. What looks great at noon might be terrible at 4 PM, and vice versa.
Lighting Setup
Lighting makes or breaks your photos. Consistent, flattering light is essential for batch photography because it creates visual cohesion across all your content.
Natural light is ideal for most content creators. It's free, flattering, and creates a natural look audiences love. Position yourself near large windows, with light coming from the side or front (not behind you, which creates backlighting challenges).
The quality of window light varies throughout the day. Direct sunlight creates harsh shadows; indirect light (when the sun isn't shining directly through the window) creates soft, even illumination. Overcast days provide beautifully diffused light all day long.
Use white reflectors (foam boards, white poster boards, or professional reflectors) opposite your window to bounce light back and fill shadows. This creates more even illumination and reduces harsh shadow contrast.
Artificial light gives you control and consistency regardless of time or weather. If you're investing in lighting, consider:
- LED panel lights (affordable, adjustable brightness and color temperature)
- Ring lights (popular for portraits and product photography, creates catchlights in eyes)
- Softbox lights (professional-quality soft light)
Position artificial lights at 45-degree angles from your subject for flattering, dimensional lighting. Use diffusion (softboxes or diffusion panels) to soften harsh light.
Maintain consistent lighting throughout your session. If you're using window light, shoot all content during the same time period when light quality is consistent. If using artificial light, keep settings consistent across setups.
Background Options and Quick Changes
Variety in backgrounds keeps your content visually interesting, but changing backgrounds shouldn't consume significant time. Prepare multiple background options that you can switch between quickly.
Seamless paper or fabric backdrops create clean, professional backgrounds in any color. Roll them down for shooting, roll them up to change. White, gray, and neutral colors are most versatile.
Portable backgrounds like foam boards, poster boards, or collapsible backdrops can be moved and positioned quickly. Keep several colors or textures ready to swap.
Environmental backgrounds use your actual space—a wall, bookshelf, window, or outdoor setting. These require less setup but offer less control. Prepare several spots in your space that offer different looks.
Flat lay surfaces for overhead photography should be clean, neutral, and large enough for your compositions. White or light wood surfaces are most popular. A large piece of foam board, a clean table, or a dedicated flat lay board all work.
Organize backgrounds in the order you'll use them. If you're shooting five setups with a white background, then three with a gray background, position them so you can transition smoothly without searching.
Equipment and Accessories Checklist
Gather all equipment before starting your session. Essential items include:
Camera: Your smartphone is perfectly adequate for social media content. If you have a dedicated camera, use it, but don't let lack of professional equipment stop you—phone cameras are excellent.
Tripod: Essential for batch photography. It enables consistent framing, hands-free shooting with timers, and stable images. A smartphone tripod costs $15-30 and is one of the best investments for content creation.
Remote shutter or timer: Enables hands-free shooting. Most smartphones have built-in timers; Bluetooth remote shutters cost $10-20 and offer more flexibility.
Lighting equipment: Whatever lighting you're using (natural light reflectors, LED panels, ring light, etc.)
Backgrounds and props: Everything from your shot list, organized and ready
Backup power: Fully charged phone/camera batteries, backup batteries if available, and charging cables nearby
Memory/storage: Ensure you have adequate storage space on your device. Clear space before starting if needed.
Editing apps: Have your editing apps downloaded and ready. You might edit immediately after shooting or later, but having tools ready prevents delays.
Shot list and notes: Print or have digital access to your shot list, content calendar, and any notes
Comfort items: Water, snacks, comfortable shoes if you'll be standing for extended periods, and anything else that keeps you comfortable and energized
Set up a "home base" area where you keep equipment, props, and your shot list. This central location prevents wasting time searching for items during your session.
The setup phase might take 30-60 minutes, but this investment creates a smooth, efficient shooting experience. When everything is prepared and organized, you can focus entirely on creating great content rather than solving logistical problems.
The Batch Shooting Workflow
With planning complete and setup finished, it's time to shoot. An efficient workflow maximizes the number of quality images you create while minimizing time and effort. The key is working systematically through your shot list, batching similar setups together, and capturing multiple variations of each shot.
Outfit and Setup Batching Strategy
The golden rule of batch photography: minimize transitions. Every time you change outfits, move locations, or reconfigure your setup, you lose time and momentum. Group your shot list so you complete all images requiring the same setup before moving to the next.
Start with your first outfit and background combination. Shoot every image on your shot list that uses this setup before changing anything. If you have five different poses or compositions planned with the same outfit and background, shoot all five consecutively.
Within each setup, shoot in this order:
1. Test shots: Take a few test images to check lighting, framing, and exposure. Adjust as needed before shooting your actual content.
2. Primary shots: Shoot the main images from your shot list, following your planned compositions.
3. Variations: Shoot variations of each primary shot—different angles, slightly different poses, closer or wider framing. These variations give you options during editing and selection.
4. Bonus shots: If time allows and you're feeling creative, capture a few unplanned shots. Sometimes the best content comes from spontaneous creativity.
Only after completing all shots for a setup should you transition to the next outfit, location, or background. This batching approach is dramatically more efficient than jumping between setups.
Shooting Multiple Angles and Variations
Never shoot just one version of each image. Capture multiple angles, framings, and variations to give yourself options during editing and selection. This abundance approach ensures you have great content even if some shots don't work out.
For each composition on your shot list, shoot:
Multiple framings: Tight crop, medium crop, wide crop. You can always crop tighter in editing, but you can't add space around a too-tight crop.
Different angles: Straight on, slightly from above, slightly from below. Small angle changes create different feels and give you variety.
Vertical and horizontal orientations: Even if you planned one orientation, shoot both. You might use the image for different platforms or purposes than originally intended.
Multiple expressions or poses: If you're in the shot, capture several expressions—serious, smiling, laughing, thoughtful. Subtle pose variations create options.
Different focus points: For product or flat lay photography, try different focus points to emphasize different elements.
Shoot in bursts when appropriate. If you're capturing movement, candid expressions, or action shots, use burst mode to capture multiple frames and select the best one later.
The goal is abundance. It's better to have 200 images to choose from and select the best 30 than to have exactly 30 images with no alternatives. Storage is cheap; missing the perfect shot because you didn't capture enough variations is expensive.
Using Timers and Tripods Effectively
If you're creating content featuring yourself, a tripod and timer are essential. They enable you to be in your own photos without needing a photographer, and they create consistency across images.
Set up your tripod at the appropriate height and distance for your shot. Use your phone or camera's grid lines to compose the frame, ensuring proper framing and alignment.
Set your timer to 3-10 seconds depending on how much time you need to get into position. Longer timers give you time to move from the camera to your position and settle into a natural pose.
Take multiple shots with each timer activation. Most cameras can be set to take 3-5 images per timer activation, giving you multiple options without returning to the camera each time.
Review images periodically to ensure framing, focus, and exposure are correct. It's frustrating to complete an entire setup only to discover everything was out of focus or poorly framed.
For full-body shots, mark your position on the floor with tape so you can return to the same spot for each shot. This consistency makes editing and selection easier.
Capturing Different Content Types in Sequence
Batch photography should create diverse content types, not just variations of the same shot. Plan your session to include:
Portrait/headshot content: Professional headshots, casual portraits, lifestyle portraits. These establish your personal brand and create connection with your audience.
Product content (if applicable): Clean product shots, lifestyle product usage, detail shots, flat lays. These showcase what you sell or use.
Behind-the-scenes content: Your workspace, your process, candid moments. This authentic content builds connection and trust.
Educational/demonstration content: Step-by-step processes, before/after comparisons, demonstrations. This provides value and positions you as an expert.
Lifestyle content: You in your environment, doing activities related to your niche. This creates relatability and context.
Flat lay/overhead content: Arranged objects shot from above. This popular Instagram format works for products, workspace setups, food, and more.
Detail shots: Close-ups of textures, products, hands, or specific elements. These add variety and can be used as supporting images or backgrounds for text overlays.
Shoot different content types in batches. Complete all portrait content with one outfit, then all product shots, then all flat lays, etc. This batching maintains efficiency while creating variety.
> Want to elevate your batch photography even further? Glowup's AI platform can enhance your photos with professional backgrounds, perfect lighting, and polished editing—turning your batch photography session into a library of studio-quality content in minutes.
Content Variety Within Your Batch
Creating a month of content in one day requires intentional variety. If all your images look too similar, your feed will feel repetitive and boring. Strategic variety in content types, formats, compositions, and subjects keeps your content fresh and engaging throughout the month.
Mix of Content Types
Diversify the types of content you create to serve different purposes and appeal to different audience preferences. A well-rounded batch session includes:
Educational content teaches your audience something valuable. This might be step-by-step demonstrations, infographics, before/after comparisons, or visual explanations. Educational content positions you as an expert and provides genuine value that builds trust and authority.
Inspirational/motivational content uplifts and encourages your audience. Quotes, success stories, transformation images, or aspirational lifestyle content fall into this category. This content drives engagement and shares because people love to spread positivity.
Behind-the-scenes content shows your process, workspace, daily life, or the reality behind your polished content. This authenticity builds connection and makes you relatable. People follow people, not just products or perfect images.
Product/service content showcases what you offer. Clean product photography, lifestyle usage shots, feature highlights, or service demonstrations. This content drives sales and conversions but should be balanced with value-driven content.
Personal/lifestyle content shares your life, interests, and personality beyond your niche. This humanizes your brand and creates deeper connection with your audience.
Engagement-focused content specifically designed to drive comments, shares, or saves. This might be questions, polls, fill-in-the-blank prompts, or controversial (but appropriate) takes on industry topics.
A good mix might be 40% educational, 20% inspirational, 20% behind-the-scenes, 10% product/promotional, and 10% personal/engagement. Adjust based on your goals and audience preferences.
Vertical vs Horizontal vs Square Formats
Different platforms and content types require different aspect ratios. Shooting multiple formats during your batch session ensures you have content optimized for each platform.
Vertical (9:16 or 4:5) is essential for Instagram Stories, Reels, TikTok, and Pinterest. Vertical content takes up more screen space on mobile devices and performs better on most platforms. Shoot vertical for any content destined for Stories or short-form video platforms.
Square (1:1) remains popular for Instagram feed posts. While Instagram now supports other ratios, square images create a cohesive grid aesthetic. Shoot square for traditional Instagram feed content.
Horizontal (16:9 or 3:2) works for YouTube thumbnails, blog headers, Facebook posts, and LinkedIn articles. Shoot horizontal for content that will be used on these platforms or embedded in websites.
The most efficient approach is shooting horizontal or vertical and cropping to other ratios as needed. Shoot with extra space around your subject so you can crop to different aspect ratios without cutting off important elements.
Consider shooting the same setup in multiple orientations. A product shot captured both vertically and horizontally gives you options for different platforms without requiring a separate setup.
Close-ups, Wide Shots, and Detail Shots
Varying your shot distance and framing creates visual interest and serves different purposes.
Wide shots show context and environment. They're great for lifestyle content, showing your workspace, or establishing setting. Wide shots tell a broader story and create atmosphere.
Medium shots are the workhorses of content creation. They show enough detail to be clear while including some context. Most portrait and product content falls into this category.
Close-ups emphasize details, create intimacy, and highlight specific elements. Close-ups of faces create emotional connection. Close-ups of products show quality and craftsmanship. Close-ups of hands working show process and authenticity.
Detail shots are extreme close-ups of textures, patterns, or small elements. These create visual interest, can be used as backgrounds for text overlays, and add variety to your content mix.
Shoot each setup at multiple distances. If you're photographing a product, capture a wide shot showing it in context, a medium shot showing the product clearly, and close-ups of important details or features. This variety gives you options and creates a more dynamic content library.
Action Shots vs Static Compositions
Movement and energy create engaging content, but static compositions have their place too. Balance both in your batch session.
Static compositions are easier to shoot and create clean, professional images. Product photography, flat lays, posed portraits, and carefully arranged scenes are all static. These images are polished and controlled.
Action shots capture movement, process, or candid moments. Someone working, walking, laughing, creating, or using a product. These images feel more dynamic and authentic.
Use burst mode for action shots to capture multiple frames and select the best one. Even subtle movement—hair moving, hands gesturing, walking—creates more engaging images than completely static poses.
Candid-looking action shots can be staged. Set up your camera, start the timer or video, and move naturally through an action. Extract still frames from video or shoot bursts while moving. The result looks candid but is actually controlled.
Balance is key. Too many static images feel stiff and boring. Too many action shots can feel chaotic. Mix both for a dynamic yet professional content library.
Organization and File Management
Creating hundreds of images in a batch session is productive, but only if you can find and use those images later. Proper organization and file management transform a chaotic pile of photos into a usable content library that saves time and reduces stress.
Naming Conventions for Easy Finding
Develop a consistent naming convention for your images that makes finding specific photos quick and intuitive. A good naming system includes relevant information without being overly complex.
A simple, effective naming convention might be:
YYYY-MM-DD_Category_Description_Number
For example:
- 2026-03-16_Portrait_NavyBlazer_01.jpg
- 2026-03-16_Product_CoffeeFlat_03.jpg
- 2026-03-16_BTS_Workspace_02.jpg
This system sorts chronologically, identifies content type, includes a brief description, and numbers variations.
Alternatively, organize by content theme:
Theme_Date_Description_Number
For example:
- Fitness_2026-03-16_WorkoutDemo_01.jpg
- Nutrition_2026-03-16_MealPrep_02.jpg
- Motivation_2026-03-16_Portrait_01.jpg
Choose a system that makes sense for your content and stick with it consistently. The specific system matters less than consistency—your brain will learn your system and finding images becomes automatic.
Rename files immediately after shooting or during your initial culling process. Don't leave files with default camera names like IMG_4829.jpg—you'll never remember what they contain.
Folder Structure by Theme/Date/Platform
Organize your photo library with a logical folder structure that mirrors how you think about and use your content.
A date-based structure works well for batch photography:
```
Content Library/
2026-03/
2026-03-16_Batch_Session/
Raw/
Edited/
Selected/
2026-04/
2026-04-12_Batch_Session/
```
A theme-based structure organizes by content type:
```
Content Library/
Portraits/
Professional/
Casual/
Products/
Lifestyle/
Clean_Background/
Behind_the_Scenes/
Flat_Lays/
```
A platform-based structure organizes by where content will be used:
```
Content Library/
Instagram/
Feed/
Stories/
Reels/
LinkedIn/
Facebook/
Website/
```
Many creators use a hybrid approach with date-based main folders and theme-based subfolders:
```
Content Library/
2026-03-16_Batch/
Portraits/
Products/
BTS/
Flat_Lays/
```
Within each folder, create subfolders for Raw (unedited originals), Edited (processed images), and Selected (final images chosen for posting). This workflow organization prevents confusion about which images are ready to use.
Immediate Culling and Selection
Don't wait to review and cull your images. Immediately after your shooting session (or during breaks), review images and delete obvious failures.
Cull ruthlessly. Delete images that are:
- Out of focus or blurry
- Poorly exposed (too dark or too bright beyond repair)
- Unflattering expressions or poses
- Duplicates that add no value
- Technical failures (finger over lens, camera moved, etc.)
This initial cull might eliminate 30-50% of images, which is normal and healthy. You're not deleting good images—you're removing clutter that makes finding good images harder.
After culling failures, rate or flag your best images. Most photo management apps allow star ratings or color flags. Use these to mark:
- 5 stars: Exceptional images, definitely using
- 4 stars: Great images, likely using
- 3 stars: Good images, maybe using
- 2 stars or lower: Acceptable but probably won't use
This rating system makes final selection easier. When you're scheduling content, you can filter to show only 4-5 star images, making selection quick and ensuring you use your best content.
Backup Strategies
Your content library is a business asset. Losing it to a hard drive failure, lost phone, or corrupted files is devastating. Implement a backup strategy immediately.
Follow the 3-2-1 backup rule:
- 3 copies of your data
- 2 different storage types
- 1 off-site backup
For example:
1. Original files on your computer (copy 1, storage type 1)
2. External hard drive backup (copy 2, storage type 2)
3. Cloud storage backup (copy 3, off-site)
Cloud storage options include Google Drive, Dropbox, iCloud, OneDrive, or dedicated photo storage services. Many offer automatic backup, ensuring new images are backed up without manual effort.
External hard drives are inexpensive insurance. A 1-2TB external drive costs $50-100 and can store years of content. Back up your entire content library monthly or after each batch session.
For critical content, consider additional backups. If you're a professional creator whose income depends on your content library, redundancy is worth the small cost.
Batch Editing for Consistency
Editing transforms good photos into great content. Batch editing—applying consistent edits across multiple images—creates visual cohesion while saving enormous time compared to editing each image individually.
Editing Workflow and Tools
Develop a systematic editing workflow that you follow for every batch session. Consistency in process creates consistency in results.
A typical editing workflow:
1. Import and organize: Transfer images from camera to computer, organize into folders, rename files
2. Cull and select: Delete failures, rate keepers, select final images for editing
3. Batch adjustments: Apply basic corrections (exposure, white balance, contrast) to all selected images
4. Individual refinement: Fine-tune specific images that need additional work
5. Export: Save edited images in appropriate formats and sizes for different platforms
6. Archive: Store raw files and edited versions in organized folders with backups
Choose editing tools that support batch processing. Options include:
Lightroom Mobile (free with optional subscription) is excellent for batch editing. Edit one image, then copy those settings and paste them to similar images. It syncs across devices and offers professional-level controls.
Snapseed (free, iOS and Android) is powerful and completely free. While it doesn't have true batch processing, you can save edits as "looks" and apply them to multiple images relatively quickly.
VSCO (free with optional subscription) offers presets and batch editing capabilities. Popular for its film-inspired aesthetic.
Adobe Express (free) provides quick, easy editing with templates and one-tap enhancements.
Desktop software like Lightroom Classic, Capture One, or Luminar offers the most powerful batch editing capabilities for serious creators.
Creating and Applying Presets
Presets are saved editing settings that you can apply to multiple images with one click. They're the secret to efficient batch editing and consistent visual branding.
Create presets by editing one image to perfection, then saving those settings as a preset. When you apply that preset to other images from the same session, they instantly receive the same adjustments.
To create effective presets:
1. Edit a representative image: Choose an image with typical lighting and subject matter from your batch
2. Make your adjustments: Adjust exposure, contrast, saturation, white balance, sharpening, etc. until the image looks exactly how you want
3. Save as preset: Save these settings as a preset with a descriptive name
4. Test on other images: Apply the preset to several other images from your batch to ensure it works well across different shots
5. Refine if needed: Adjust the preset if it doesn't work well on most images
Create multiple presets for different scenarios:
- Bright and airy (high exposure, low contrast, desaturated)
- Moody and dramatic (lower exposure, high contrast, rich colors)
- Natural and warm (slight warmth, moderate saturation)
- Clean and minimal (neutral tones, high clarity)
Apply presets as a starting point, then fine-tune individual images as needed. Presets handle 80% of the work; individual adjustments handle the remaining 20%.
Maintaining Visual Cohesion
Visual cohesion—a consistent look and feel across your content—is crucial for brand recognition and professional appearance. Batch editing naturally creates cohesion when done correctly.
Maintain cohesion by:
Using the same preset or editing approach for all images from a batch session. This creates consistent color tones, contrast, and overall aesthetic.
Matching white balance across images. Inconsistent color temperature (some images warm, others cool) looks unprofessional and breaks visual flow.
Consistent exposure and contrast. While individual images may need slight adjustments, overall brightness and contrast should be similar across your content.
Similar saturation levels. Some images highly saturated and others desaturated creates jarring inconsistency.
Consistent cropping and framing. If you're creating a series (like product photos), maintain consistent framing and composition across all images.
Review your edited images together, not just individually. View them as a grid or collection to see how they work together. This reveals inconsistencies that aren't obvious when viewing images one at a time.
Platform-Specific Optimizations
Different platforms have different technical requirements and visual expectations. Optimize your edited images for each platform where you'll post.
Instagram:
- Feed: 1080 x 1080 pixels (square) or 1080 x 1350 pixels (vertical)
- Stories/Reels: 1080 x 1920 pixels (vertical)
- Bright, high-contrast images perform well
- JPEG format, sRGB color space
Facebook:
- 1200 x 630 pixels for link previews
- 1080 x 1080 pixels for standard posts
- Similar aesthetic to Instagram but slightly more conservative
LinkedIn:
- 1200 x 627 pixels for articles
- 1080 x 1080 pixels for posts
- Professional, polished aesthetic
- Avoid overly casual or trendy editing
Pinterest:
- 1000 x 1500 pixels (vertical 2:3 ratio)
- Bright, clear images with high contrast
- Text overlays often beneficial
Website/Blog:
- Varies by design, typically 1200-2000 pixels wide
- Optimize file size for fast loading (compress without visible quality loss)
- JPEG for photos, PNG for graphics with text
Export images in appropriate sizes and formats for each platform. Most editing apps allow you to create export presets that automatically size and format images correctly.
Compress images to reduce file size without visible quality loss. Tools like TinyPNG, ImageOptim, or built-in export optimization in editing apps reduce file sizes by 50-70% without noticeable quality degradation.
Scheduling and Posting Strategy
Creating a month of content is only valuable if you actually post it strategically. A thoughtful scheduling and posting strategy ensures your batch photography effort translates into consistent social media presence and audience growth.
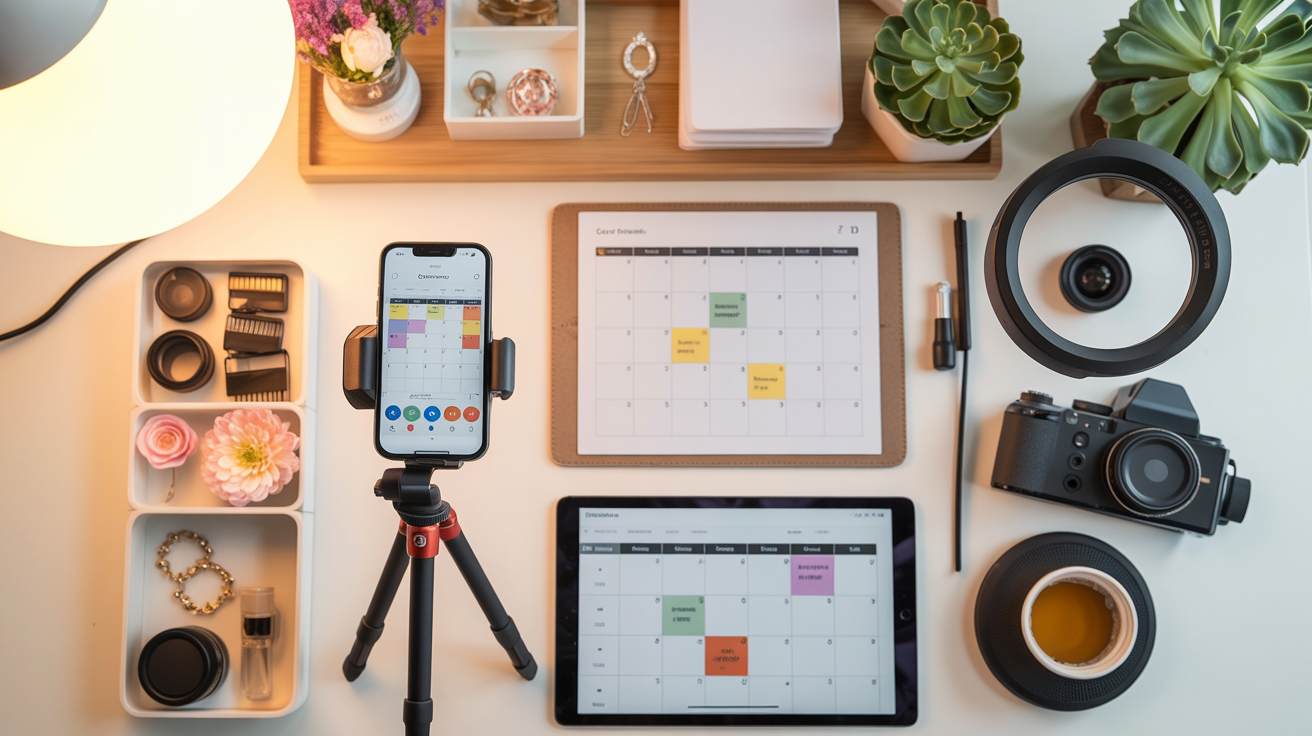
Content Calendar Tools
Use content calendar tools to plan, schedule, and automate your posting. This removes the daily decision of "what should I post today" and ensures consistent presence even when you're busy.
Popular scheduling tools include:
Later (free and paid plans) is excellent for Instagram, Facebook, Pinterest, and TikTok. Visual calendar interface, drag-and-drop scheduling, and analytics. Free plan allows 10 posts per month per platform.
Buffer (free and paid plans) supports Instagram, Facebook, Twitter, LinkedIn, and Pinterest. Clean interface, browser extension for easy scheduling, and analytics. Free plan allows 3 channels and 10 scheduled posts.
Planoly (free and paid plans) focuses on Instagram and Pinterest. Visual grid planner shows how your feed will look. Free plan allows 30 uploads per month.
Meta Business Suite (free) is Facebook's native tool for scheduling Facebook and Instagram posts. Completely free with no limits, but less features than third-party tools.
Hootsuite (paid, with limited free plan) is comprehensive, supporting most major platforms. More complex but powerful for managing multiple accounts.
Choose a tool that supports your platforms, fits your budget, and has an interface you find intuitive. The best tool is the one you'll actually use consistently.
Optimal Posting Times
Post when your audience is most active and engaged. Optimal times vary by platform, audience demographics, and time zones.
General guidelines:
Instagram: Weekdays 10 AM - 3 PM, with peaks around 11 AM and 1-2 PM. Wednesday and Friday often perform well.
Facebook: Weekdays 9 AM - 3 PM, with peak engagement 1-3 PM. Thursday and Friday are often strongest.
LinkedIn: Weekdays 7-9 AM and 5-6 PM (before and after work hours). Tuesday through Thursday perform best.
Pinterest: Evenings 8-11 PM and weekends. Saturday morning is particularly strong.
TikTok: Evenings 6-10 PM and early mornings 6-9 AM. Tuesday through Thursday are strong.
However, these are generalizations. Your specific audience may have different patterns. Check your platform analytics to see when your audience is most active and engaged.
Test different posting times and track performance. Schedule some content at recommended times and some at different times, then compare engagement rates to find your optimal schedule.
Mixing Batch Content with Real-Time Posts
While batch photography creates your content foundation, don't post exclusively pre-created content. Mix batch content with real-time, timely posts for authenticity and relevance.
A good mix might be:
- 70-80% batch content (planned, polished, strategic)
- 20-30% real-time content (timely, spontaneous, trending)
Real-time content includes:
- Responses to trending topics or news in your industry
- Behind-the-scenes moments from your current day
- User-generated content or customer features
- Time-sensitive announcements or promotions
- Live event coverage or real-time updates
This mix maintains consistency (you always have batch content ready) while staying relevant and authentic (real-time content shows you're present and engaged).
Schedule batch content in advance, but leave flexibility in your calendar for real-time posts. If something timely comes up, you can easily shift scheduled content to make room.
Maintaining Authenticity While Batching
A common concern about batch photography is that it feels inauthentic or disconnected from real-time life. Address this by:
Varying posting times: Don't post at exactly the same time every day. Vary by 30-60 minutes to feel more natural.
Writing captions in real-time: Even if photos are pre-created, write captions when you schedule or post. This keeps your voice current and authentic.
Engaging in real-time: Respond to comments, engage with other accounts, and participate in conversations in real-time, even if your posts are scheduled.
Mixing content types: Combine polished batch content with casual Stories, real-time updates, and spontaneous posts.
Being honest: There's no shame in batching content. Many successful creators openly share their batching process, which actually builds trust and helps other creators.
Staying current: Reference current events, seasons, or timely topics in your captions even if the photo was taken weeks earlier.
Batch photography is a production strategy, not a deception. Your content can be pre-created and still be authentic, valuable, and engaging.
> Take your scheduled content to the next level: Glowup's AI platform enhances your batch photography with professional editing, perfect backgrounds, and studio-quality polish. Create a month of premium content that stands out in crowded feeds. Transform your content strategy today.
Common Batch Photography Mistakes to Avoid
Even with a solid plan, certain mistakes can undermine your batch photography efforts. Recognizing and avoiding these pitfalls ensures your sessions are productive and your content library is valuable.
Over-Batching (Content Feels Stale)
The biggest risk of batch photography is creating content so far in advance that it feels outdated or disconnected by the time you post it.
Avoid over-batching by:
Limiting batch sessions to 2-4 weeks of content. A month is manageable; three months is risky. Trends change, seasons shift, and your business evolves. Content created too far in advance may no longer be relevant.
Focusing on evergreen content. Batch photography works best for timeless content that remains relevant regardless of when it's posted. Avoid batching highly time-sensitive or trendy content.
Updating captions in real-time. Even if photos are weeks old, write captions when you post to keep your voice current and reference timely topics.
Mixing batch and real-time content. Don't rely exclusively on batch content. Mix in fresh, spontaneous posts to maintain currency.
Reviewing content before posting. Before posting batch content, confirm it's still relevant and appropriate. If something has changed (season, trends, your business focus), swap in different content.
Lack of Variety
Creating 50 images that all look similar defeats the purpose of batch photography. Your feed will feel repetitive and boring.
Ensure variety by:
Planning diverse content types during your shot list creation. Include portraits, products, flat lays, behind-the-scenes, educational content, and lifestyle shots.
Varying compositions and angles. Don't shoot everything from the same distance and angle. Mix close-ups, wide shots, overhead shots, and different perspectives.
Using multiple outfits and backgrounds. Change outfits 3-5 times during your session. Use different backgrounds and locations.
Shooting different orientations. Capture vertical, horizontal, and square images for different platforms and visual variety.
Including different moods and energy levels. Mix serious and playful, professional and casual, static and action shots.
Review your batch as a collection before finishing your session. If everything looks too similar, shoot additional variety before wrapping up.
Ignoring Seasonal and Timely Content
Batch photography works for evergreen content, but you still need seasonal and timely content throughout the year.
Balance batch and seasonal content by:
Creating seasonal batches. In early fall, batch autumn-themed content. In late November, batch winter/holiday content. This keeps content seasonal without requiring daily shooting.
Leaving calendar gaps for timely content. Don't schedule every single day with batch content. Leave flexibility for holidays, announcements, or trending topics.
Planning ahead for known events. If you know you'll need content for a product launch, holiday, or event, include it in your batch session.
Keeping props and outfits seasonal. When batching in March, don't wear heavy sweaters or include pumpkins. Keep content seasonally appropriate for when it will post.
Updating batch content with timely captions. A neutral photo can be made timely with a caption referencing current events or seasons.
Poor Organization Leading to Wasted Effort
Creating hundreds of images is pointless if you can't find them when needed. Poor organization wastes the time you saved through batching.
Avoid organization problems by:
Implementing a system immediately. Don't wait to organize. Rename files, create folders, and cull images immediately after shooting.
Being consistent with naming and organization. Use the same system every time so finding images becomes automatic.
Documenting your system. Write down your naming convention and folder structure so you remember it months later.
Backing up immediately. Don't risk losing your batch session to a technical failure. Back up to cloud storage and external drives right away.
Creating a content calendar. Track which images you've used and when. This prevents accidentally posting the same image twice or forgetting about great content.
Reviewing your library regularly. Periodically review your content library to remember what you have and identify gaps for future batch sessions.
Conclusion
Batch photography transforms content creation from a daily burden into a strategic, efficient process. By dedicating one focused day to creating a month of content, you reclaim countless hours, reduce stress, improve consistency, and free yourself to focus on growing your business and serving your audience.
The transformation is dramatic. Instead of scrambling daily for content ideas, you have a library of professional images ready to post. Instead of inconsistent quality that varies with your energy and inspiration, you have cohesive, polished content that strengthens your brand. Instead of decision fatigue from daily content choices, you make decisions once and execute systematically.
The workflow is straightforward: plan your content calendar and shot list, prepare your locations and props, set up efficient shooting spaces, batch shoot systematically through your list, organize and edit for consistency, and schedule strategically. Each step builds on the previous one, creating a system that becomes easier and more efficient with practice.
Start small if batch photography feels overwhelming. Your first session might create just one week of content in a few hours. That's still a win—you've eliminated a week of daily content stress. As you refine your process, you'll naturally become more efficient, creating more content in less time.
The key is consistency. One batch photography session is helpful; regular monthly sessions transform your entire content strategy. Block a recurring day each month for batch photography, and within a few months, you'll have a content library that keeps you consistently visible and engaged with your audience.
Remember that batch photography is a production strategy, not a creativity killer. Many creators find they're more creative during focused batch sessions than when scrambling for daily content. The structure and efficiency of batching actually frees creative energy rather than constraining it.
Your content is the foundation of your social media presence, personal brand, and business growth. Investing one day per month in batch photography is investing in your success. The time you save, the consistency you create, and the stress you eliminate compound over time, creating space for the strategic work that actually grows your business.
The content machine doesn't have to control you. With batch photography, you control it. Start planning your first batch session today, and experience the transformation from reactive content scrambling to strategic content creation.