Makeup for Photos: The Complete Guide to Camera-Ready Looks for Headshots and Professional Shoots
Whether you're preparing for a professional headshot session, a brand photoshoot, content creation, or simply want to look your best on a video call, there's one truth every photographer and makeup artist knows: makeup for photos is not the same as everyday makeup. What looks perfectly natural in the bathroom mirror can appear washed out, uneven, or invisible once a camera enters the equation. Conversely, techniques that feel "too much" in person often translate to polished, dimensional, and effortlessly put-together on screen.
Camera sensors, lenses, and lighting all change how skin, color, and texture are rendered. Flash photography can flatten your features, studio lighting can amplify imperfections you'd never notice with your eyes, and high-resolution cameras capture every detail — sometimes more than you'd like. Understanding how to work with the camera instead of against it is the key to looking your absolute best in photos.
This guide is for everyone — all genders, all experience levels, all skin tones. Makeup is not about conforming to any particular standard of beauty; it's a tool for enhancing what's already there so the camera captures you at your best. Whether you've been wearing makeup for decades or have never picked up a brush, you'll find practical, actionable advice here. Let's dive in.
Why Makeup Looks Different on Camera
Before you start applying anything, it helps to understand why what you see in the mirror doesn't match what the camera captures. This knowledge alone will transform your approach to photo-day preparation.
How Cameras Flatten Features and Wash Out Color
Human eyes perceive depth through binocular vision — two eyes working together to create a three-dimensional picture. Cameras, however, capture the world through a single flat lens. This means the natural shadows, contours, and dimensions of your face get compressed into a two-dimensional image. Cheekbones that look sculpted in person may appear flat. The subtle definition around your jawline or nose can disappear entirely. Without a little help from makeup, many people look "flatter" and less defined on camera than they do in real life.
Color is another casualty. Camera sensors interpret color differently than the human eye, and the white balance settings, lens coatings, and post-processing all affect how hues are rendered. A rosy blush that's perfectly visible in person might barely register on camera. Lip color can look muted. Even your natural skin undertones may shift warmer or cooler depending on the lighting and camera settings. This is why photographers and makeup artists consistently recommend going 10–20% bolder with color for camera work than you would for everyday life.
Flash and Studio Lighting Effects
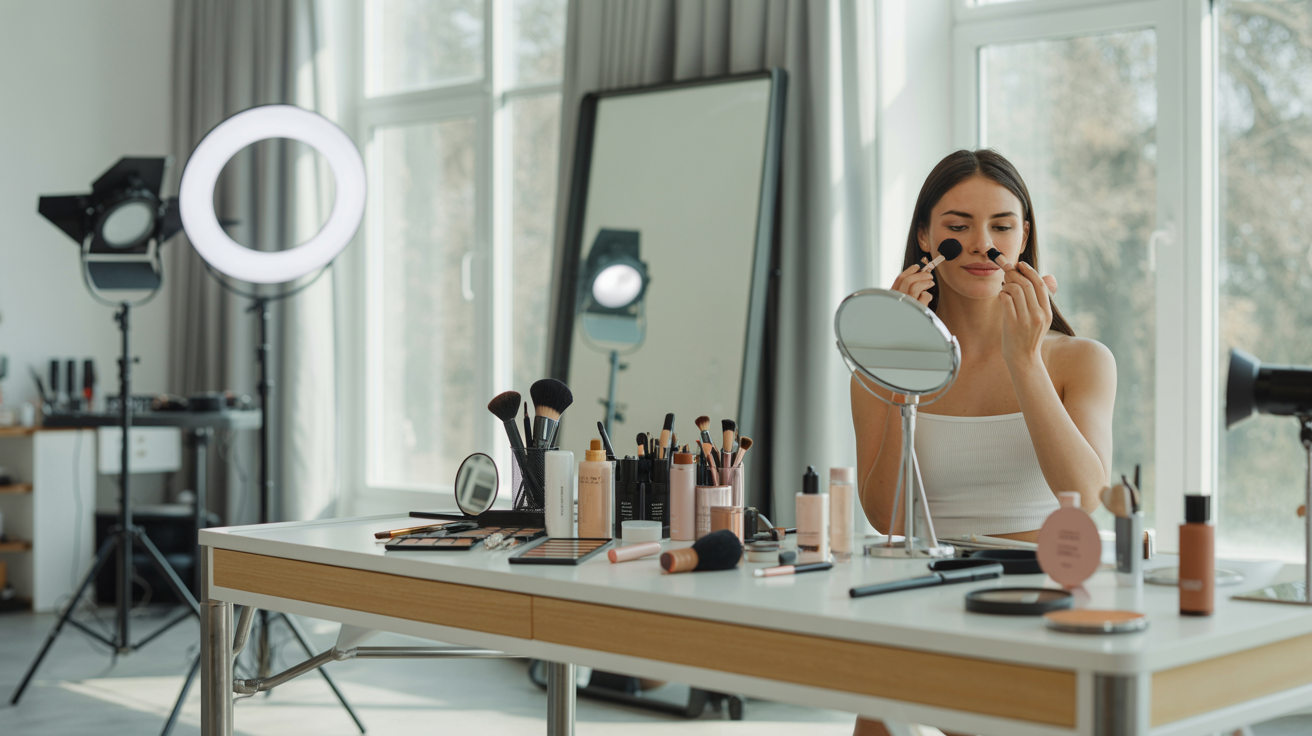
Lighting is arguably the most important variable in photography — and it has a massive impact on how makeup reads on camera. Direct flash, commonly used in event photography and some headshot setups, fires a burst of intense, flat light straight at your face. This eliminates natural shadows (which is why flash photos can look so unflattering without preparation). It also highlights every bit of texture, oil, and shine on your skin's surface.
Studio lighting setups — softboxes, ring lights, diffused panels — are more forgiving but still behave differently from natural light. They tend to create a more even illumination, which is great for skin but can also reduce the natural dimension of your features. Continuous lighting (as opposed to flash) generates heat, which means your skin is more likely to produce oil during a longer shoot, making setting products essential.
The Role of Skin Texture and Shine
In everyday life, a little natural glow or slight texture is completely normal and often unnoticeable. On camera, these become amplified. Oily areas like the T-zone can create distracting "hot spots" that catch the light. Dry patches around the nose or mouth appear more pronounced. Pores, fine lines, and uneven texture that are invisible at conversational distance suddenly become visible in a high-resolution close-up.
This doesn't mean your skin needs to be flawless — no one's skin is. It means preparation and the right products can minimize distractions and help the camera capture your face as you actually look, rather than an exaggerated version of every minor imperfection.
Why "No Makeup" Often Looks Like "No Face" on Camera
One of the most common misconceptions is that going makeup-free looks "natural" and authentic on camera. In reality, the camera's tendency to flatten features and mute color means that completely bare skin often reads as washed out, tired, or undefined — even on people with great skin. This is why news anchors, actors, and professional speakers of all genders wear at least some makeup for camera appearances. The goal isn't to look "made up" — it's to look like the best, most defined version of yourself once the camera does its flattening work.
The Foundation of Camera-Ready Skin
Great camera-ready makeup starts with the skin. If your base is right, everything else falls into place. If it's wrong — cakey, patchy, or the wrong finish — no amount of eye or lip work will save the photo.
Primer: Why It Matters for Photos
Primer is the unsung hero of photo-ready makeup. It creates a smooth, even surface for foundation to adhere to, fills in fine lines and pores, and extends the wear time of everything applied on top. For photos specifically, a pore-minimizing or mattifying primer applied to the T-zone works wonders — it prevents the shine that flash and studio lights love to amplify. If you have dry skin, a hydrating primer on the cheeks prevents foundation from clinging to dry patches. Apply primer after moisturizer and sunscreen but before foundation, and give it 60 seconds to set before moving on.
Foundation Coverage and Finish
For camera work, medium to full coverage foundation generally photographs best. Sheer or tinted moisturizers can work for casual social media content but may not provide enough evening-out for professional headshots or studio shoots. The finish you choose matters too:
- Matte finish — Best for flash photography, studio headshots, and any situation with powerful lighting. Prevents shine and hot spots. Ideal for oily or combination skin.
- Satin finish — A happy medium that provides a natural-looking sheen without excessive shine. Works well for most photo types and skin types.
- Dewy finish — Creates a luminous, youthful glow. Can look gorgeous in natural light and editorial shoots but may read as "oily" under flash. If you prefer a dewy foundation, set the T-zone with a light dusting of translucent powder.
Shade matching tip: Always match foundation to your jawline, not your hand. Check the match in natural light near a window — bathroom lighting lies. For photos, your foundation should blend seamlessly into your neck with no visible line of demarcation.
Concealer Placement for Headshots
Concealer is your secret weapon for headshots. Use a shade that's one to two shades lighter than your foundation under the eyes (in an inverted triangle shape) to brighten the under-eye area and counteract the shadows that camera flash can deepen. Dab concealer on any blemishes, redness around the nose, or discoloration. For headshots, also consider concealing any dark spots on the forehead, chin, or jawline — areas that tend to be in the camera's direct line of sight.
Blend with a damp beauty sponge for the most natural, skin-like finish. Brushes can leave streaks that cameras pick up, and fingers can deposit oil.
Setting Powder and Spray for Longevity
Setting your base is non-negotiable for photos. A light dusting of finely milled translucent setting powder locks everything in place and prevents shine. Focus on the T-zone, under the eyes (lightly — too much powder here creates a crepe-y texture), and around the nose. Avoid powders with silica or heavy SPF, as these can cause flashback — a ghostly white cast that appears in flash photography.
Finish with a setting spray to meld everything together and remove any powdery appearance. A good setting spray also extends wear time through long shoots, outdoor heat, or emotional moments (weddings, anyone?).
Eyes That Pop on Camera
The eyes are the focal point of nearly every portrait and headshot. On camera, well-defined eyes draw the viewer in, create connection, and convey confidence. Under-defined eyes can make you look tired or disengaged — even if you feel amazing.
Why Eyes Need More Definition in Photos
The camera's flattening effect hits the eye area hard. Natural shadows around the eye socket get diminished, lash definition decreases, and the contrast between your iris and the surrounding skin can fade. This is why even people who never wear makeup in daily life benefit from a little eye definition for photos. You don't need a dramatic smokey eye — sometimes just a coat of mascara and groomed brows make all the difference.
Eyebrow Shaping and Filling for Photos
Brows frame the face, and on camera, they're one of the first features the viewer notices. Even if you don't fill your brows in daily life, consider doing so for photos. Use a brow pencil, powder, or tinted brow gel that matches your natural hair color (go one shade lighter if you're unsure). The goal is to fill in sparse areas, define the shape, and create a clean frame for the eyes without drawing on obviously fake brows. Brush through with a spoolie to blend and soften any harsh lines.
Eyeliner and Mascara Tips for Camera
For headshots and professional photos, a tight-line technique works beautifully: apply a thin line of dark brown or black eyeliner right at the base of your upper lashes, filling in the gaps between lash hairs. This makes your lashes look thicker and your eyes more defined without any visible "eyeliner look." It's subtle, effective, and works for everyone.
Mascara should be applied in two coats to the upper lashes, wiggling the wand at the base and pulling through to the tips. Waterproof mascara is recommended for photo shoots — it resists smudging under hot lights and holds a curl better throughout the day. If you want extra drama for editorial or social media content, individual false lash clusters at the outer corners add dimension without looking costume-like.
Eye Shadow Basics for Non-Makeup Wearers
If eye shadow intimidates you, keep it simple. A single matte shade slightly deeper than your skin tone, swept into the crease of your eye, adds depth and dimension that the camera will love. Think of it as replacing the natural shadow that the camera erases. Blend well — there should be no harsh edges. For a slightly more polished look, add a light shimmer shade to the center of the eyelid to catch the light. That's it. Two shades, blended well, and your eyes will look more alive and defined on camera.
Lips and Cheeks for Photos
Lip Color That Photographs Well
Bare lips tend to disappear on camera, especially under flash. At minimum, a tinted lip balm or a lip color one to two shades deeper than your natural lip color adds definition. For professional headshots, muted pinks, mauves, berries, and warm nudes photograph universally well across skin tones. Avoid extremely glossy formulas for headshots — they can create distracting light reflections. A satin or velvet matte finish provides color payoff without excessive shine.
For content creation and more expressive shoots, bolder colors absolutely work — just ensure they're well-applied with a clean lip line. A lip liner that matches your lipstick prevents feathering and creates a crisp edge that photographs beautifully.
Blush and Bronzer Placement for Dimension
Blush is critical for camera-ready makeup because flash photography drains warmth from the skin. Without blush, even perfectly made-up faces can look flat and lifeless in photos. Apply a natural-toned blush to the apples of your cheeks, blending slightly upward toward the temples. Cream blushes blend seamlessly into the skin for a natural finish; powder blushes offer more buildable coverage.
Bronzer adds warmth and dimension. Apply it to the hollows of the cheeks, along the temples, and lightly down the sides of the nose. Use a large, fluffy brush and blend thoroughly — the key word is subtle warmth, not visible stripes.
Contouring Basics for Headshots
Contouring for photos doesn't need to be Instagram-level dramatic. A light contour along the hollows of the cheeks, the sides of the nose, and under the jawline restores the dimension that the camera removes. Use a matte contour shade that's only two to three shades deeper than your skin tone — anything darker risks looking muddy. Blend, blend, blend. The best contour is one that's completely invisible as "contour" in the final photo — it should simply look like your natural bone structure, beautifully lit.
Makeup Tips for Different Photo Types
Not all photos are created equal, and your makeup approach should adapt to the context.
Headshots and LinkedIn Photos
Keep it clean, polished, and professional. Medium coverage foundation, groomed brows, subtle eye definition, and a natural lip color. The goal is to look approachable and competent, not glamorous. Avoid glitter, heavy shimmer, or trendy looks that may date quickly.
Social Media Content and Selfies
You have more creative freedom here. Selfies are typically shot in natural light at close range, so finish and texture matter more than coverage. A dewy or satin foundation, a pop of color on the lips or cheeks, and well-defined brows create scroll-stopping content. Ring lights are your friend — they create even, flattering illumination that makes skin look radiant.
Product Photography (Hands and Nails)
If your hands appear in product shots, don't neglect them. Moisturize well, push back cuticles, and consider a clear or neutral nail polish for a groomed appearance. Even out skin tone on the backs of your hands with a light layer of foundation if needed.
Video Calls and Virtual Meetings
Webcams are lower resolution and often paired with unflattering overhead lighting. Go slightly bolder with blush and lip color than you would in person. Define your brows clearly — they frame your face on the small screen. A touch of highlighter on the brow bone and inner corners of the eyes catches light from your screen and makes your eyes look brighter and more engaged.
Outdoor vs. Indoor Shoots
Outdoor shoots in natural light are the most forgiving — you can get away with lighter coverage and more natural finishes. Indoor shoots with artificial lighting require more attention to setting products and shine control. If you're shooting outdoors in summer, waterproof and sweat-proof formulas are essential.
Gender-Neutral Makeup Essentials for Anyone
Makeup has no gender. Whether you're a CEO preparing for a corporate headshot, a fitness coach updating your website, or a creative professional shooting content, these basics will make you look more polished on camera with minimal effort.
Minimal Makeup That Makes a Big Difference
If you want to look camera-ready with the fewest possible products, here's your essentials list:
- Concealer — Dab under the eyes and on any redness or blemishes. This single product can transform your on-camera appearance.
- Tinted brow gel — Brush through your brows to define and groom them. Takes 10 seconds and frames your entire face.
- Translucent setting powder — A light dusting on the T-zone prevents shine under lights.
- Tinted lip balm — Adds natural color and prevents lips from disappearing on camera.
- Clear mascara — Defines lashes without any visible "makeup" look.
That's five products, two minutes of application, and a dramatically better photo. You don't need to be a makeup expert — you just need to counteract what the camera takes away.
Products That Work for All Skin Tones and Types
Look for brands with extensive shade ranges. Products labeled "universal" or "adjusting" often adapt to multiple skin tones. Multi-use sticks (lip, cheek, and eye in one product) simplify your kit and reduce the number of products you need to carry to a shoot. Cream-based products tend to be more forgiving for beginners than powders, as they blend more naturally and are harder to over-apply.
Building a Photo-Ready Kit on Any Budget
You don't need luxury products for great photos. Drugstore brands have come a long way, and many professional makeup artists use a mix of high-end and affordable products. Prioritize a good concealer and setting powder — these two products do the most heavy lifting for camera work. Everything else can be built out over time as you determine what works for your skin and your typical photo needs.
Want to see how you look with professional-quality photos without a full studio setup? Try Glowup AI — upload your selfies and get stunning AI-generated headshots and professional photos in minutes.
Common Makeup Mistakes That Ruin Photos
Even experienced makeup wearers fall into these traps when preparing for camera work. Knowing what to avoid is just as important as knowing what to do.
Flashback from SPF and Certain Powders
This is the number one photo-ruining mistake. Many sunscreens, moisturizers, and setting powders contain ingredients like zinc oxide, titanium dioxide, or silica that reflect light. In everyday life, this is invisible. In flash photography, it creates a ghostly white cast on the face — a phenomenon called flashback. Before any photo session that involves flash, test your products by taking a selfie with your phone's flash in a dark room. If you see a white cast, switch to a non-SPF primer and a flashback-free setting powder.
Over-Contouring That Looks Muddy
Heavy contour that looks sculpted and dramatic in a bathroom mirror can read as dirty or muddy on camera, especially under different lighting conditions than what you applied it in. For photos, less is more. Use a shade only slightly deeper than your skin, blend meticulously, and check your work in multiple light sources before the shoot begins.
Mascara Smudges and Under-Eye Issues
Raccoon eyes are a common problem during long shoots, especially under hot lights. Waterproof mascara, a thin layer of translucent powder under the eyes (applied before mascara), and a clean-up brush dipped in micellar water are your insurance policy. Keep cotton swabs on hand for quick touch-ups between shots.
Mismatched Foundation Lines
The most obvious makeup mistake in photos is a visible foundation line along the jawline or hairline. This usually happens when the foundation shade doesn't match the neck, or when blending stops abruptly. Always blend foundation down the neck and check the match in natural light. In photos, the camera captures your face, neck, and décolletage in a single frame — any mismatch is immediately obvious.
Makeup Removal and Skin Recovery After a Shoot
What you do after a shoot matters as much as the preparation. Camera-ready makeup tends to be heavier and more long-wearing than everyday products, which means your skin needs a thorough and gentle recovery routine.
Double Cleansing
Start with an oil-based cleanser or micellar water to dissolve makeup, sunscreen, and primer. Follow with a gentle water-based cleanser to remove any residue and clean the pores. This two-step approach ensures that no product is left behind to clog pores or cause irritation. Avoid harsh scrubs or exfoliants immediately after a shoot — your skin has already been through enough with products, lighting, and potential touch-ups.
Hydration and Recovery Routine
After cleansing, apply a hydrating serum (hyaluronic acid is a great option), followed by a rich moisturizer to replenish the skin's moisture barrier. If your skin feels particularly stressed, a soothing face mask with ingredients like aloe, centella asiatica, or niacinamide can calm any redness or irritation. Give your skin a full evening to breathe and recover before applying heavy products again.
Preparing Skin for the Next Shoot
If you have shoots scheduled regularly — whether for content creation, business headshots, or social media — maintaining a consistent skincare routine between sessions is key. Regular exfoliation (two to three times per week), daily SPF, and consistent hydration keep your skin in photo-ready condition. The better your baseline skin health, the less makeup you'll need for each session, and the more natural your photos will look.
When to Use AI Photos Instead
Sometimes, despite the best makeup, the best lighting, and the best intentions, scheduling and executing a full photoshoot simply isn't practical. Maybe you need updated headshots for a job application tomorrow. Maybe you're a small business owner who needs professional team photos but doesn't have the budget for a studio session. Maybe you want to experiment with different looks — professional, creative, casual — without committing to multiple shoots.
This is where AI photo platforms like Glowup change the game. Glowup uses advanced AI to generate professional-quality headshots and portraits from your existing photos — no studio, no photographer, no two-hour makeup session required. You upload your everyday selfies, and the platform produces polished, consistent, professional images that are ready for:
- LinkedIn profile updates — Get a corporate-ready headshot without booking a photographer.
- Website about pages — Maintain a professional, approachable image for your personal brand or business site.
- Social media profiles — Keep your profiles fresh and cohesive across platforms.
- Team pages — Small businesses can create matching, professional team photos without coordinating everyone's schedules for a single shoot.
- Dating profiles — Present your best self with high-quality photos that stand out.
- Content creation — Generate a library of professional images for blogs, newsletters, and marketing materials.
AI-generated photos are ideal when you want consistent, polished results without the extensive prep time that traditional photoshoots demand. They're also perfect for experimenting with different styles, backgrounds, and looks before committing to a specific aesthetic for your brand.
Conclusion: Look Your Best, On Camera and Beyond
Camera-ready makeup is not about transformation — it's about translation. It's about ensuring that the camera captures you as you actually are: vibrant, defined, and present. Whether you apply a full face of makeup or just concealer and brow gel, the principles are the same: counteract the camera's tendency to flatten, mute, and amplify. Prepare your skin, define your features, set your work, and let your confidence do the rest.
Remember: these tips work for everyone, regardless of gender, experience level, or budget. The best camera-ready look is one that makes you feel like yourself — just the most polished, well-lit version.
And if you want professional-quality photos without any of the prep? Technology has you covered.
Ready to get professional-quality photos without the stress of a full photoshoot? Sign up for Glowup and transform your photos with AI in minutes.